
Personalised wedding veils are the perfect hen party accessory for any time of the year. I have seen them on Etsy and they sell really well. You can personalise them to say anything that you want, but typically they say soon to be or bride to be. However, you can personalise the veils to say whatever you want. In this blog i will show you step by step how you can apply Heat Transfer Vinyl To A Veil. This will allow you to personalise veils for a hen party or even a wedding.
Shop the supplies i bought:
Cricut Maker: https://amzn.to/4n26KMm
Rose Gold HTV Vinyl: https://amzn.to/4mYb2o2
Wedding veil: https://amzn.to/3HDV0Qh
Heat press mini: https://amzn.to/4kFbLcb
Heat press mat: https://amzn.to/4e5Qu9e
Standard grip mat: https://amzn.to/3FQZuT6
Wedding Tool: https://amzn.to/43KBv13
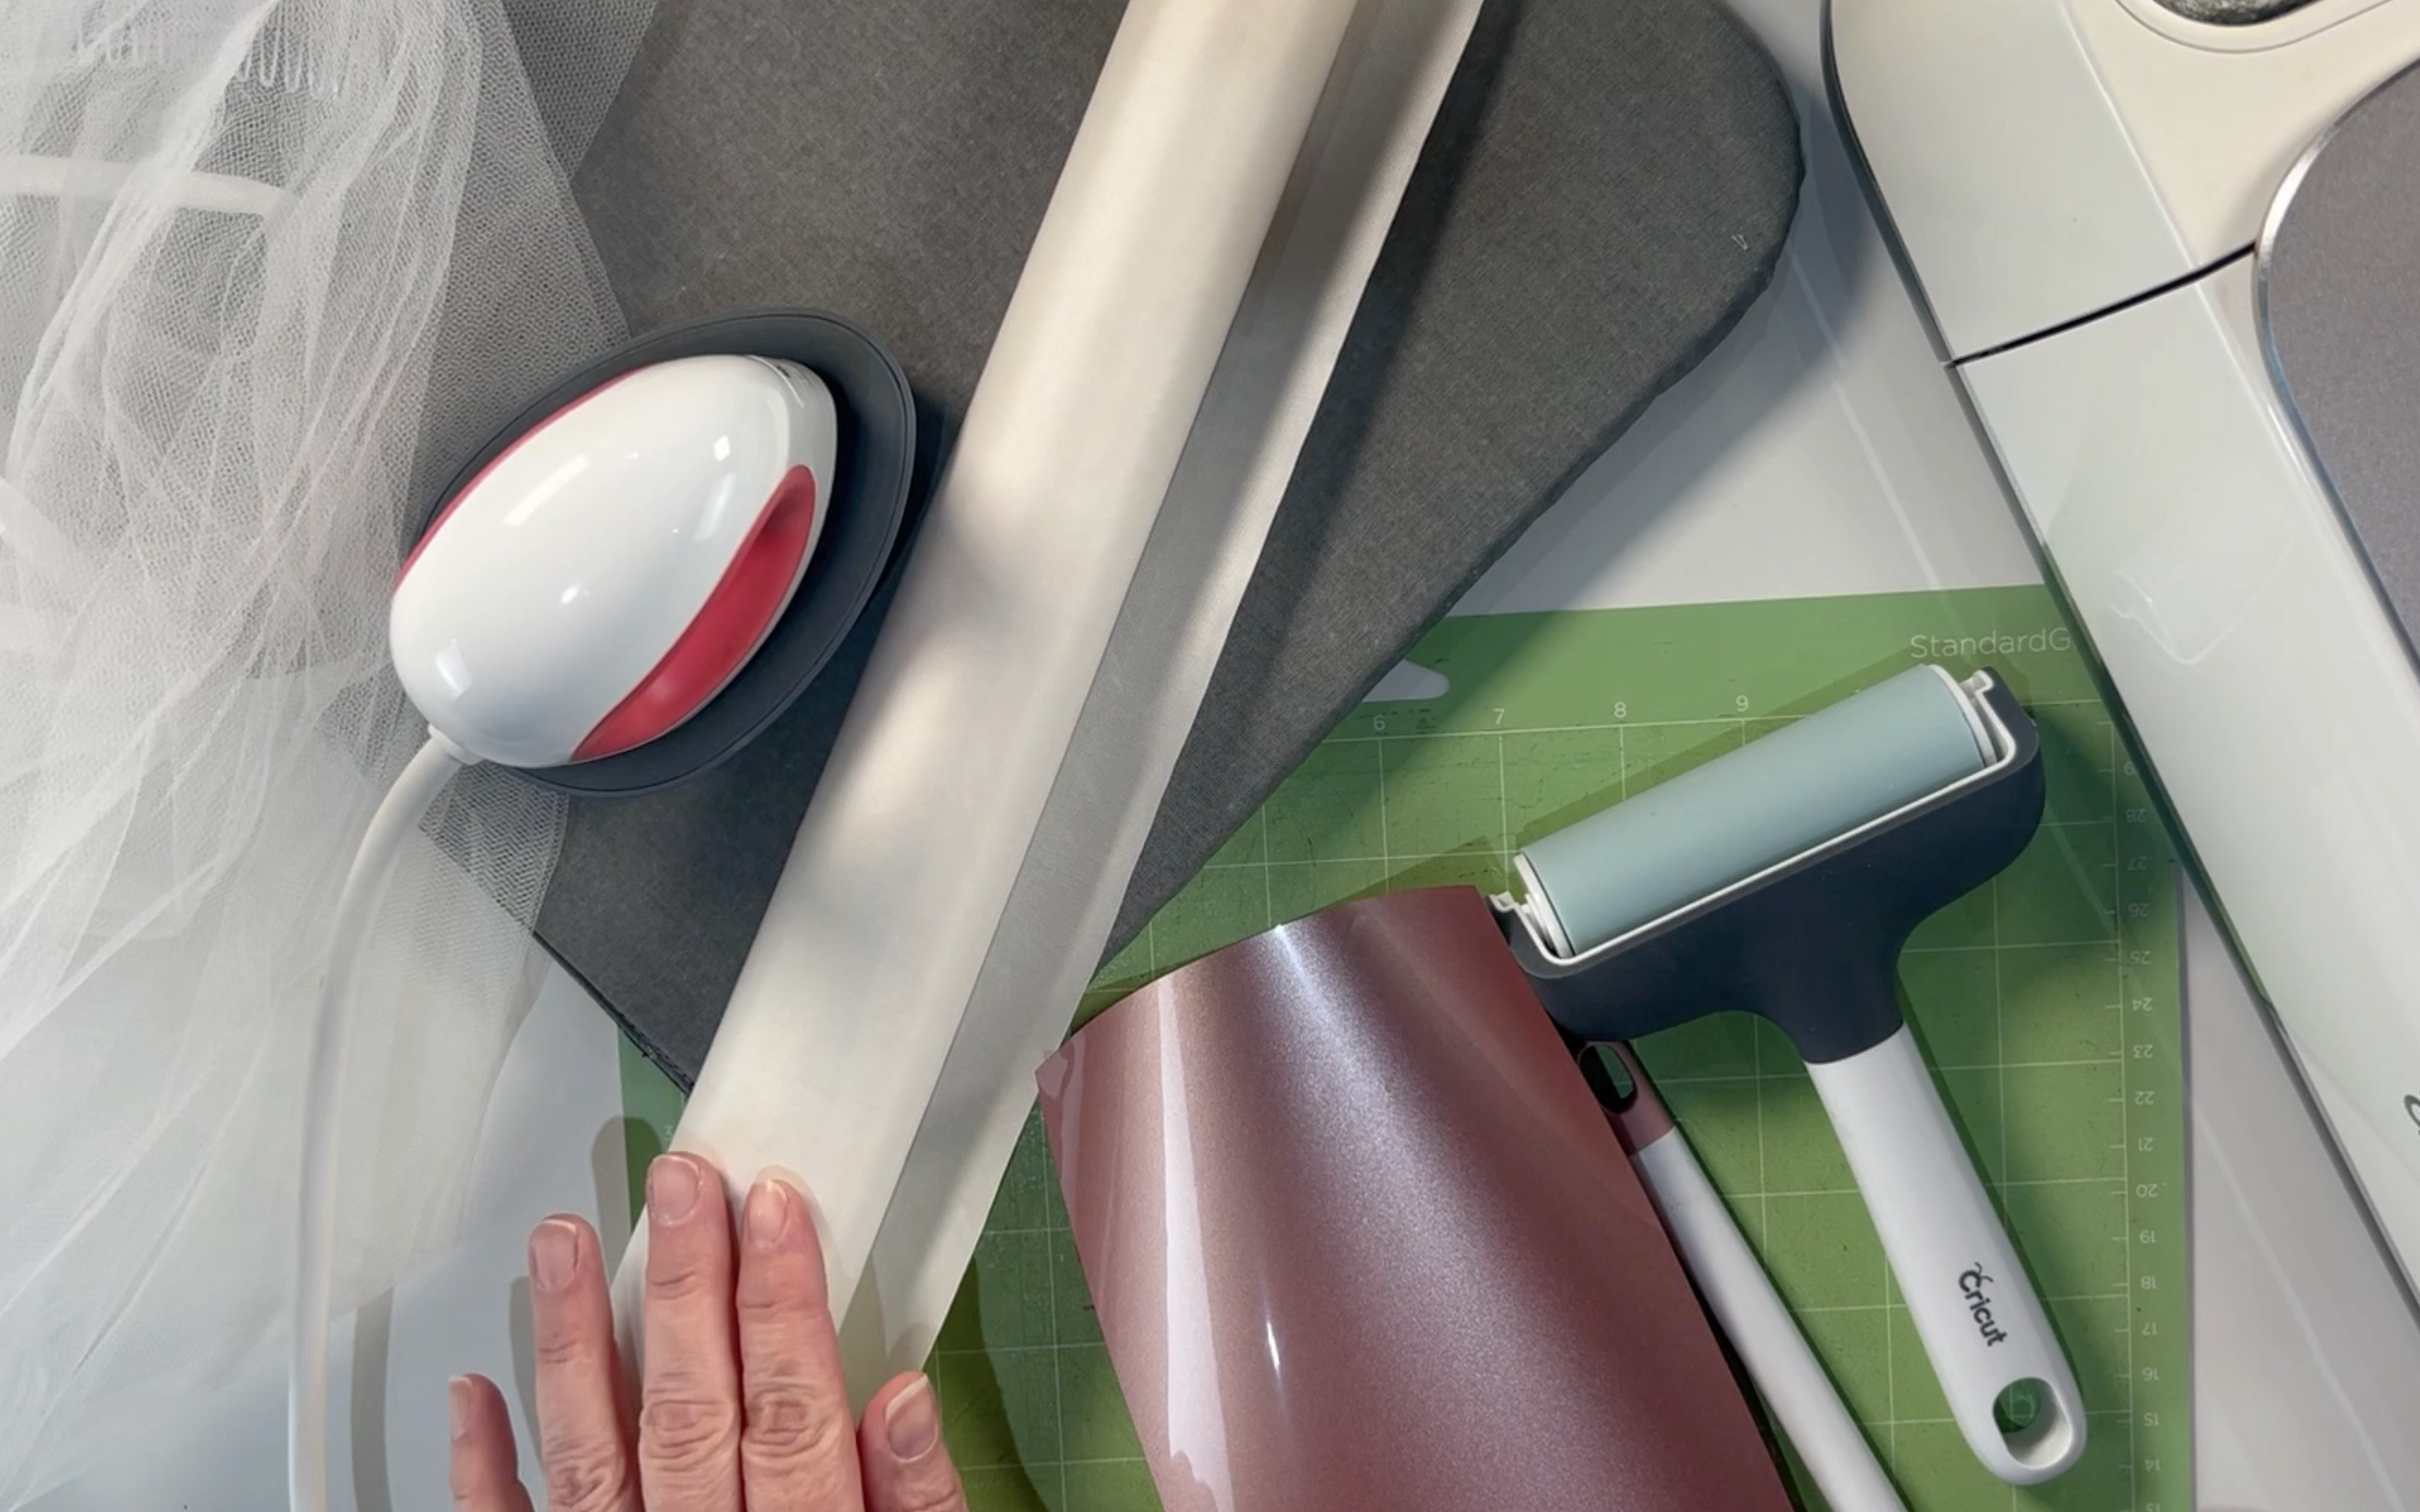
Brayer: https://amzn.to/4e3dZQm
Teflon Sheet: https://amzn.to/45TR2Ne
DISCLAIMER: Links included in this description might be affiliate links. If you purchase a product or service with the links that I provide I may receive a small commission. There is no additional charge to you. Thank you so much for helping to support my channel, you are awesome.
Step 1
Head over into cricut design space, select the text option and start to type in the text that you wish to put on the veil.
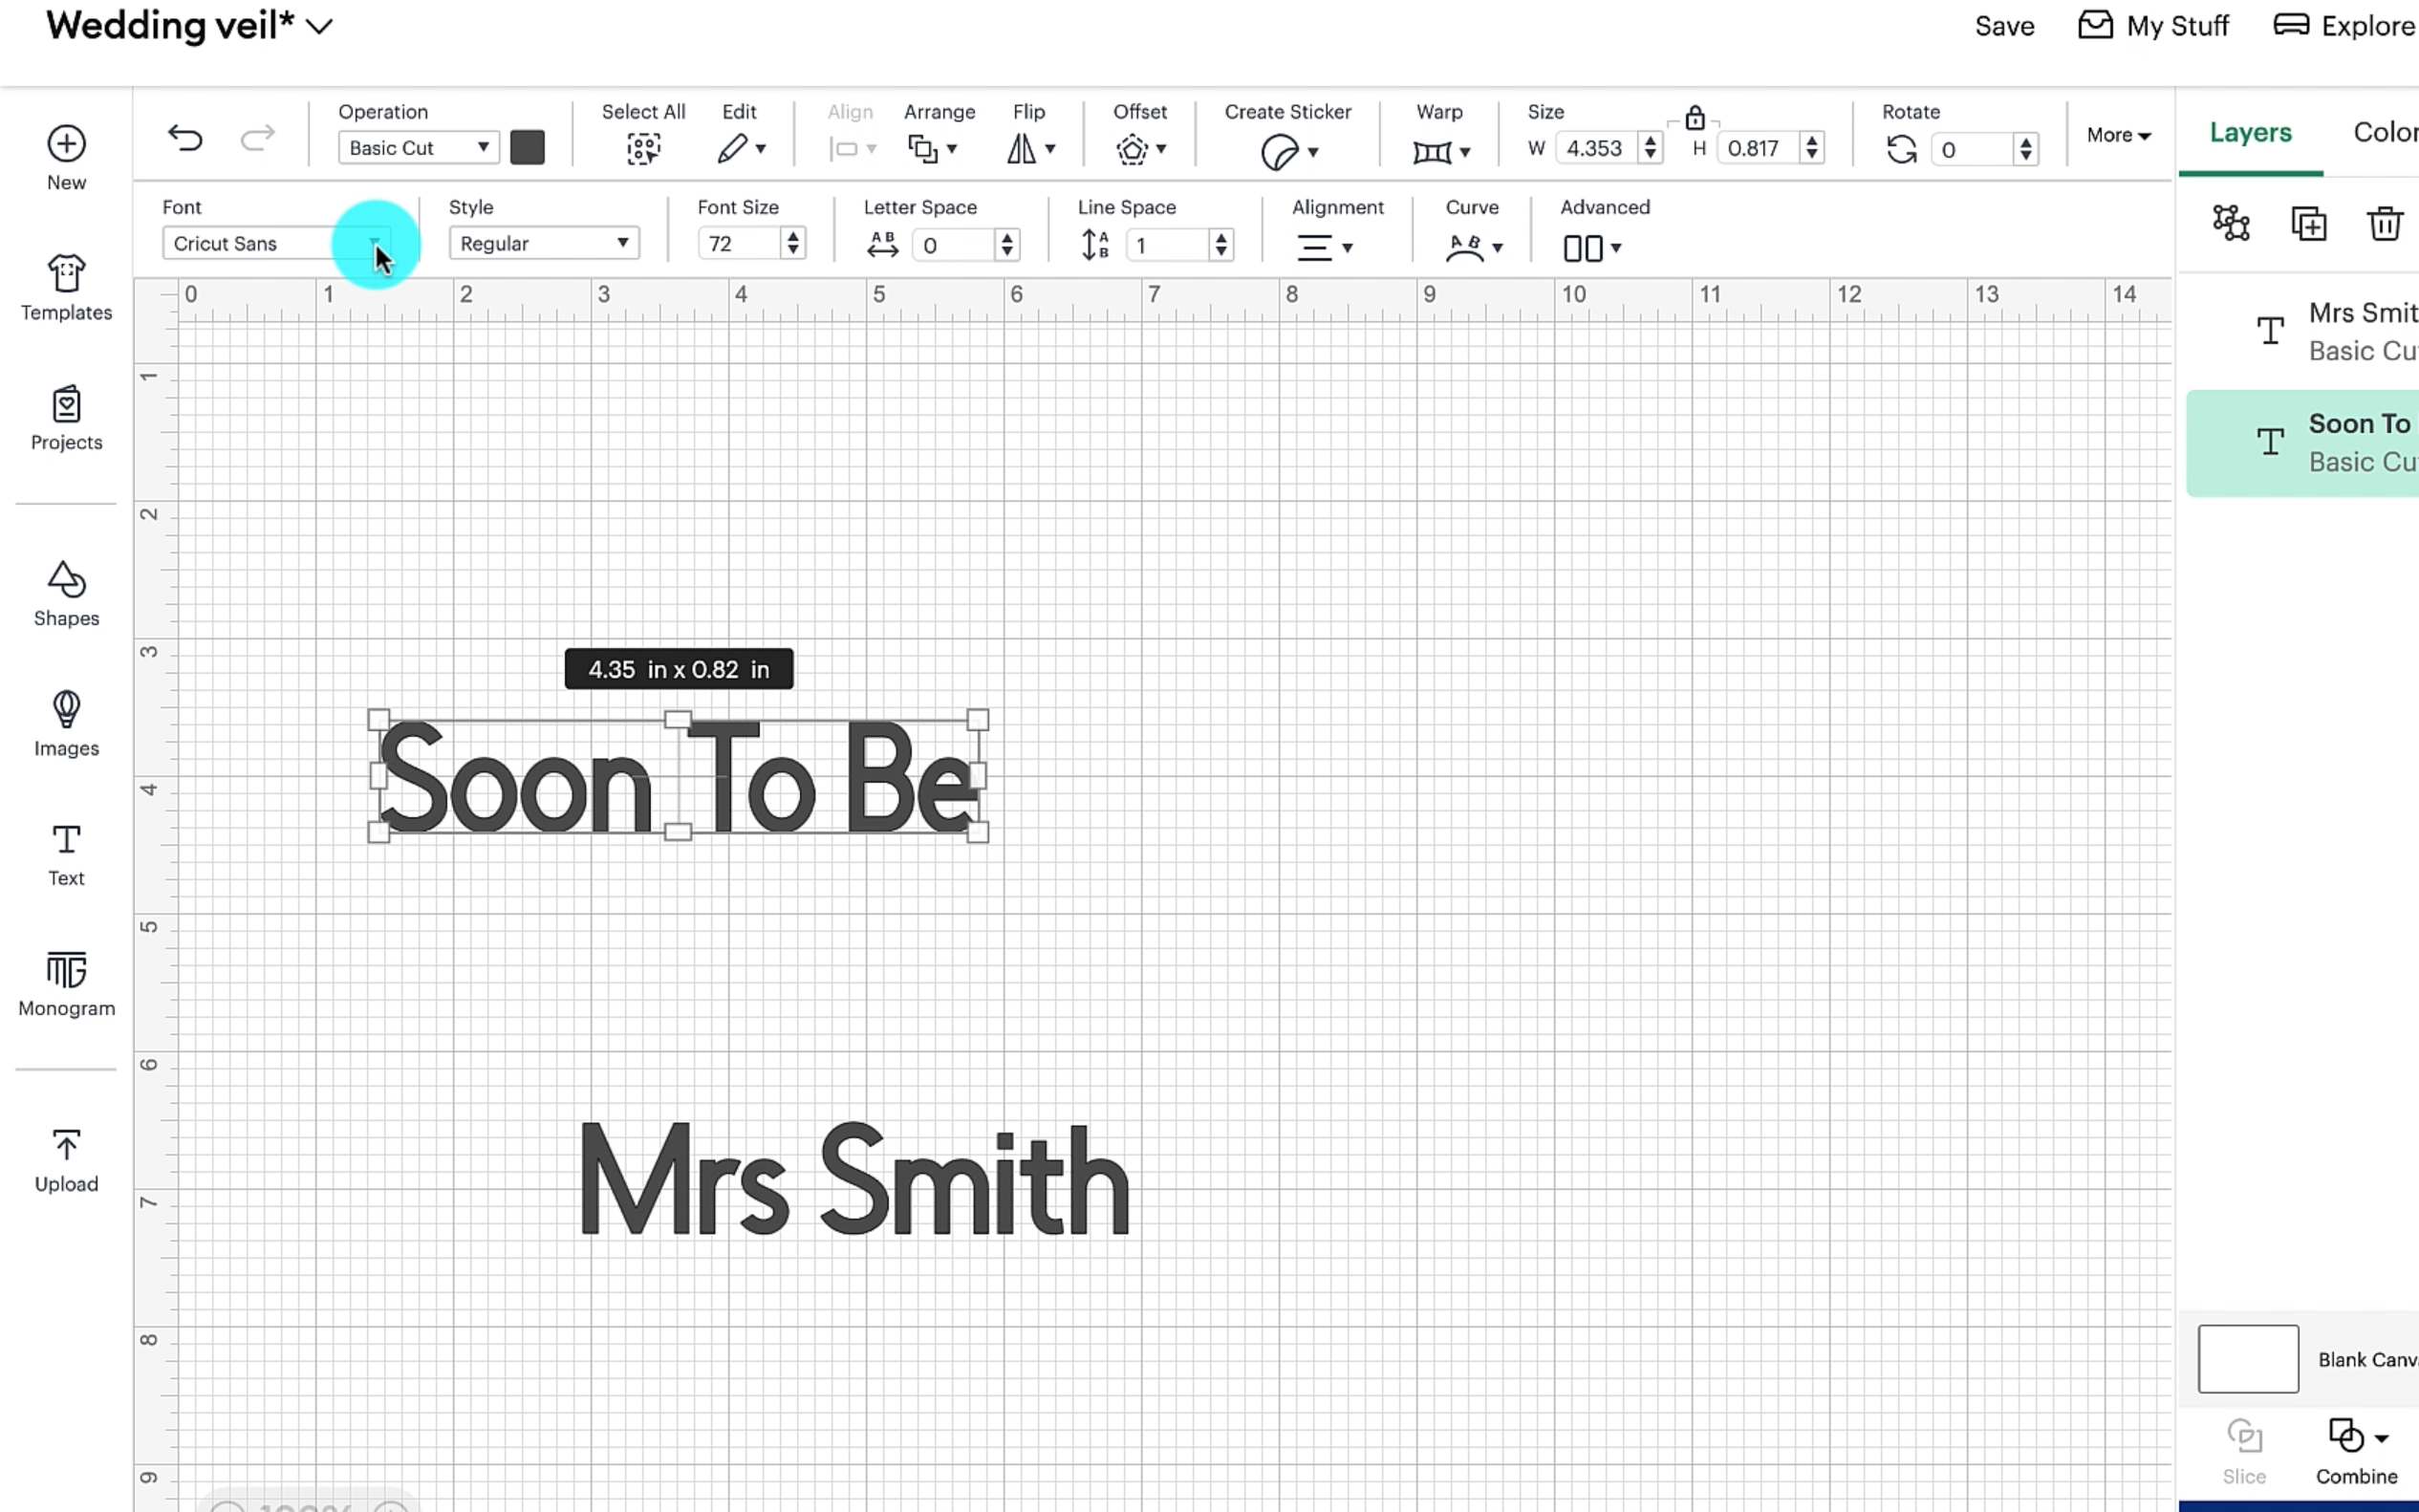
Select the font that you wish to use for the text. I used a font that i had purchased and uploaded into cricut design space.
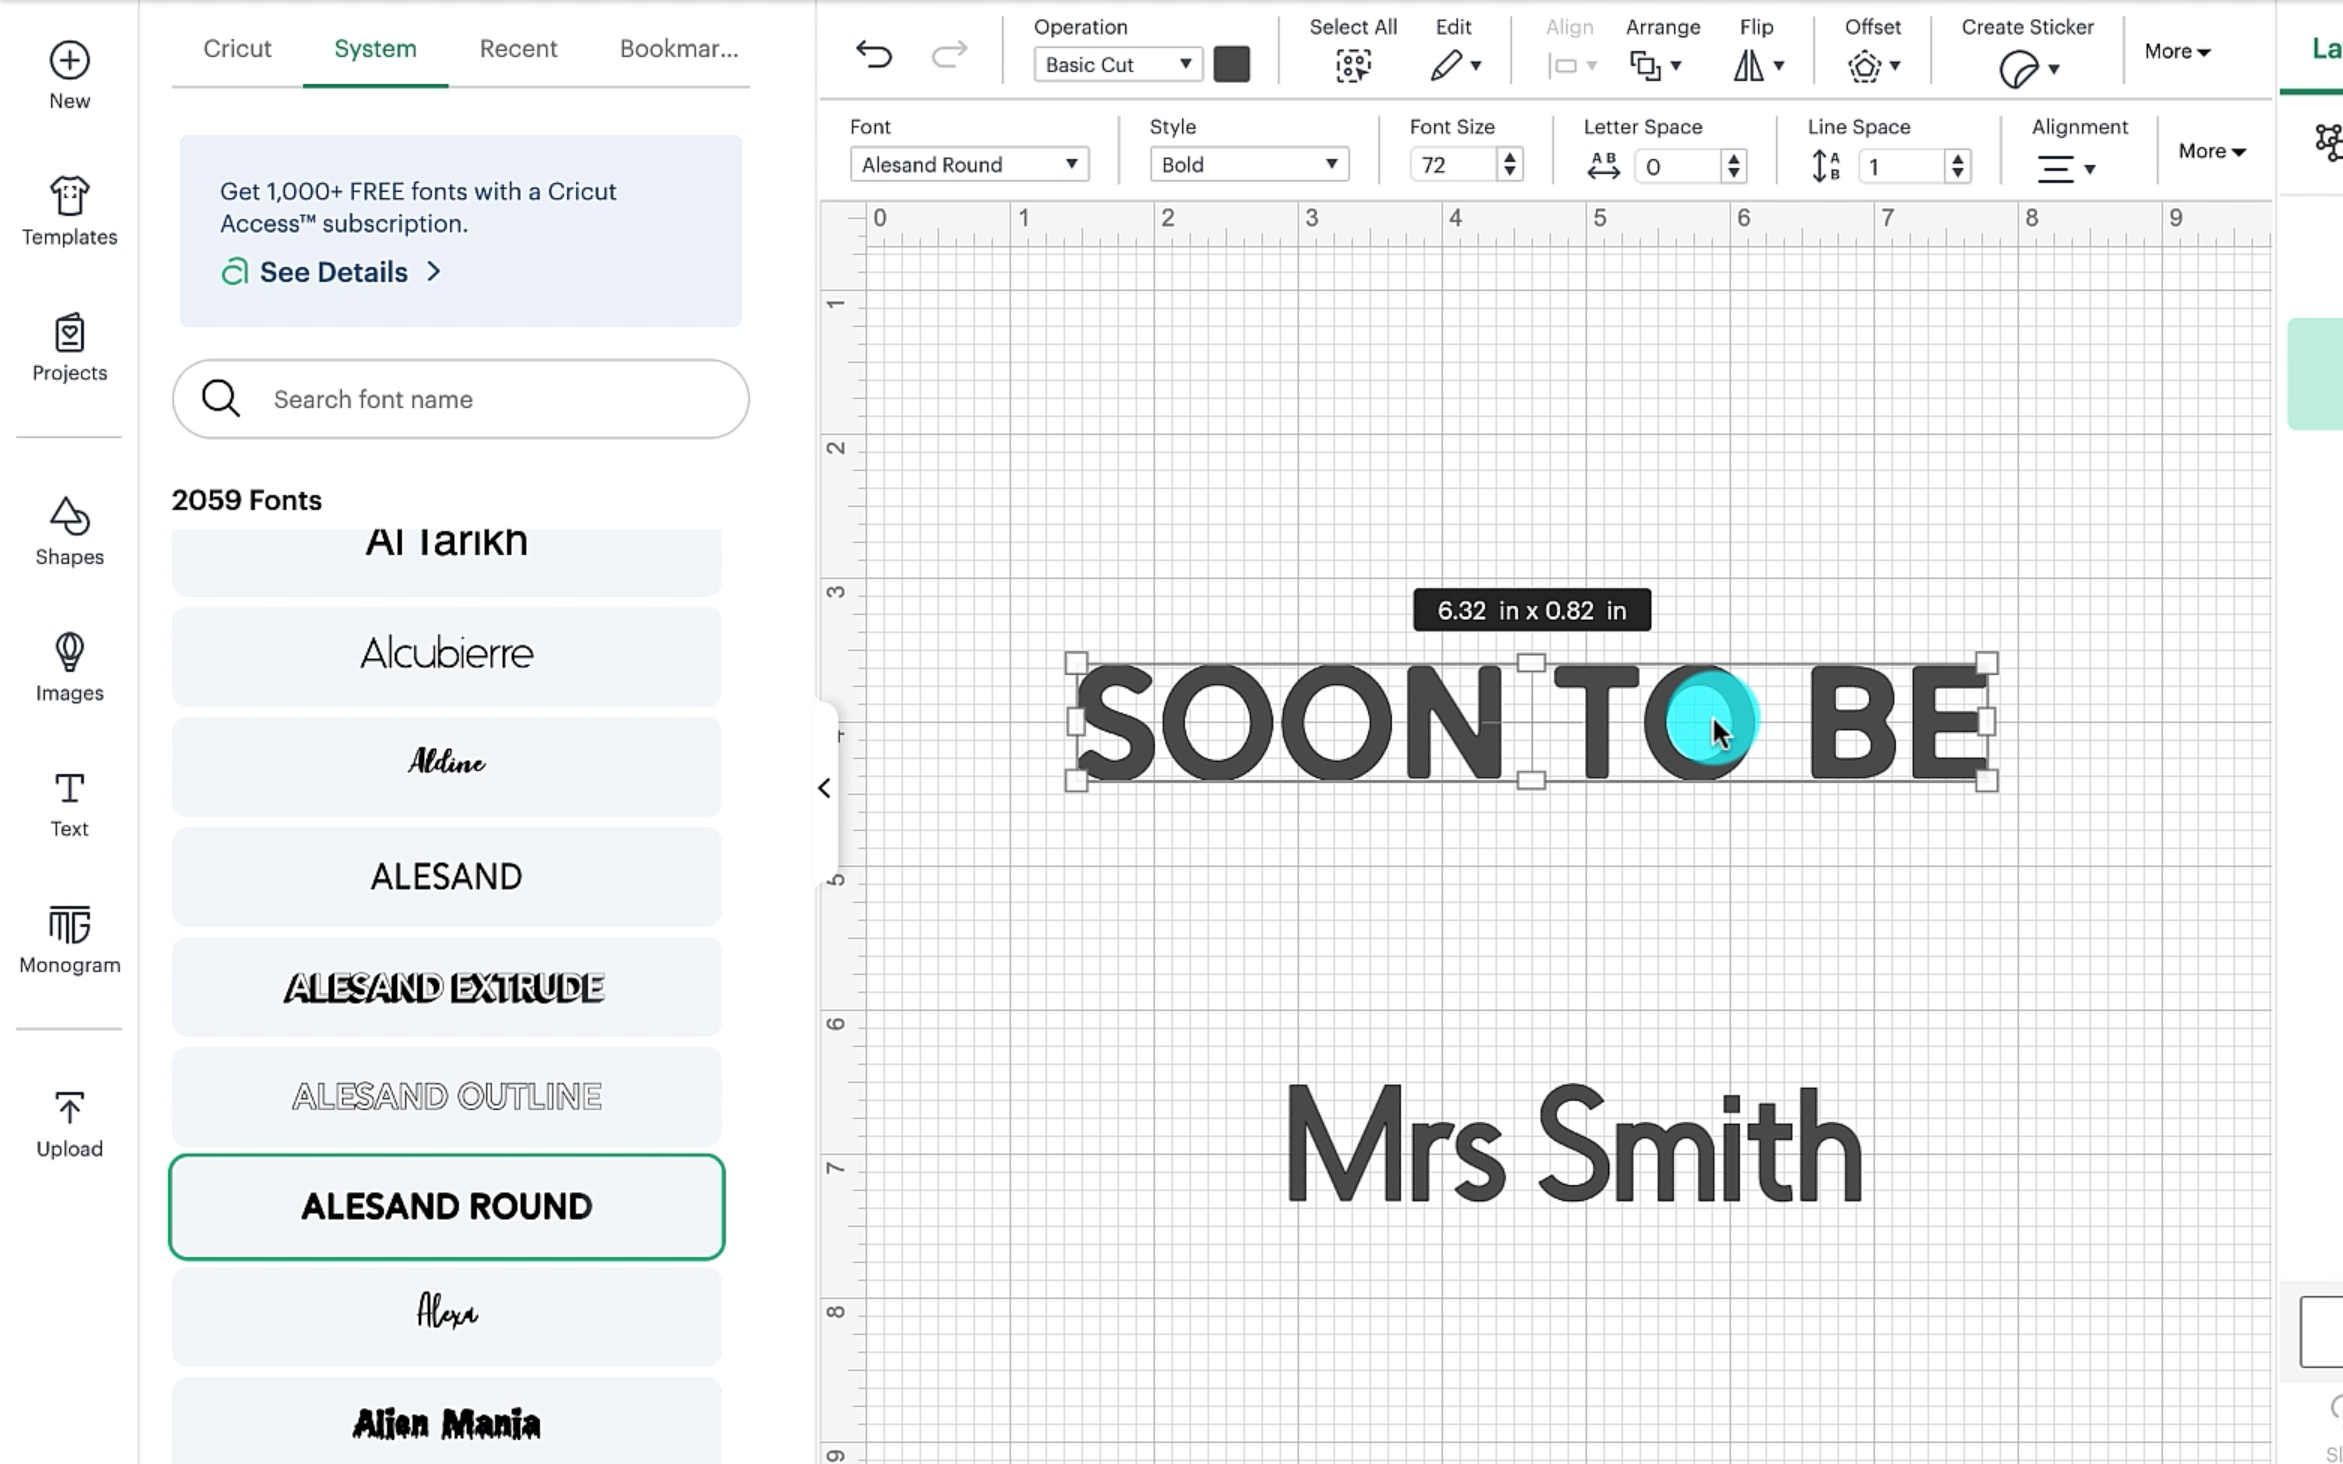
Try to choose a different font for 'soon to be' and 'Mrs Smith'. I tried to chose a plain font for 'Soon to be' and a more romantic font for 'Mrs Smith'.
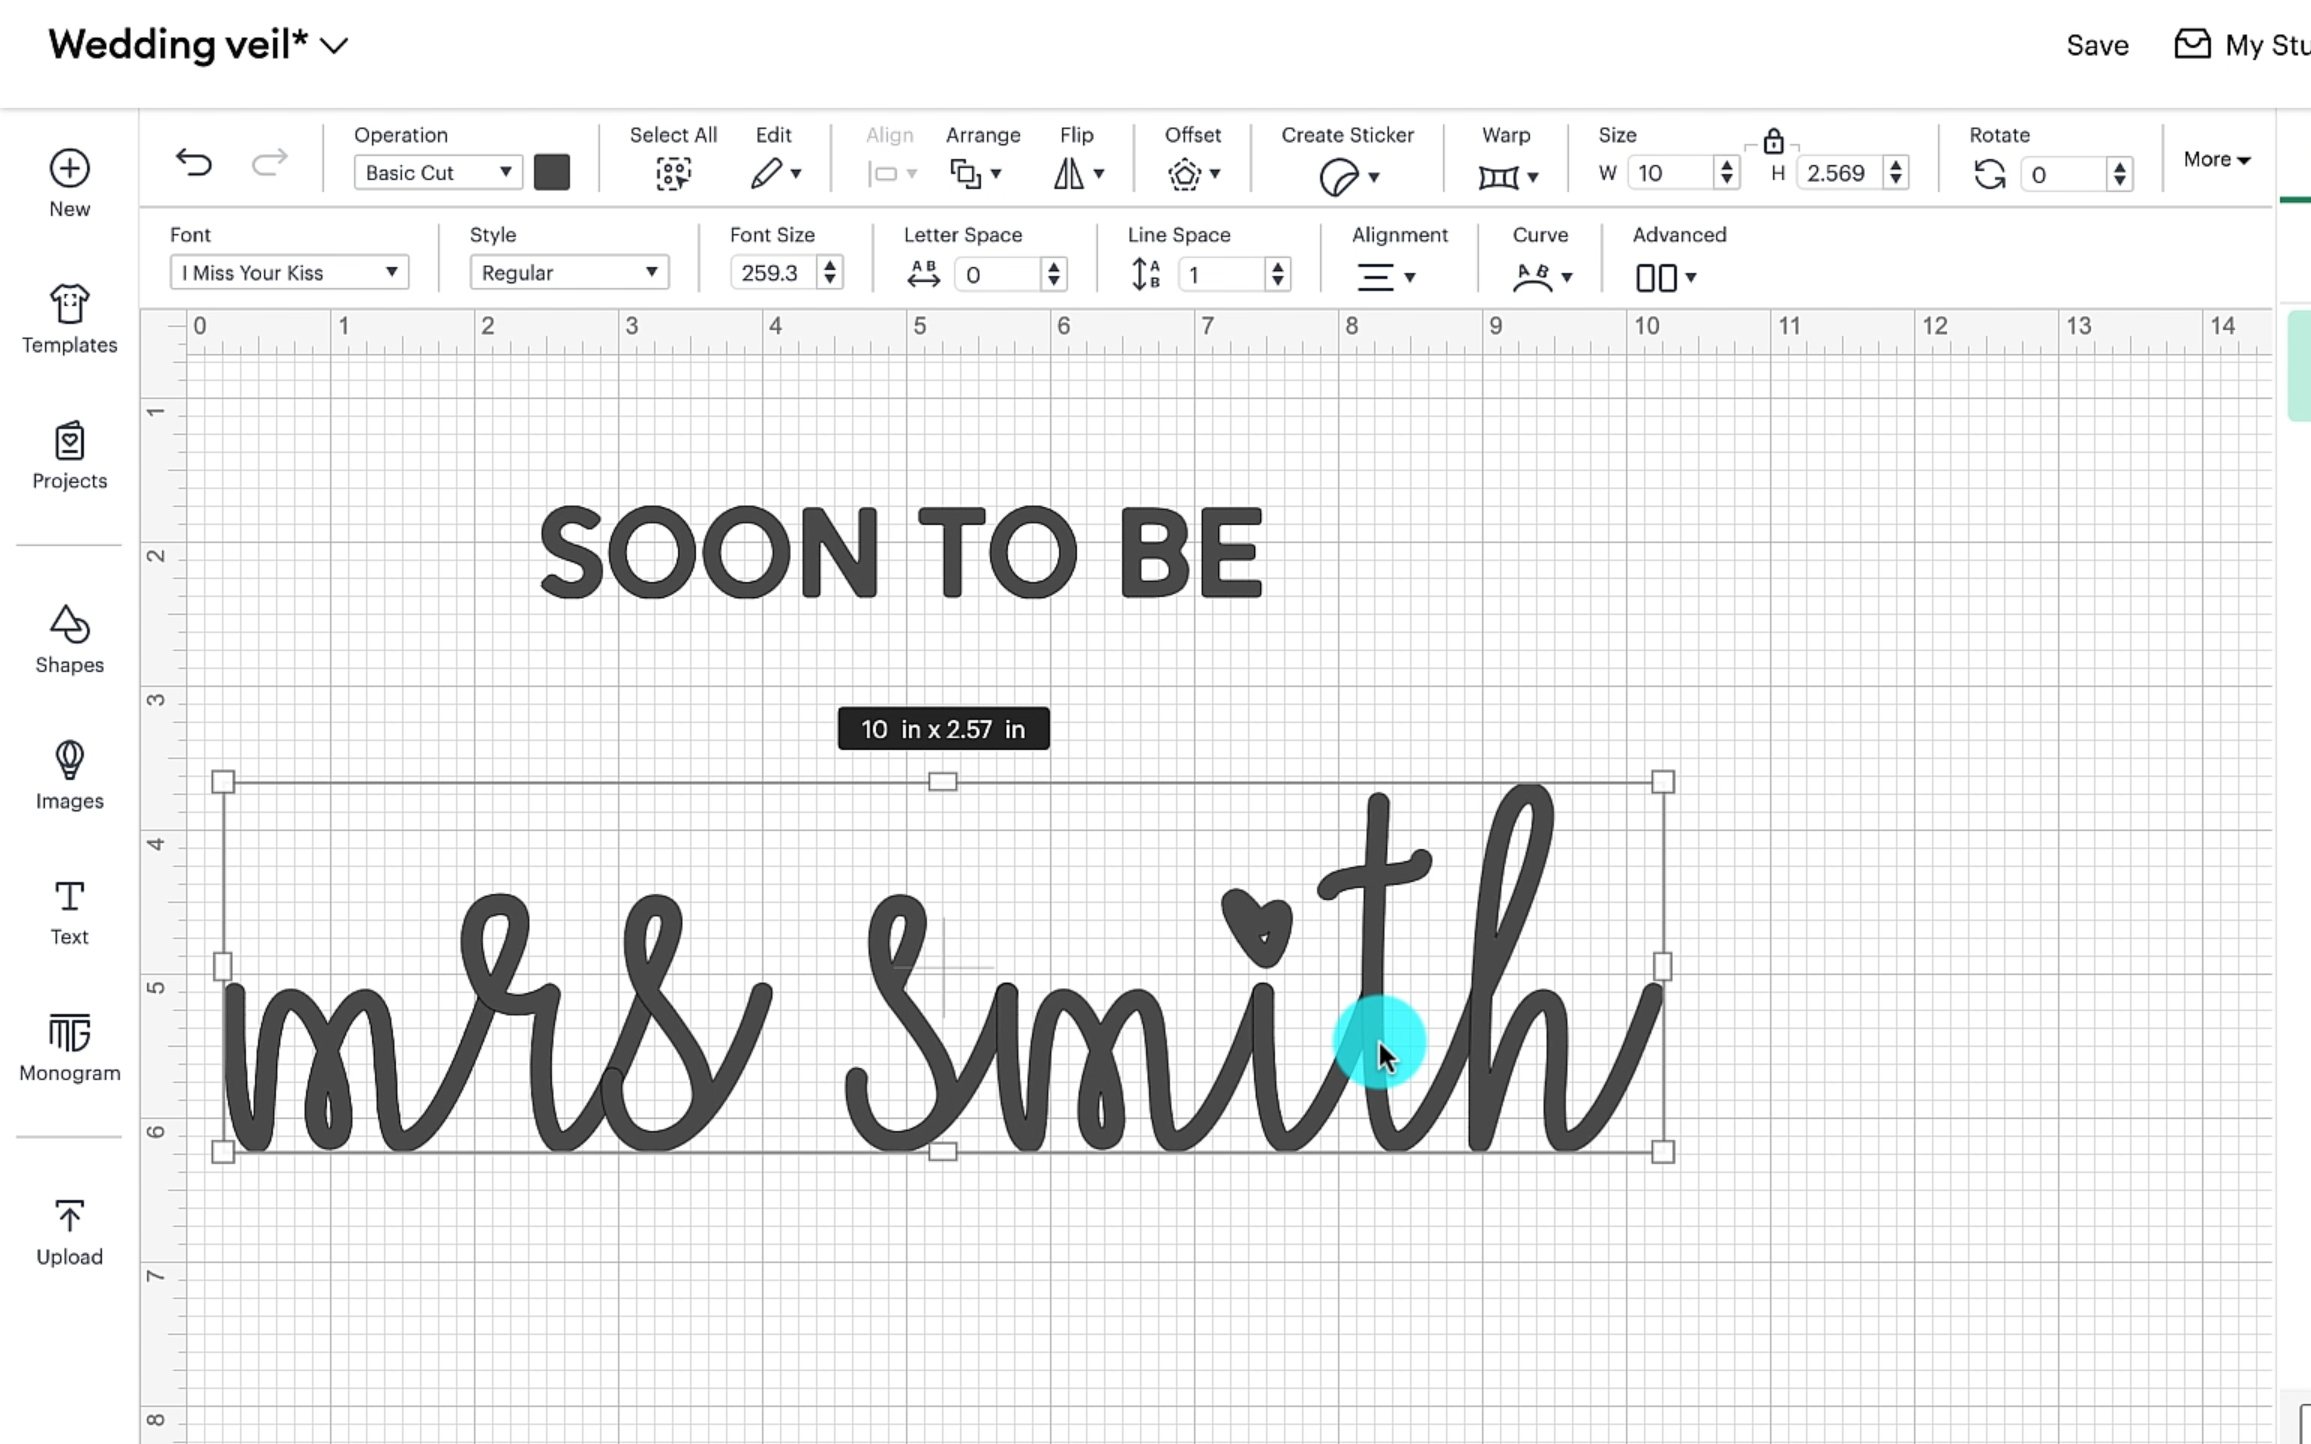
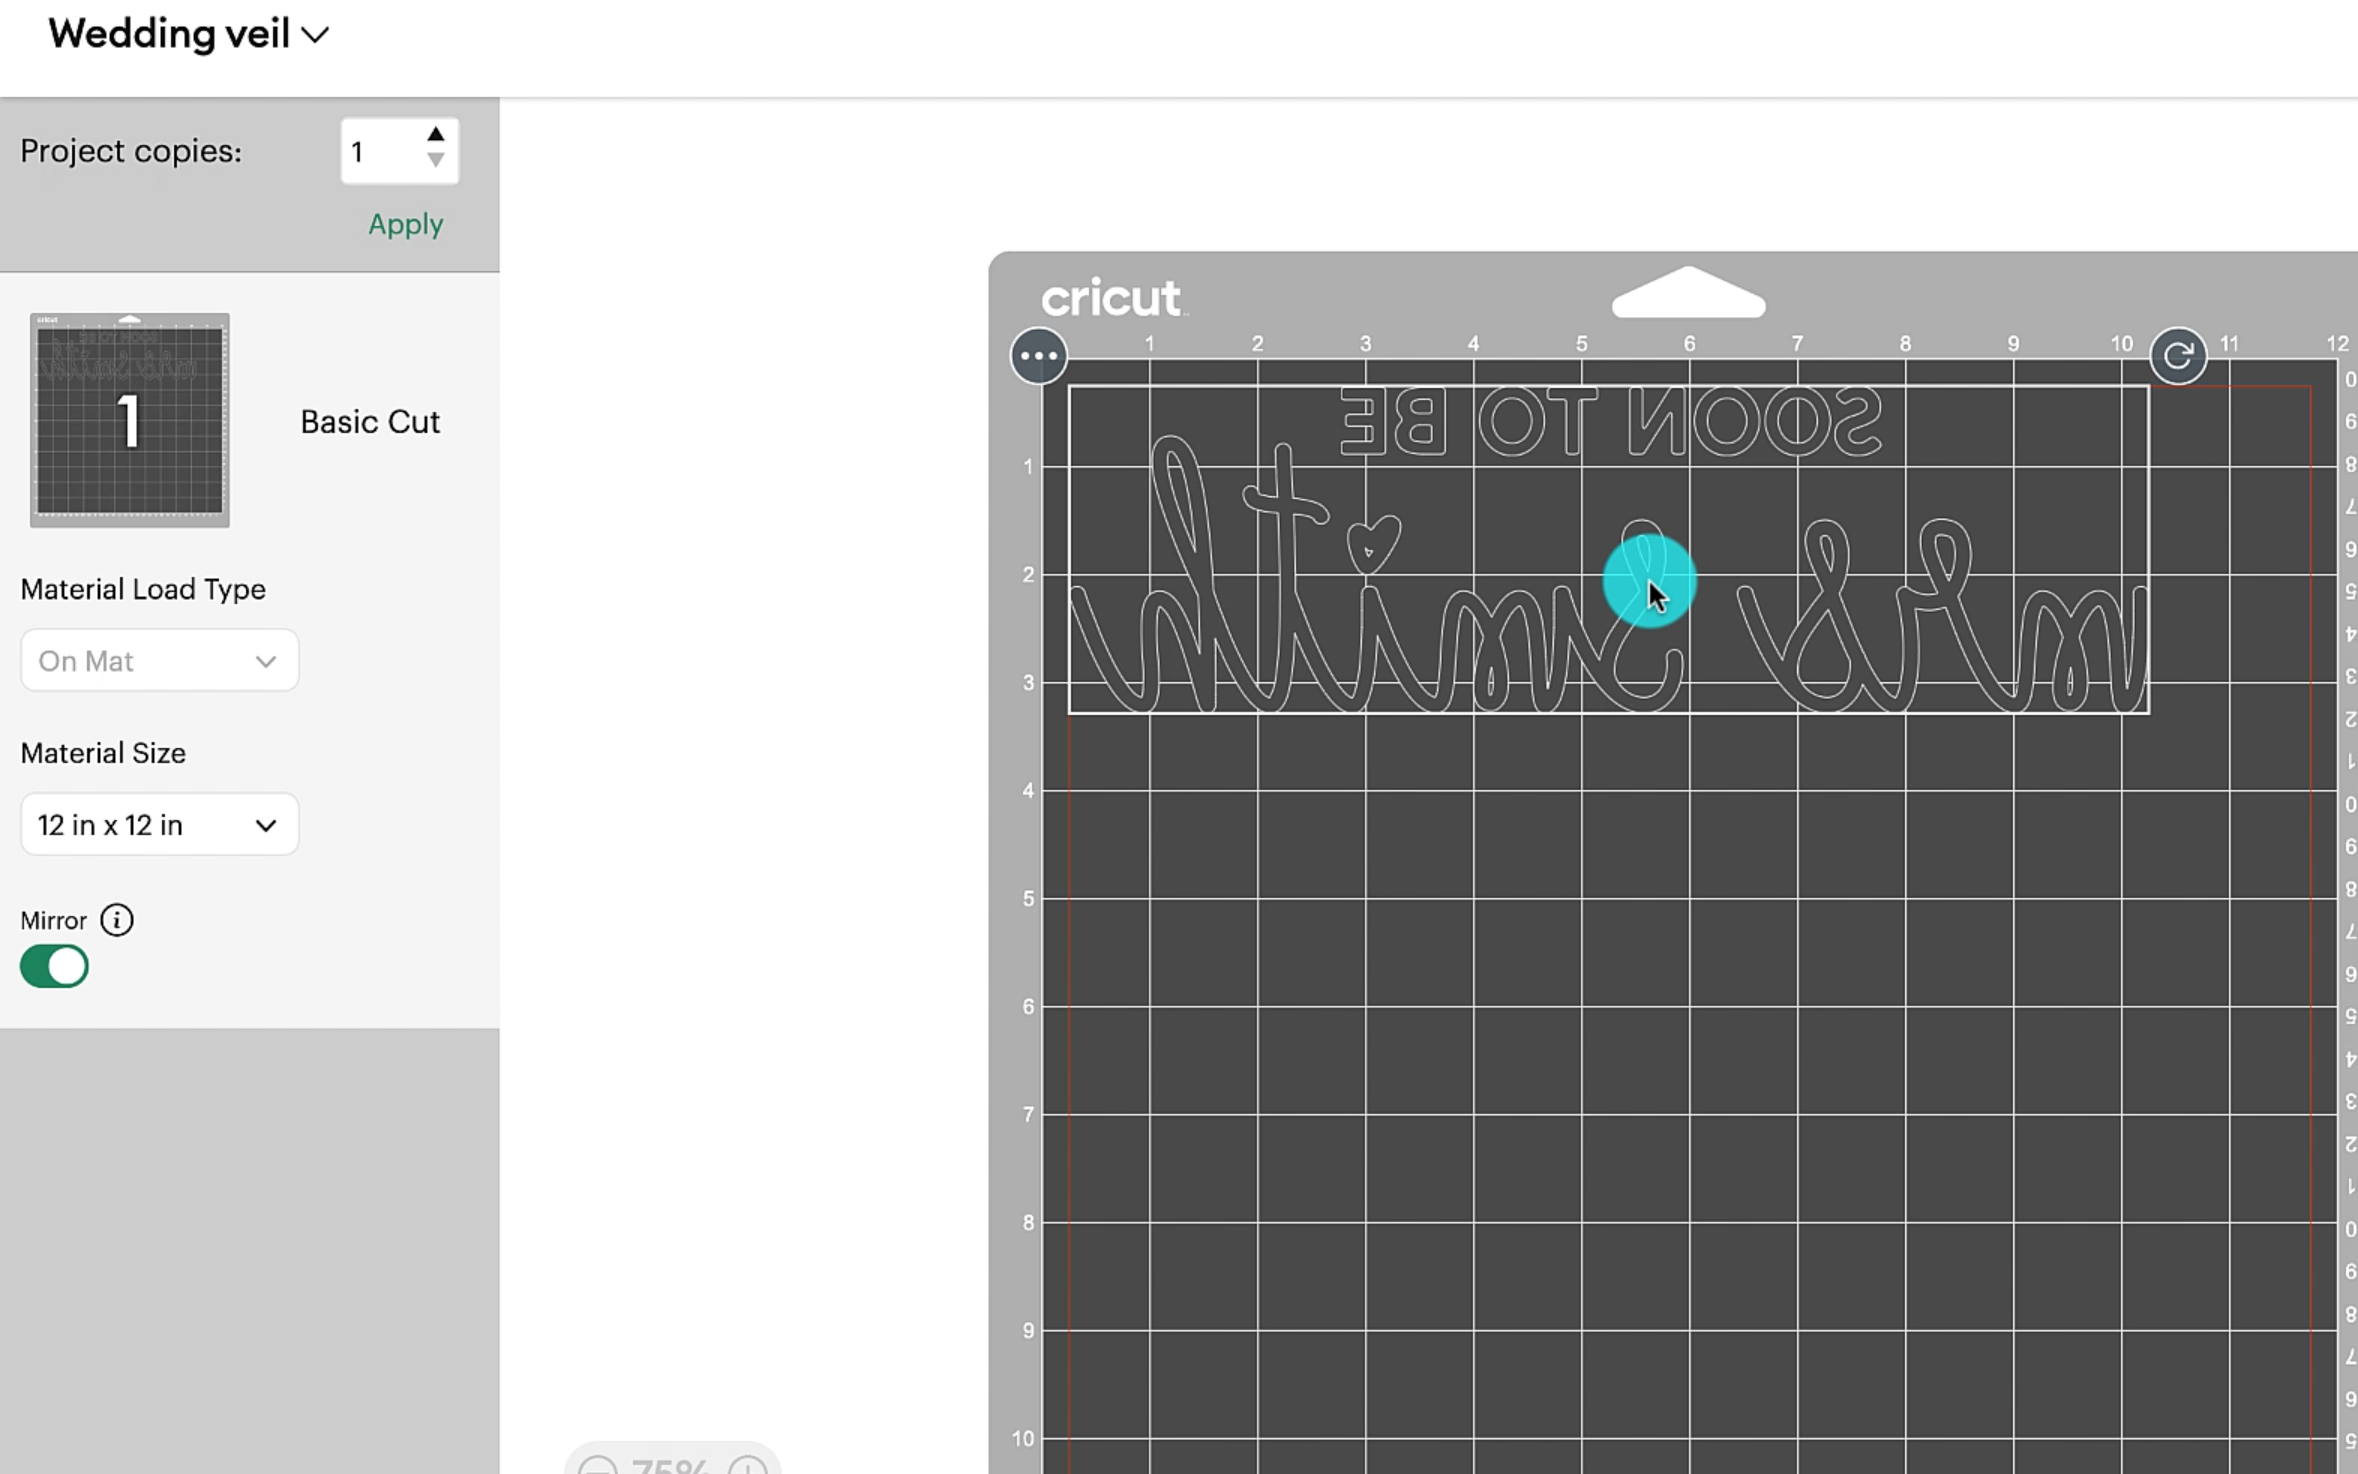
Position the text as you want it to appear on the veil. When you are happy with the positioning, select all the text and click attach. This will keep all the text in position when you cut the vinyl. If you prefer you can also cut the text separate and position the text once it is on the veil. The choice is yours, i personally prefer to position the text in cricut design space and attach it together before cutting.
Step 2
Once you are happy with your chosen fonts you are ready to cut the vinyl. Select 'Make it'. You will now see your design on the cricut mat. This is showing where you need to place your vinyl. As you are using heat transfer vinyl at this point you need to mirror the text.
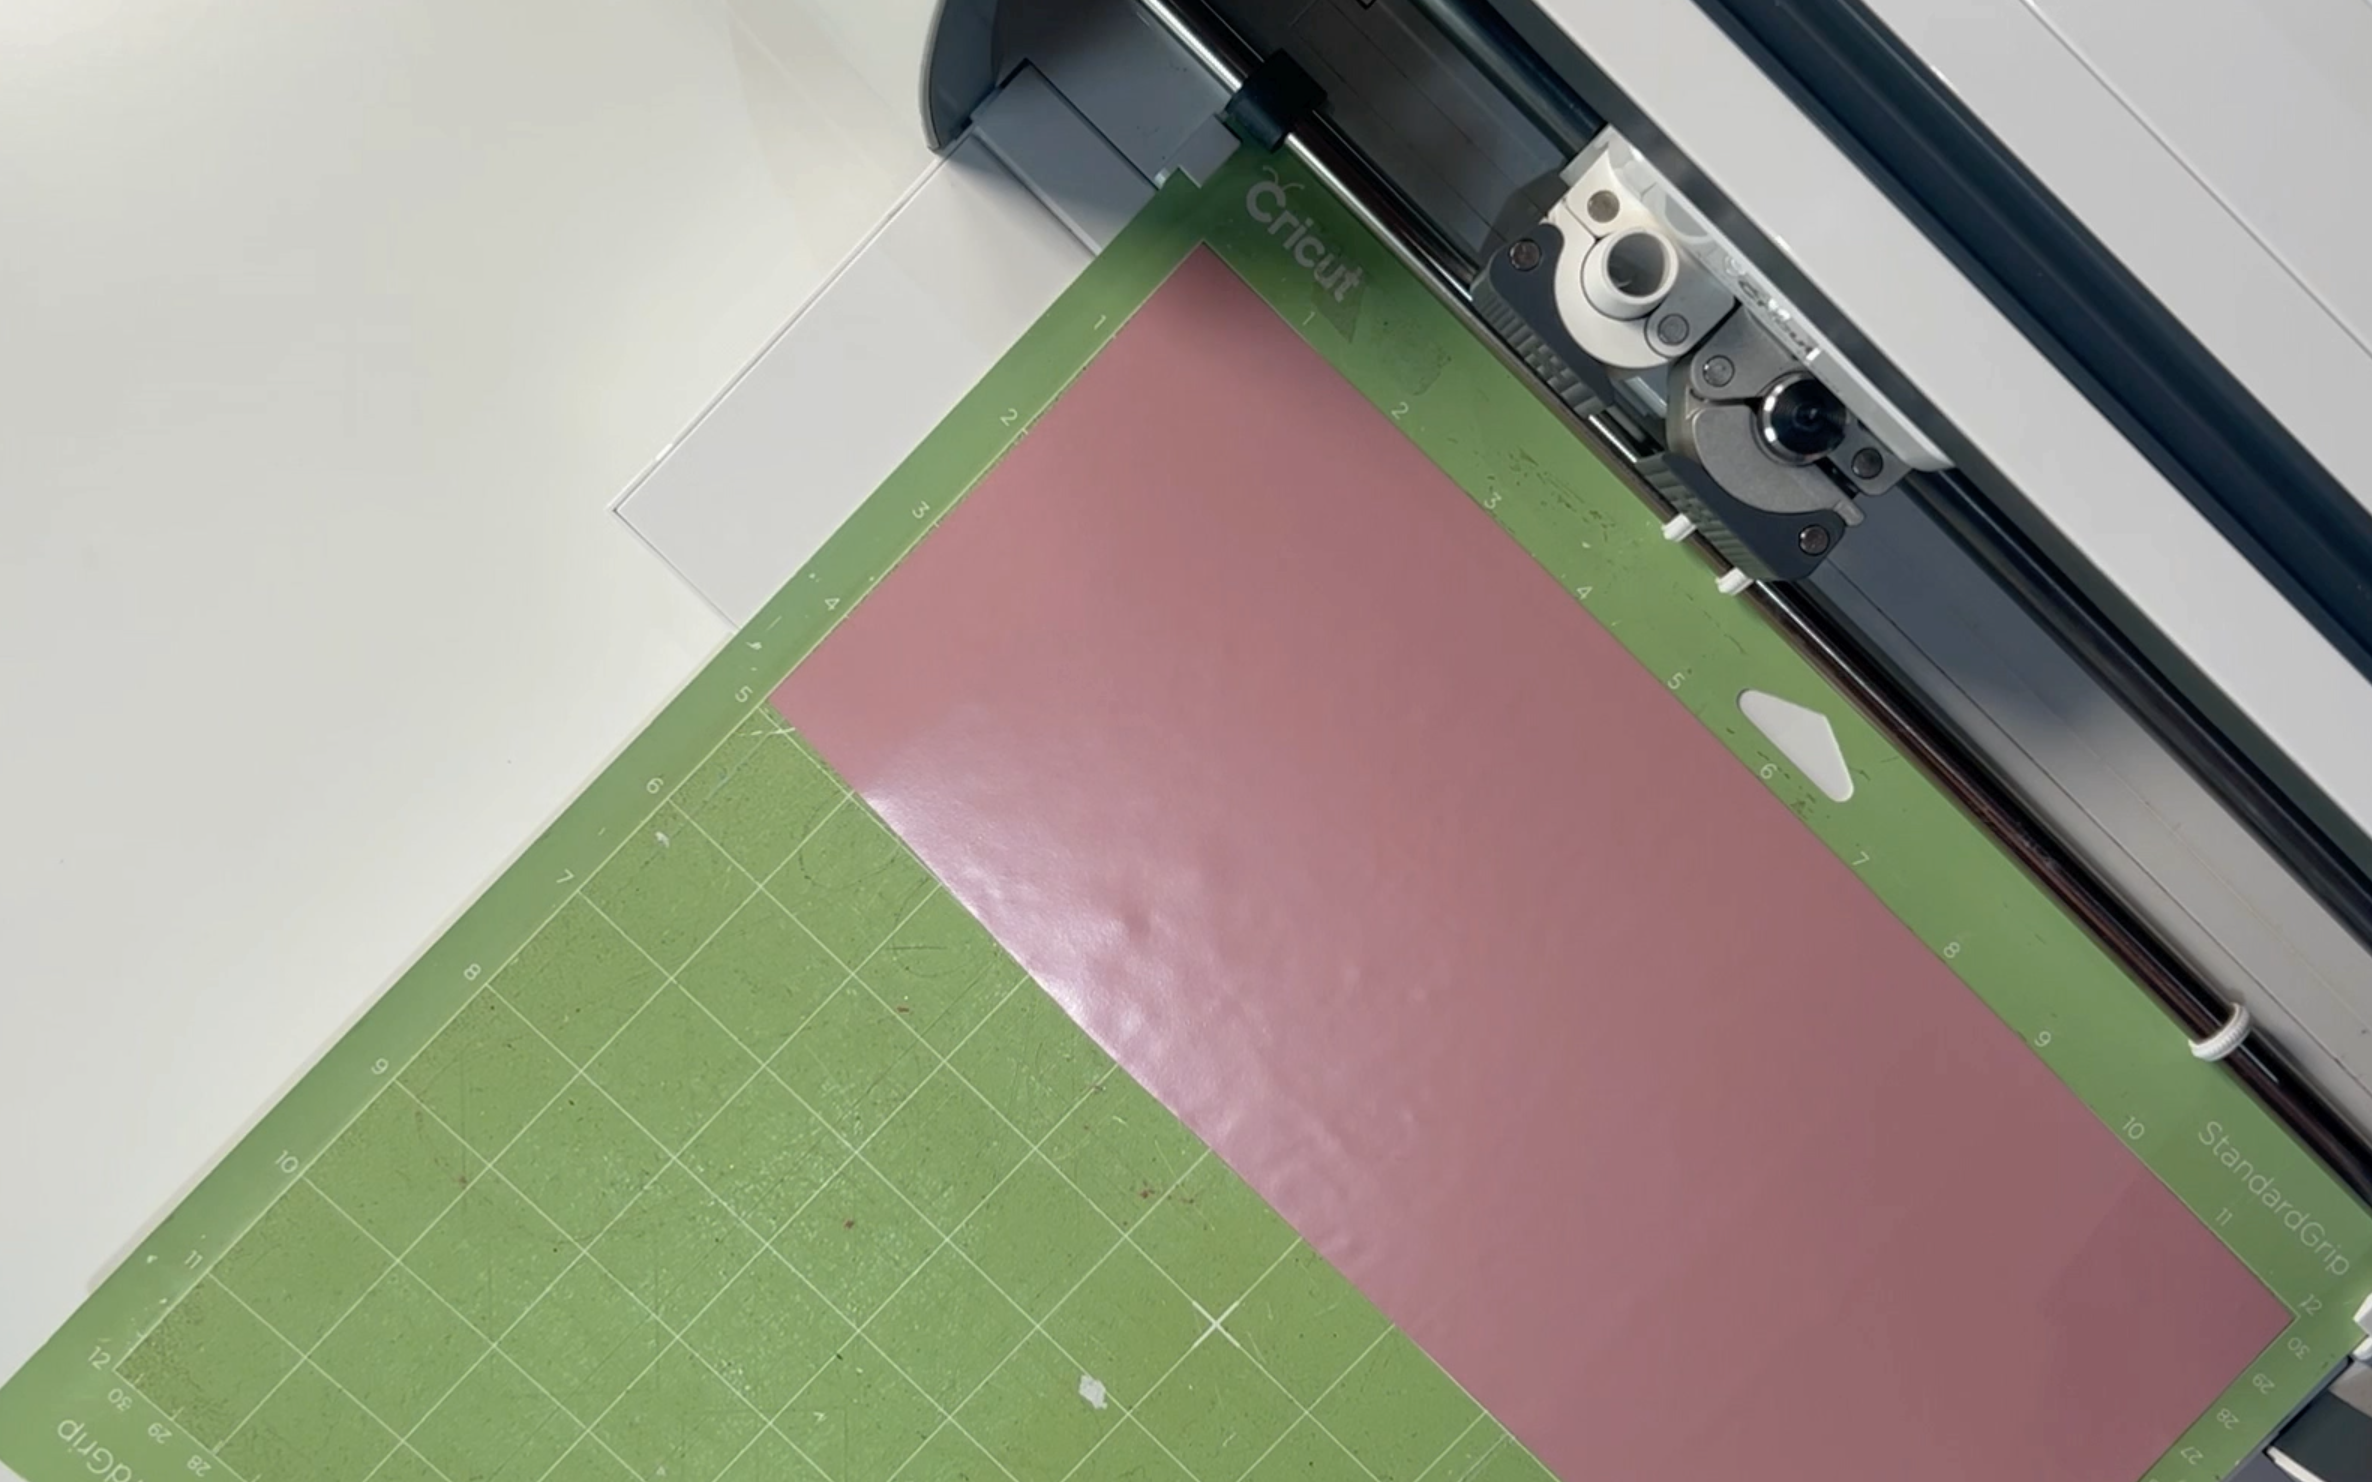
Step 3
Position the vinyl on the standard grip mat in the same place shown on the mat preview. Make sure it is secured down. I used a brayer to secure the vinyl.
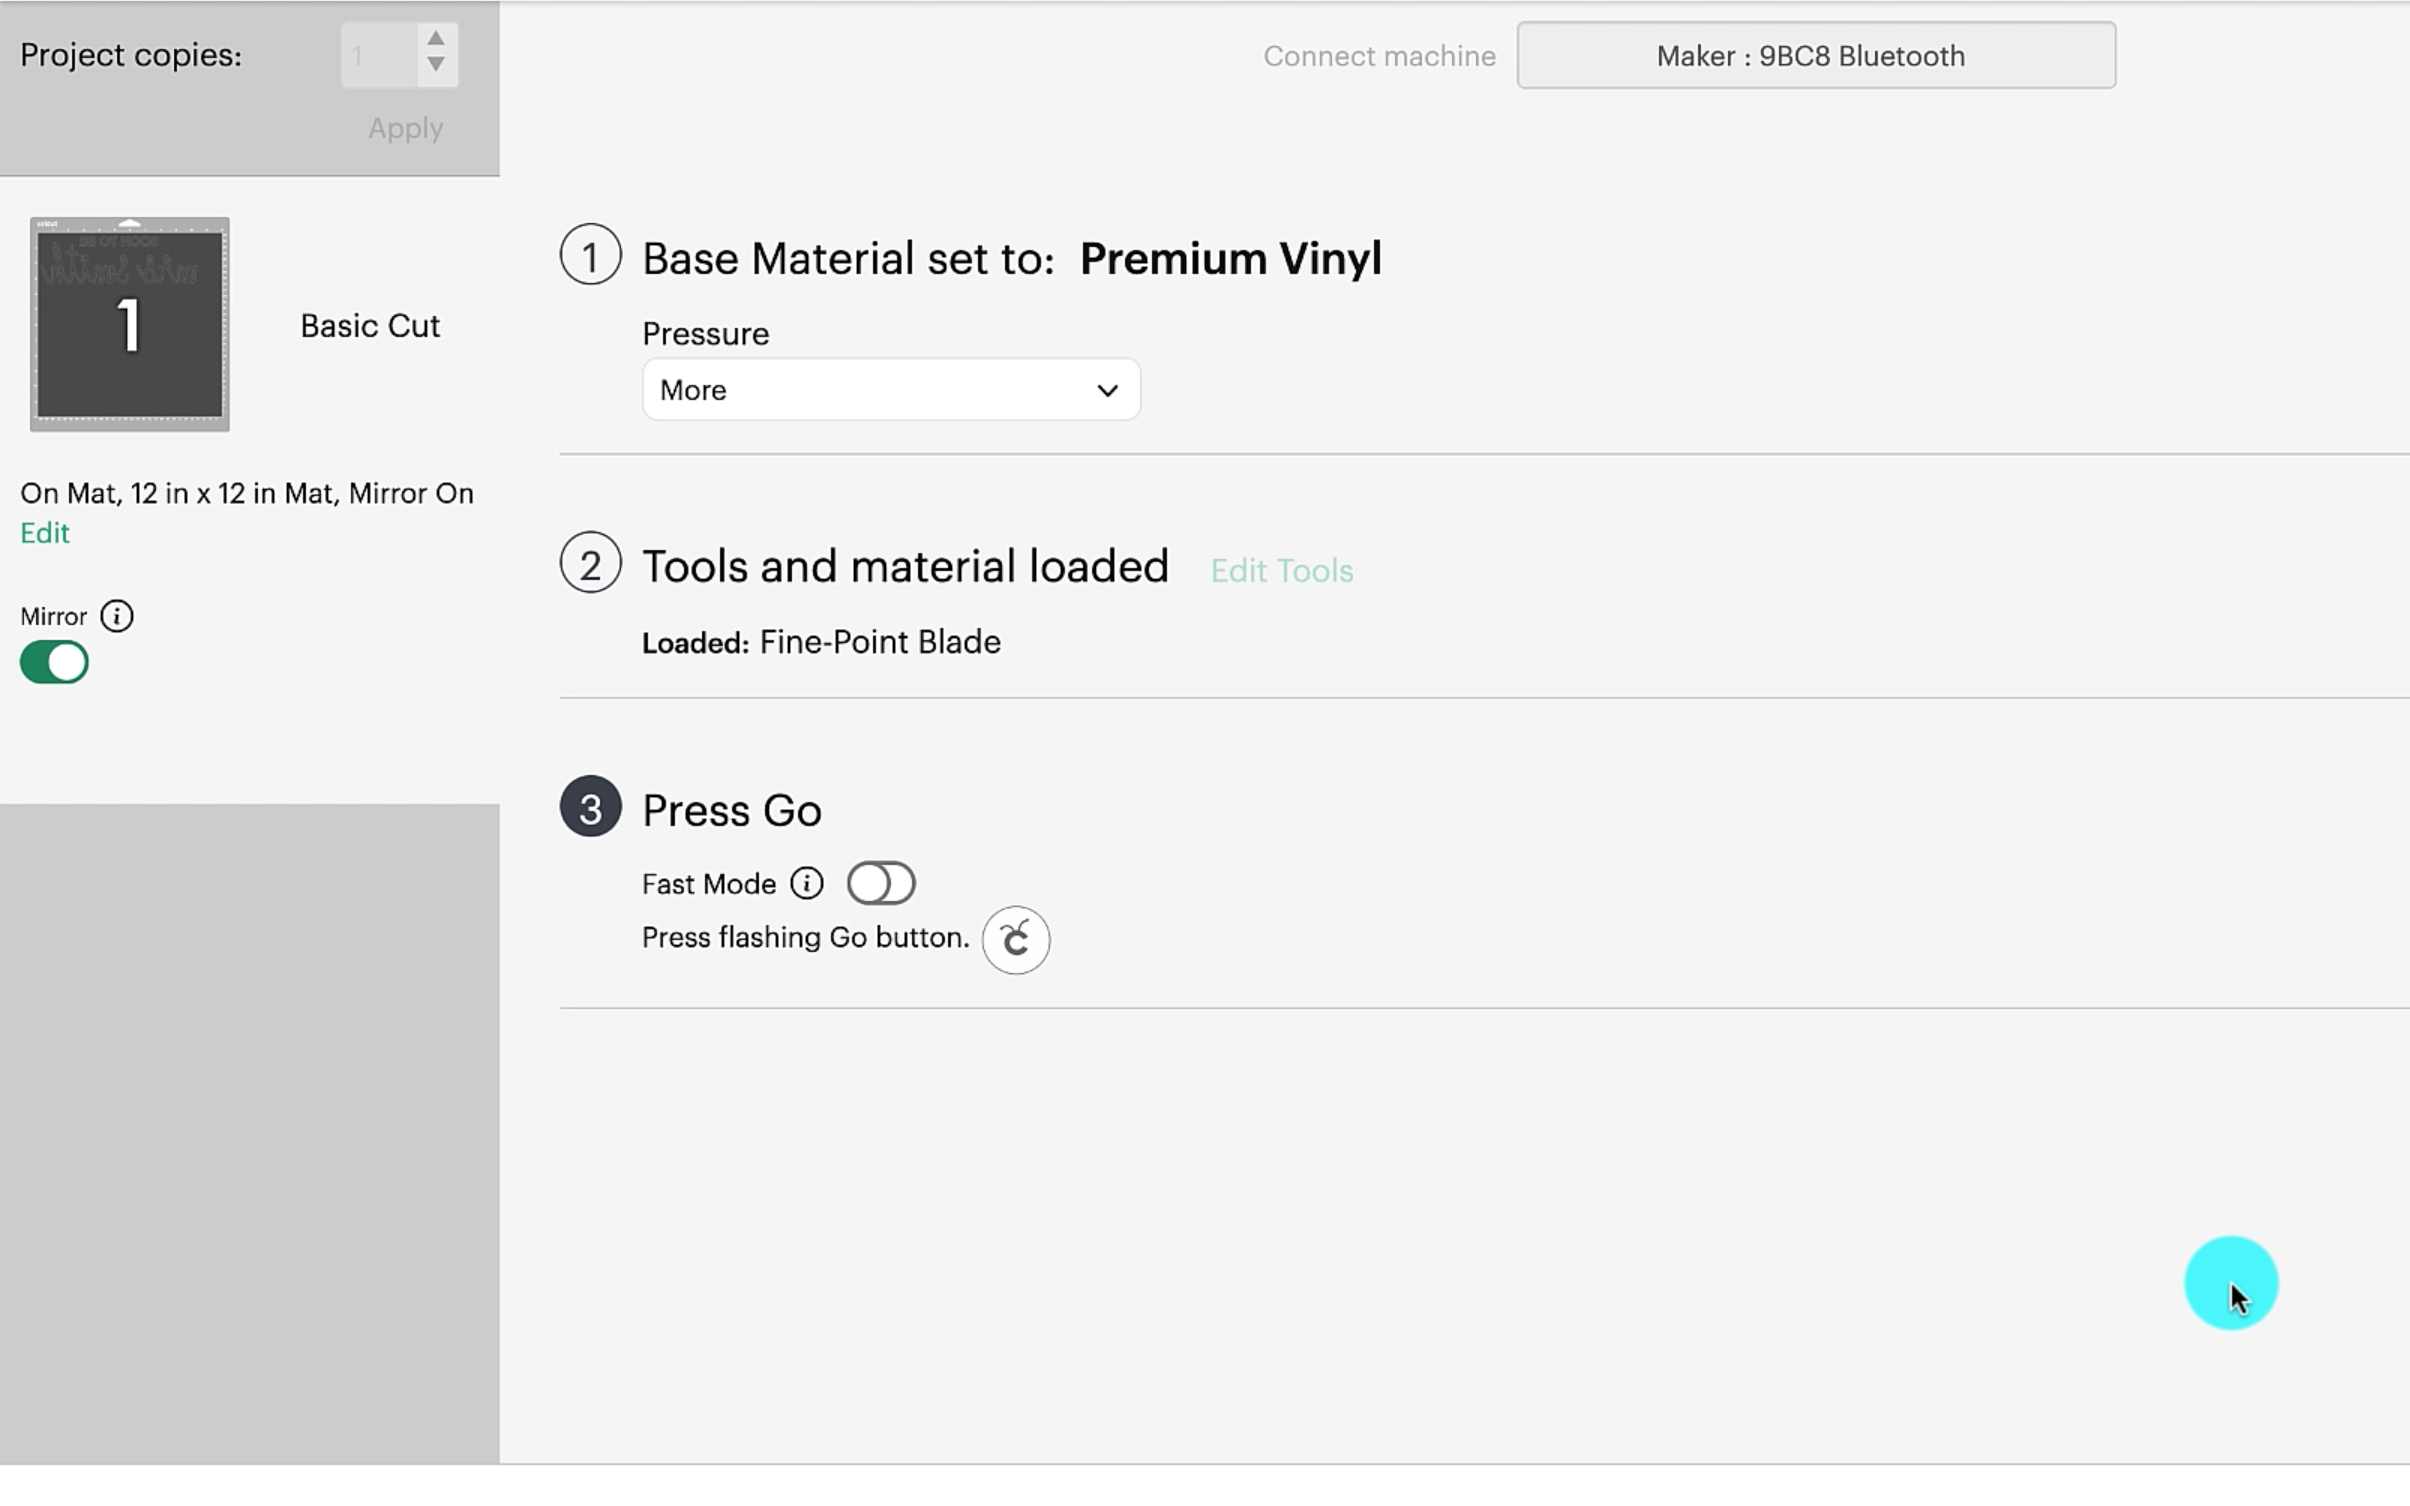
Once your vinyl is on the mat, select the material you are going to be using. I always like to select premium vinyl when i am cutting vinyl.
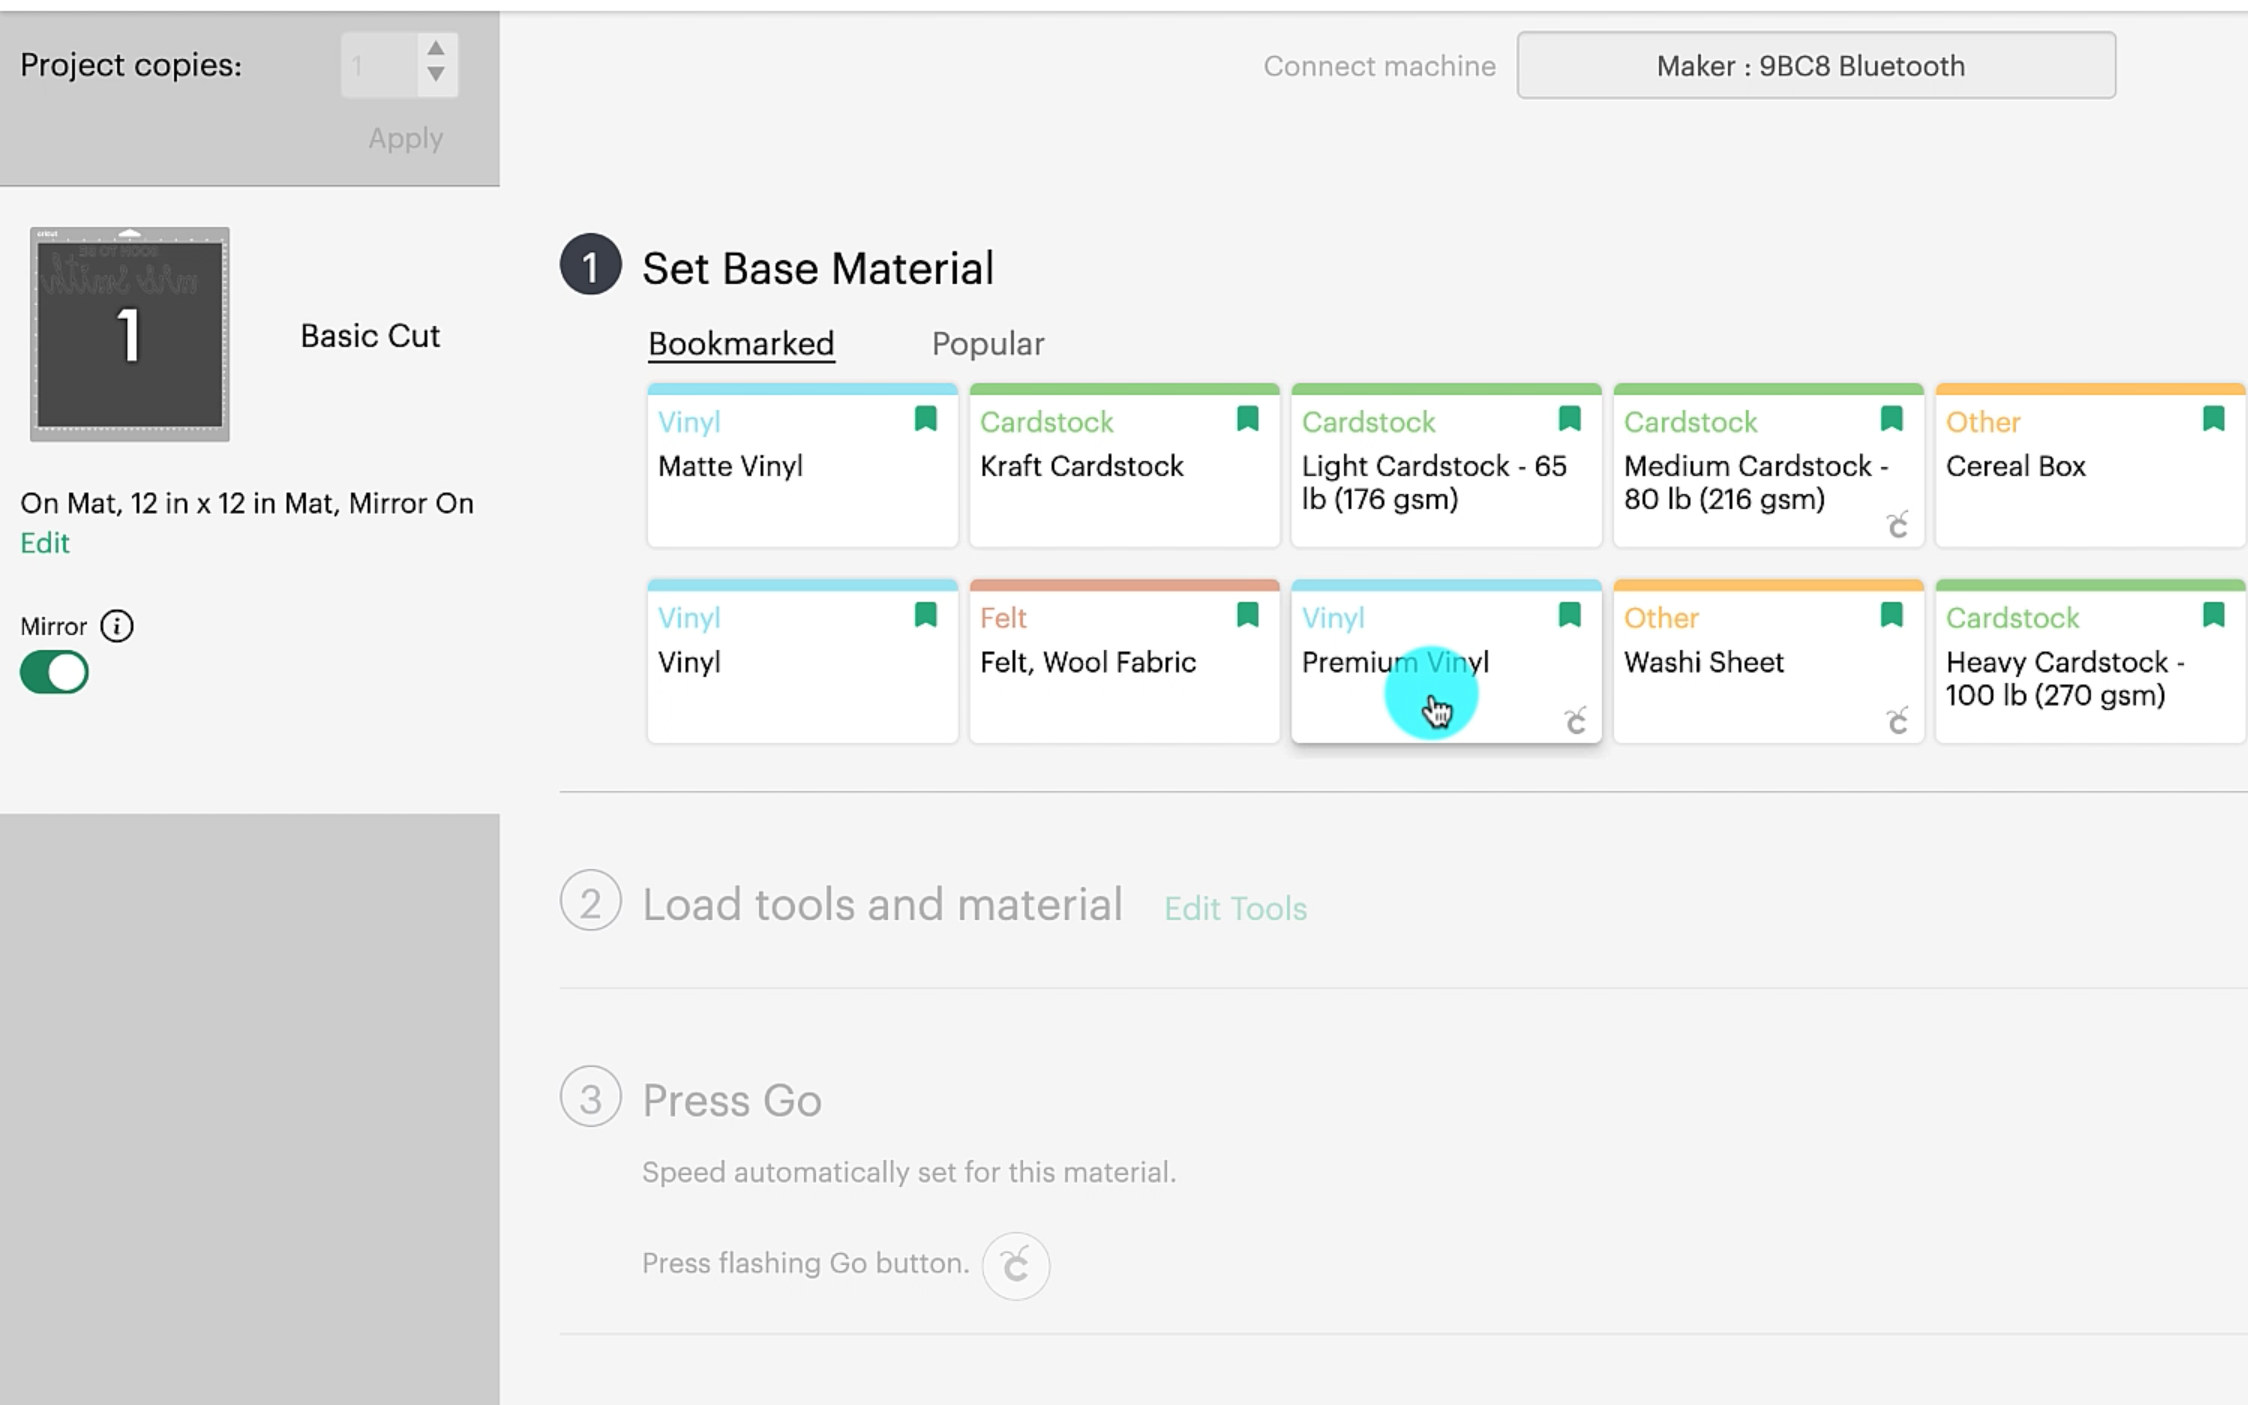
I always set the pressure to be more so i get a good clean cut.
Step 4
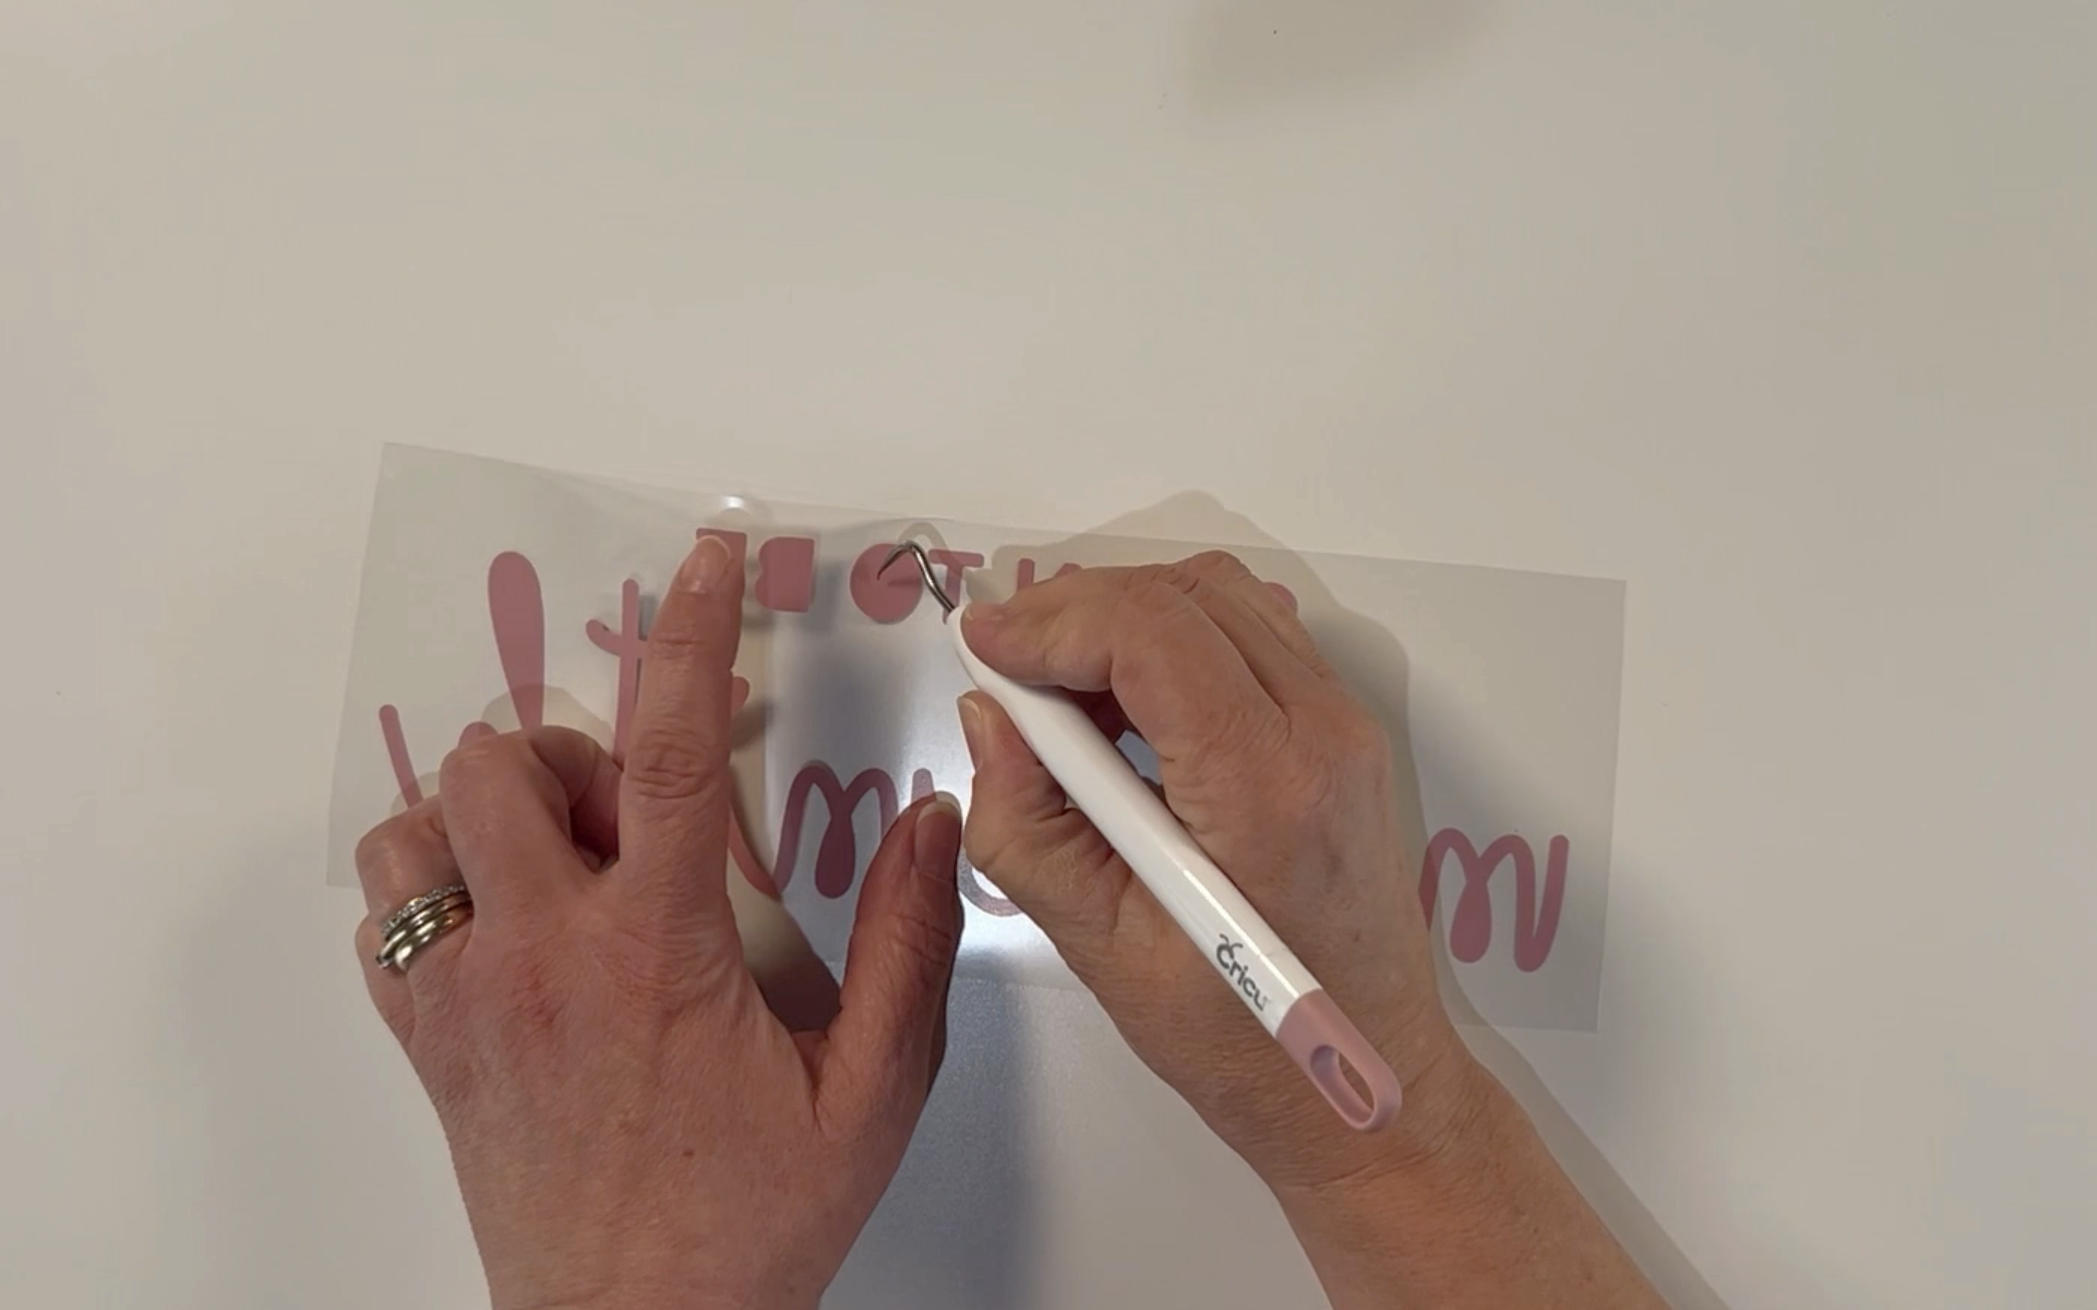
Once the design has been cut out, the design will need to be weeded. Using your weeding tools, weed away any vinyl that you do not need as part of your design.
Step 5
Once the design is all weeded, position the design onto the wedding veil.
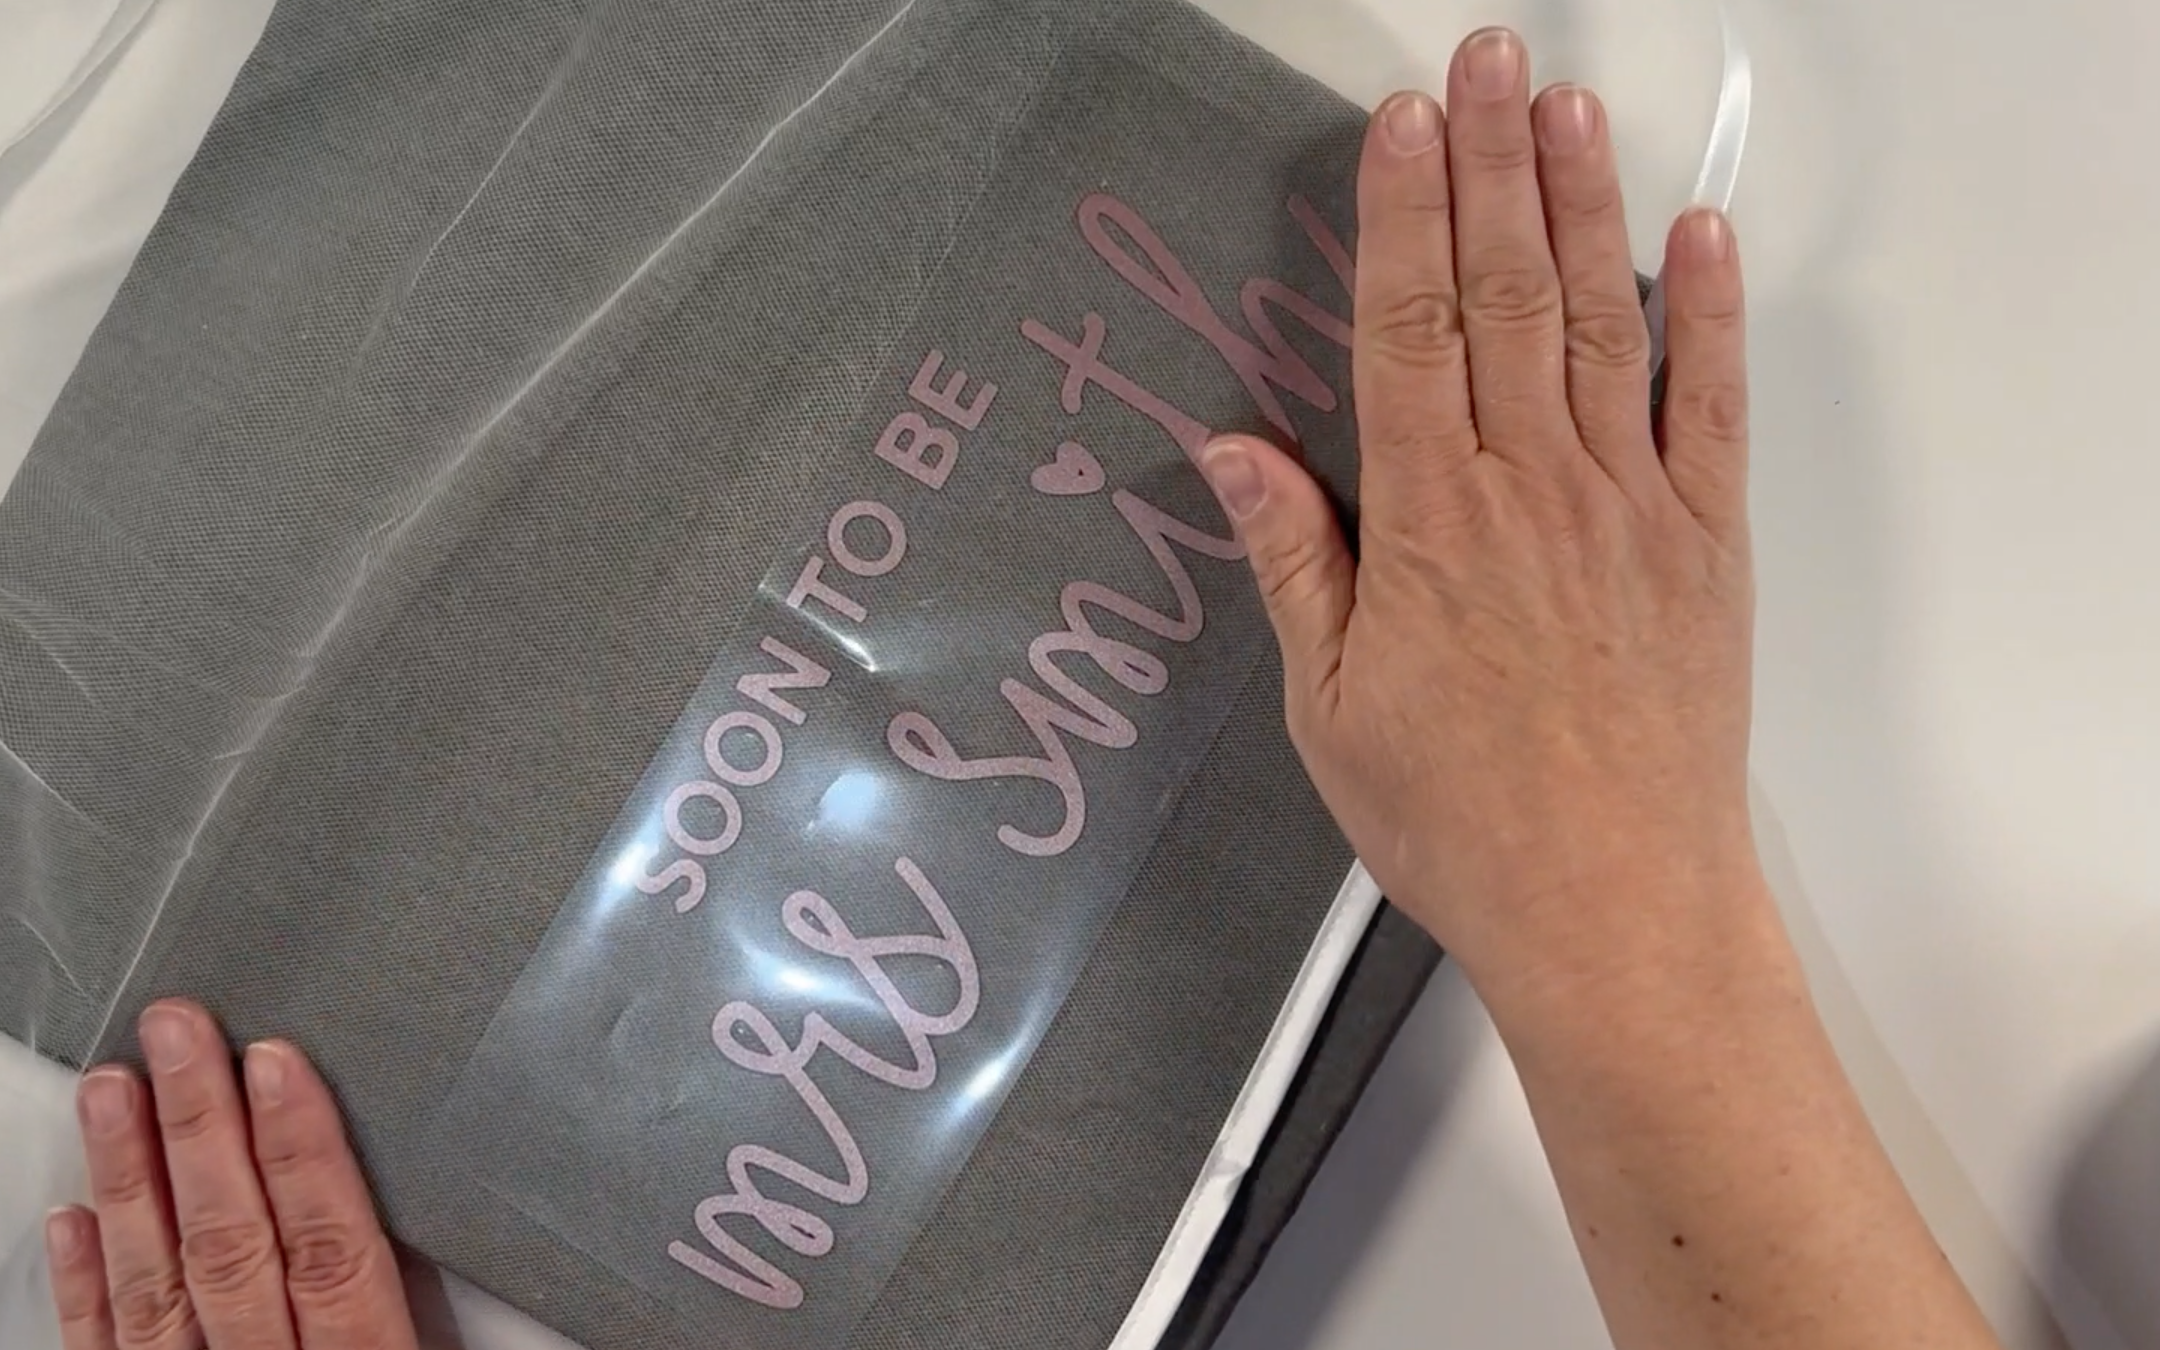
Once you are happy with the position of your vinyl design, turn on the heat press to start to warm up.
I used a heat press mini to heat the vinyl. I also used a teflon sheet to protect the veil.
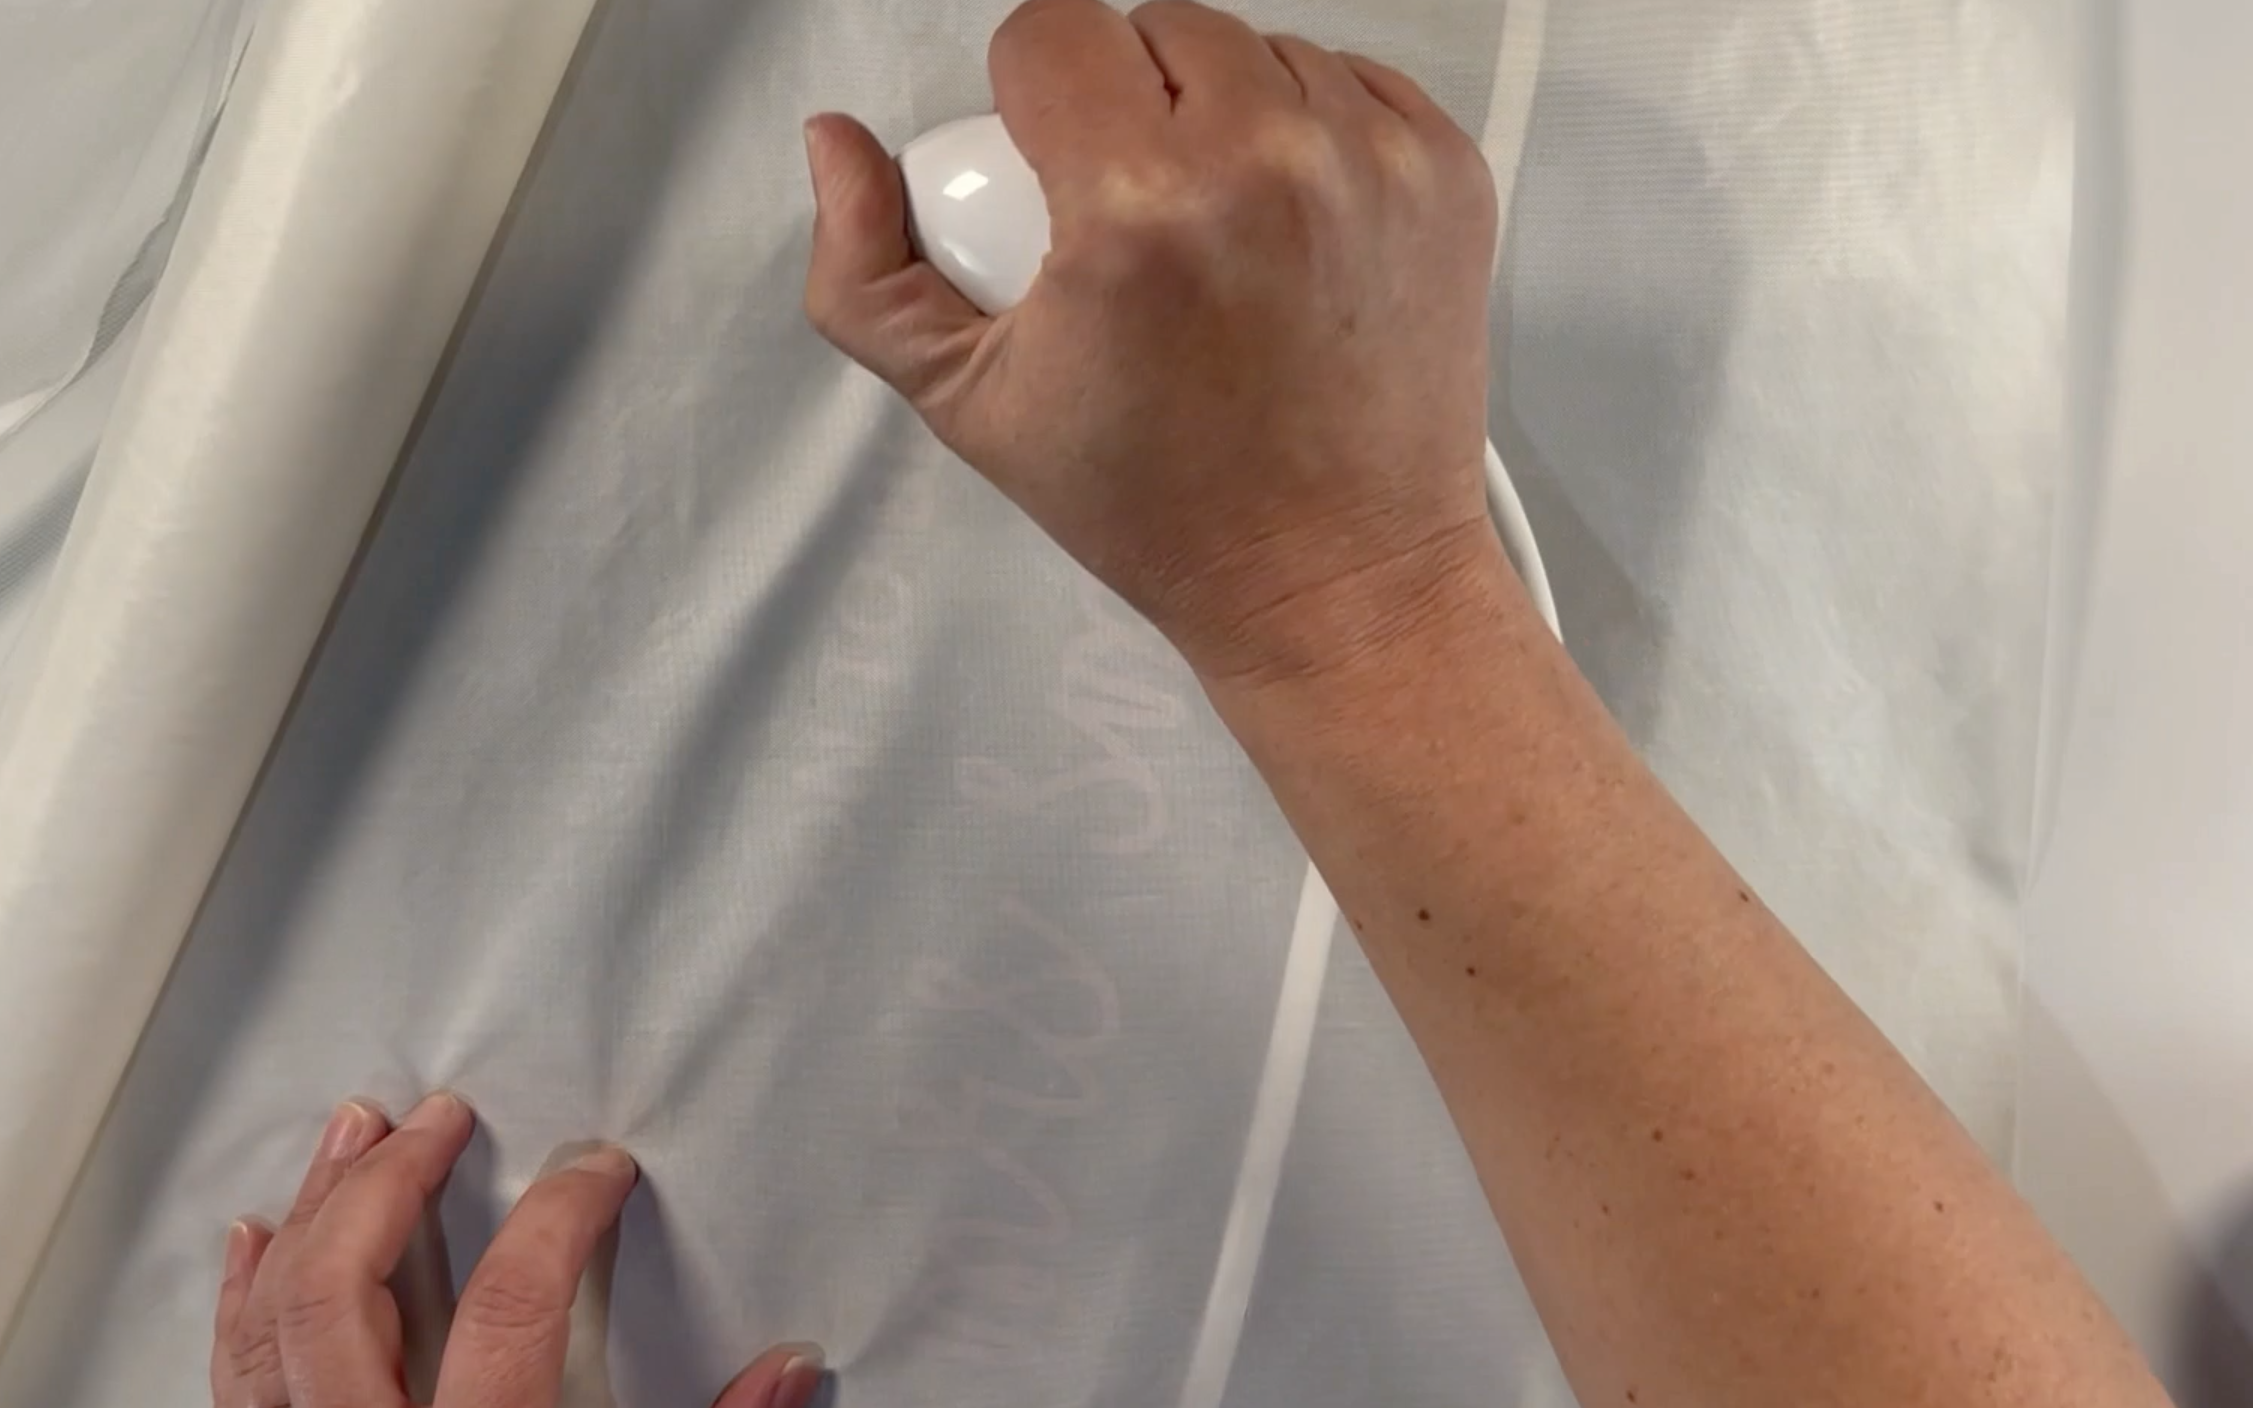
Heat the design until you are happy that it is fully adhered to the veil. Remove the carrier sheet to reveal you finished design.
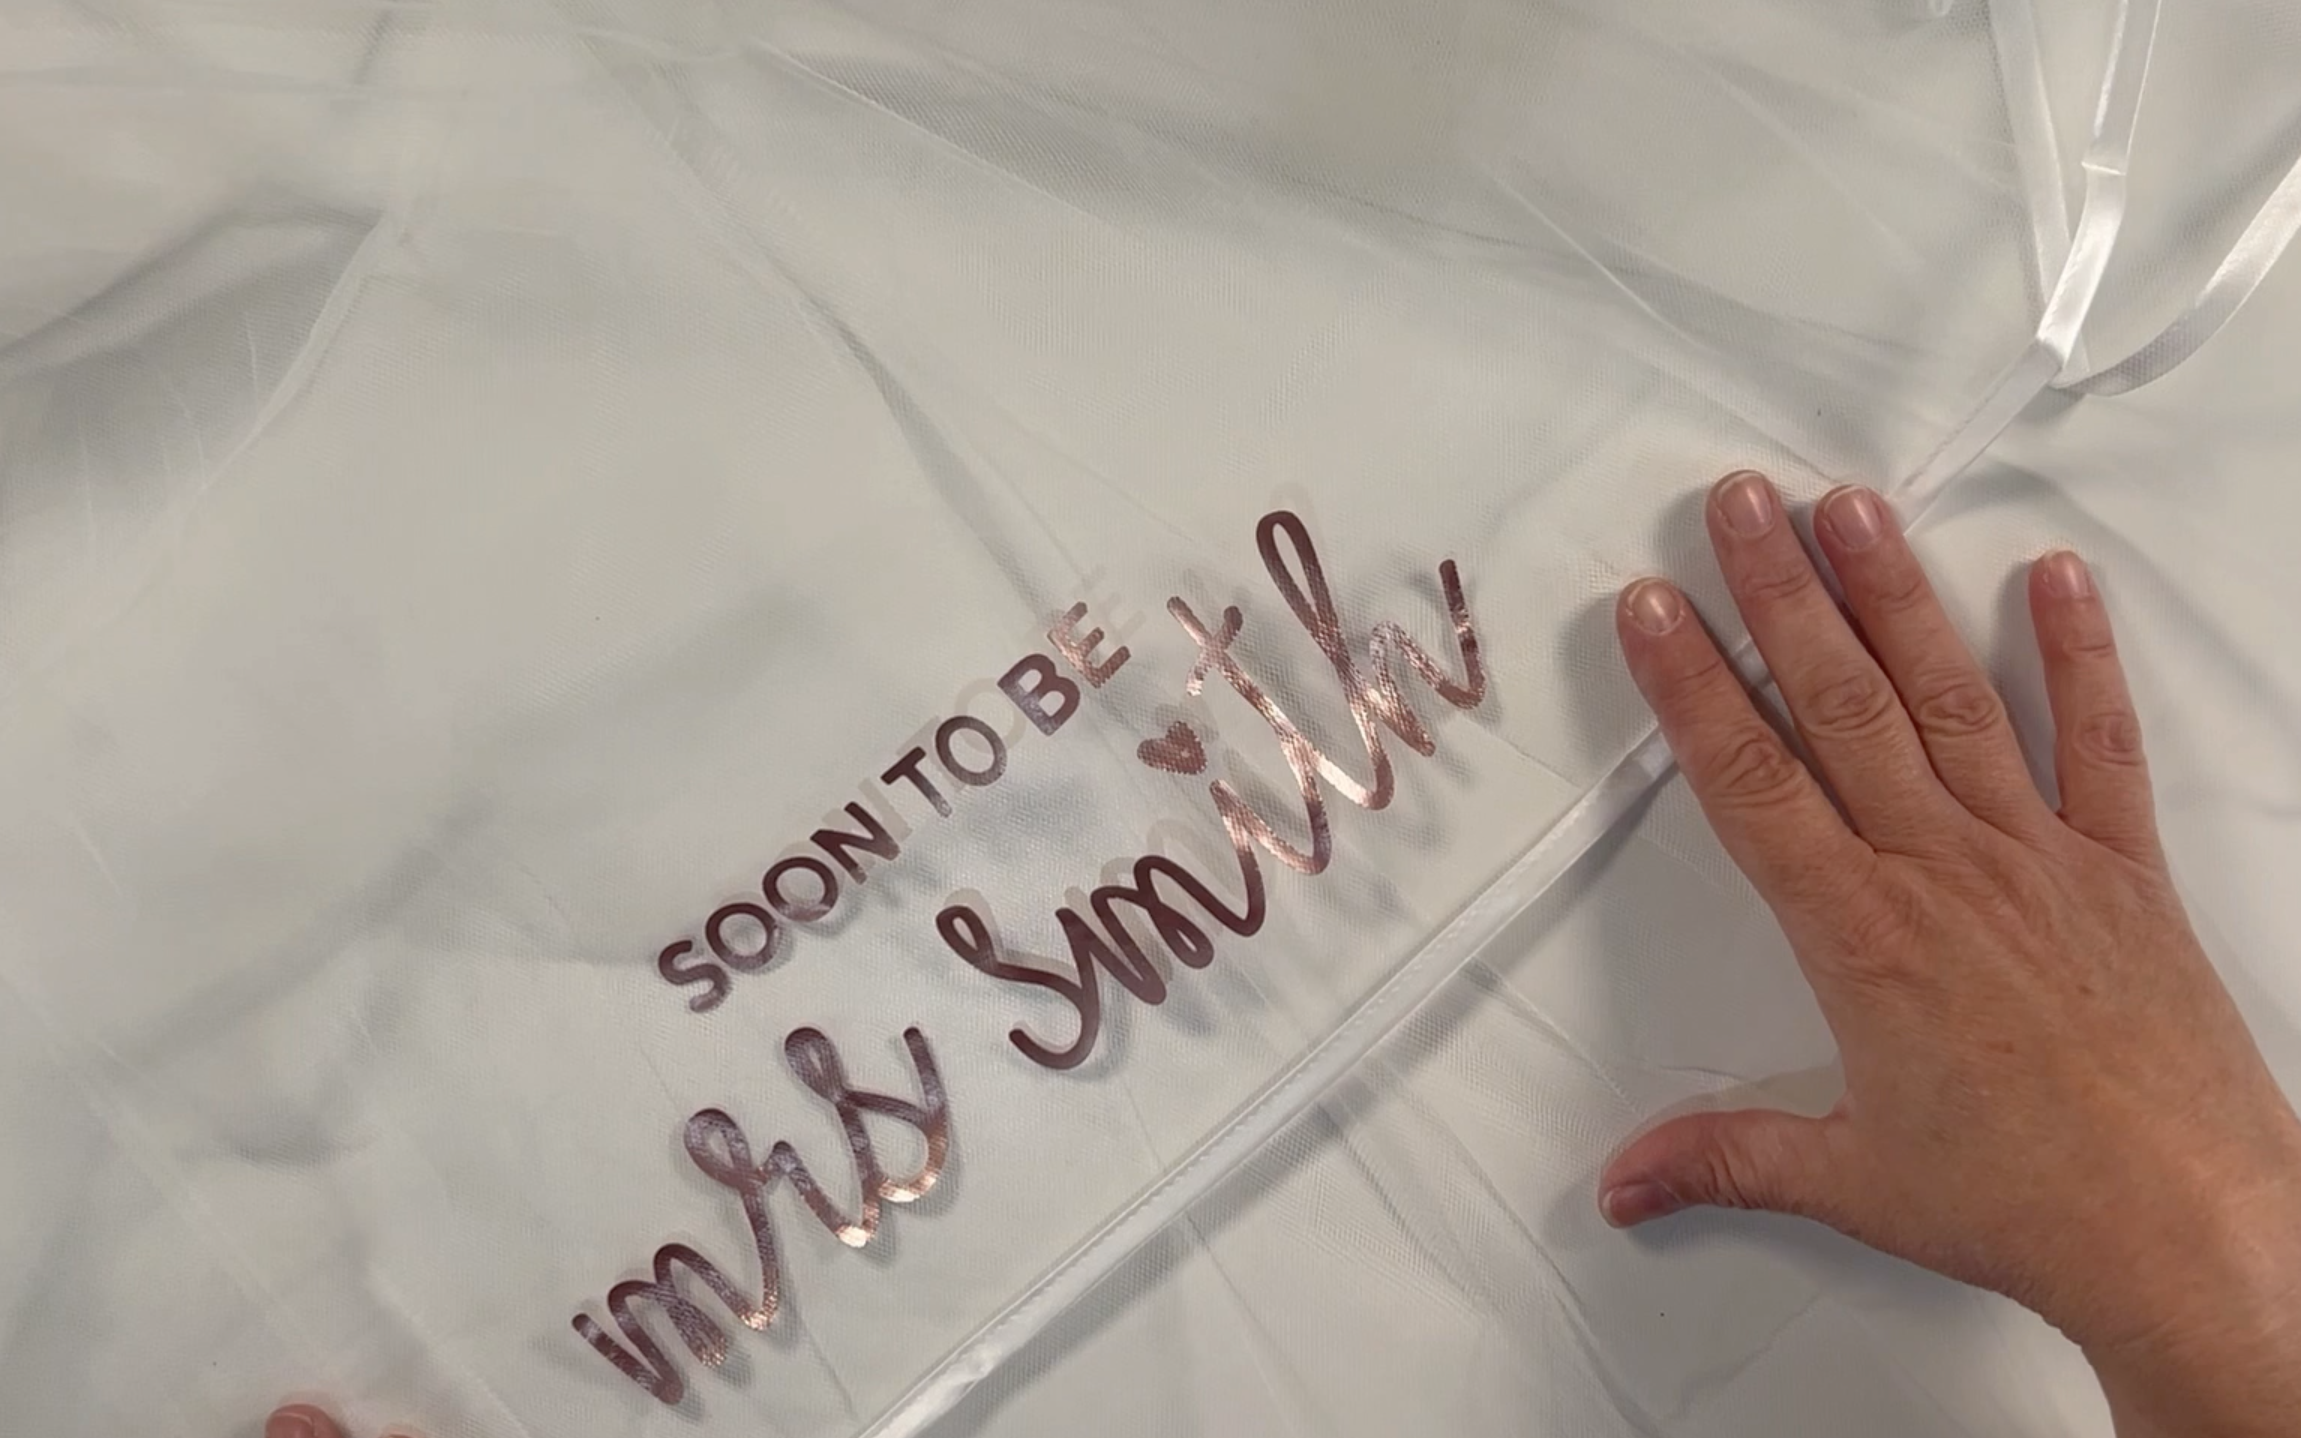
Now you have a personalised wedding veil, ready for your intended event.
If you would like to watch how i personalised the wedding veil then please check out the video below:
If you enjoyed this blog, how to apply heat transfer vinyl to a veil then please check out my other blog posts:
How To Apply Vinyl To A Glass Jar