
If you love making Christmas decor then you will love making these cute wool Christmas trees. They are really simple to make using only a few supplies that you may already have. If you do not have these supplies they are quite cheap to buy and easy to find. These are great to get the kids involved with too. I especially love crafts like these as you can get really creative and make some really cool looking Christmas trees. In this blog i am sharing step by step how to make these easy to make wool Christmas trees.
Shop the supplies i used:
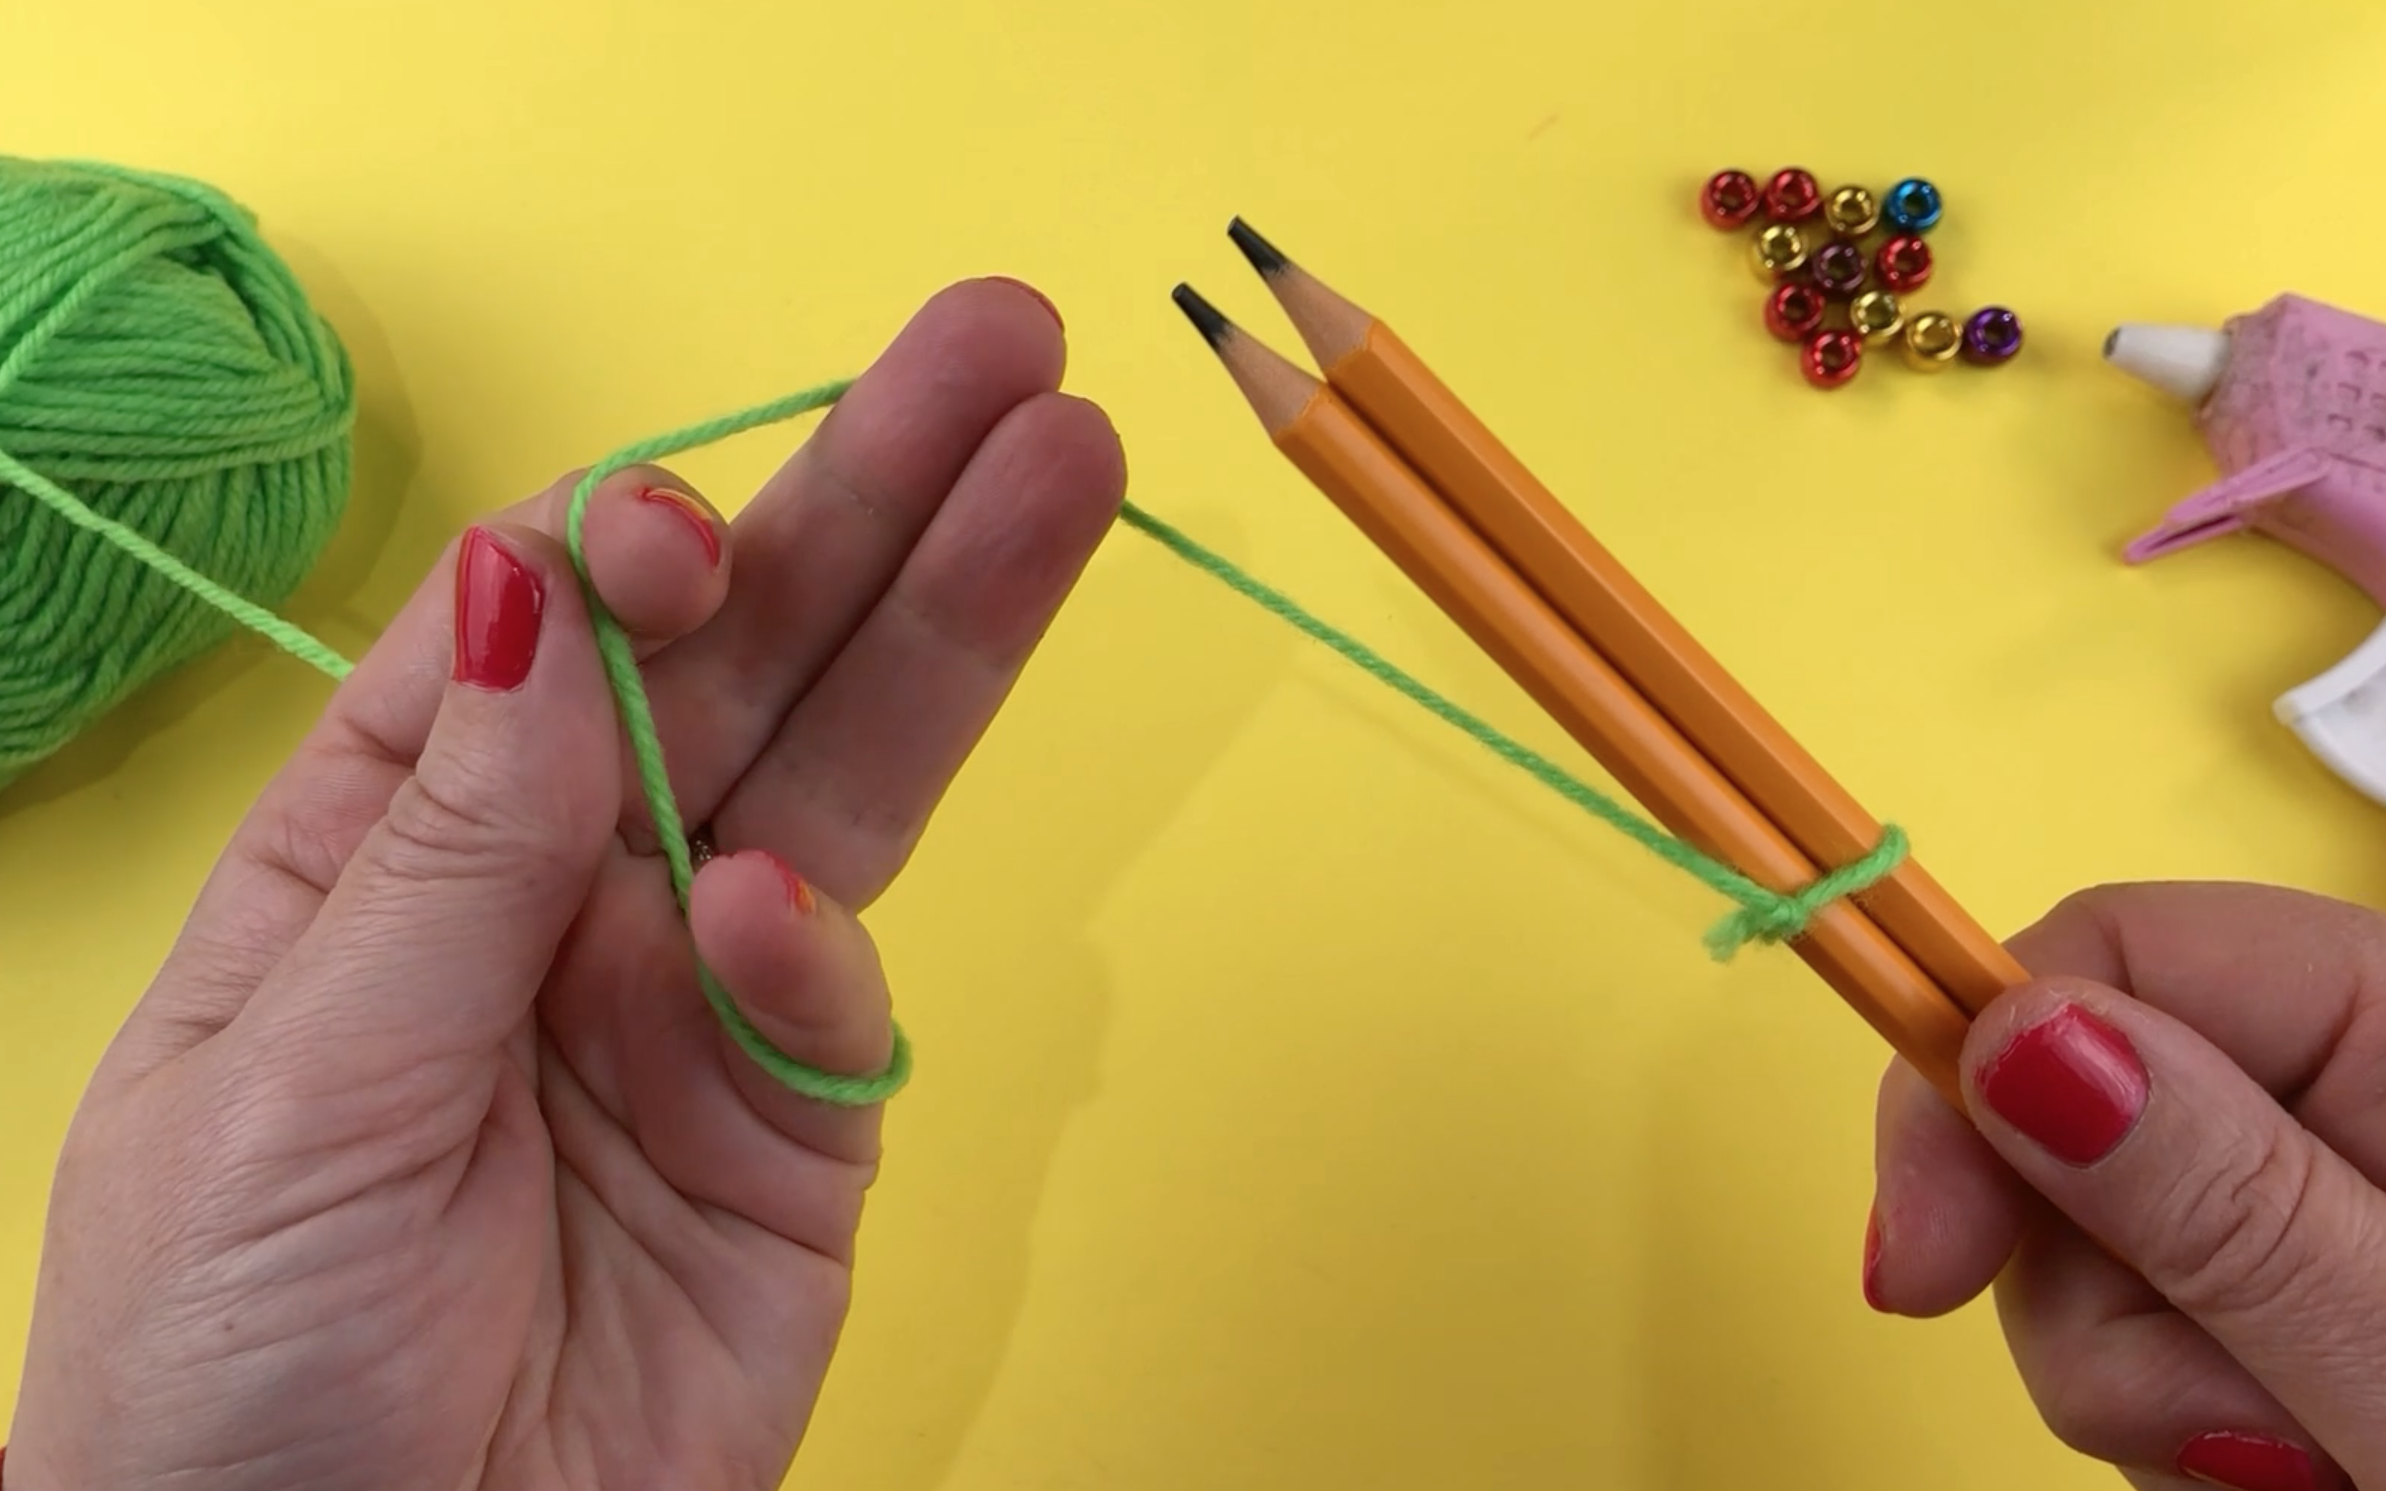
Step 1
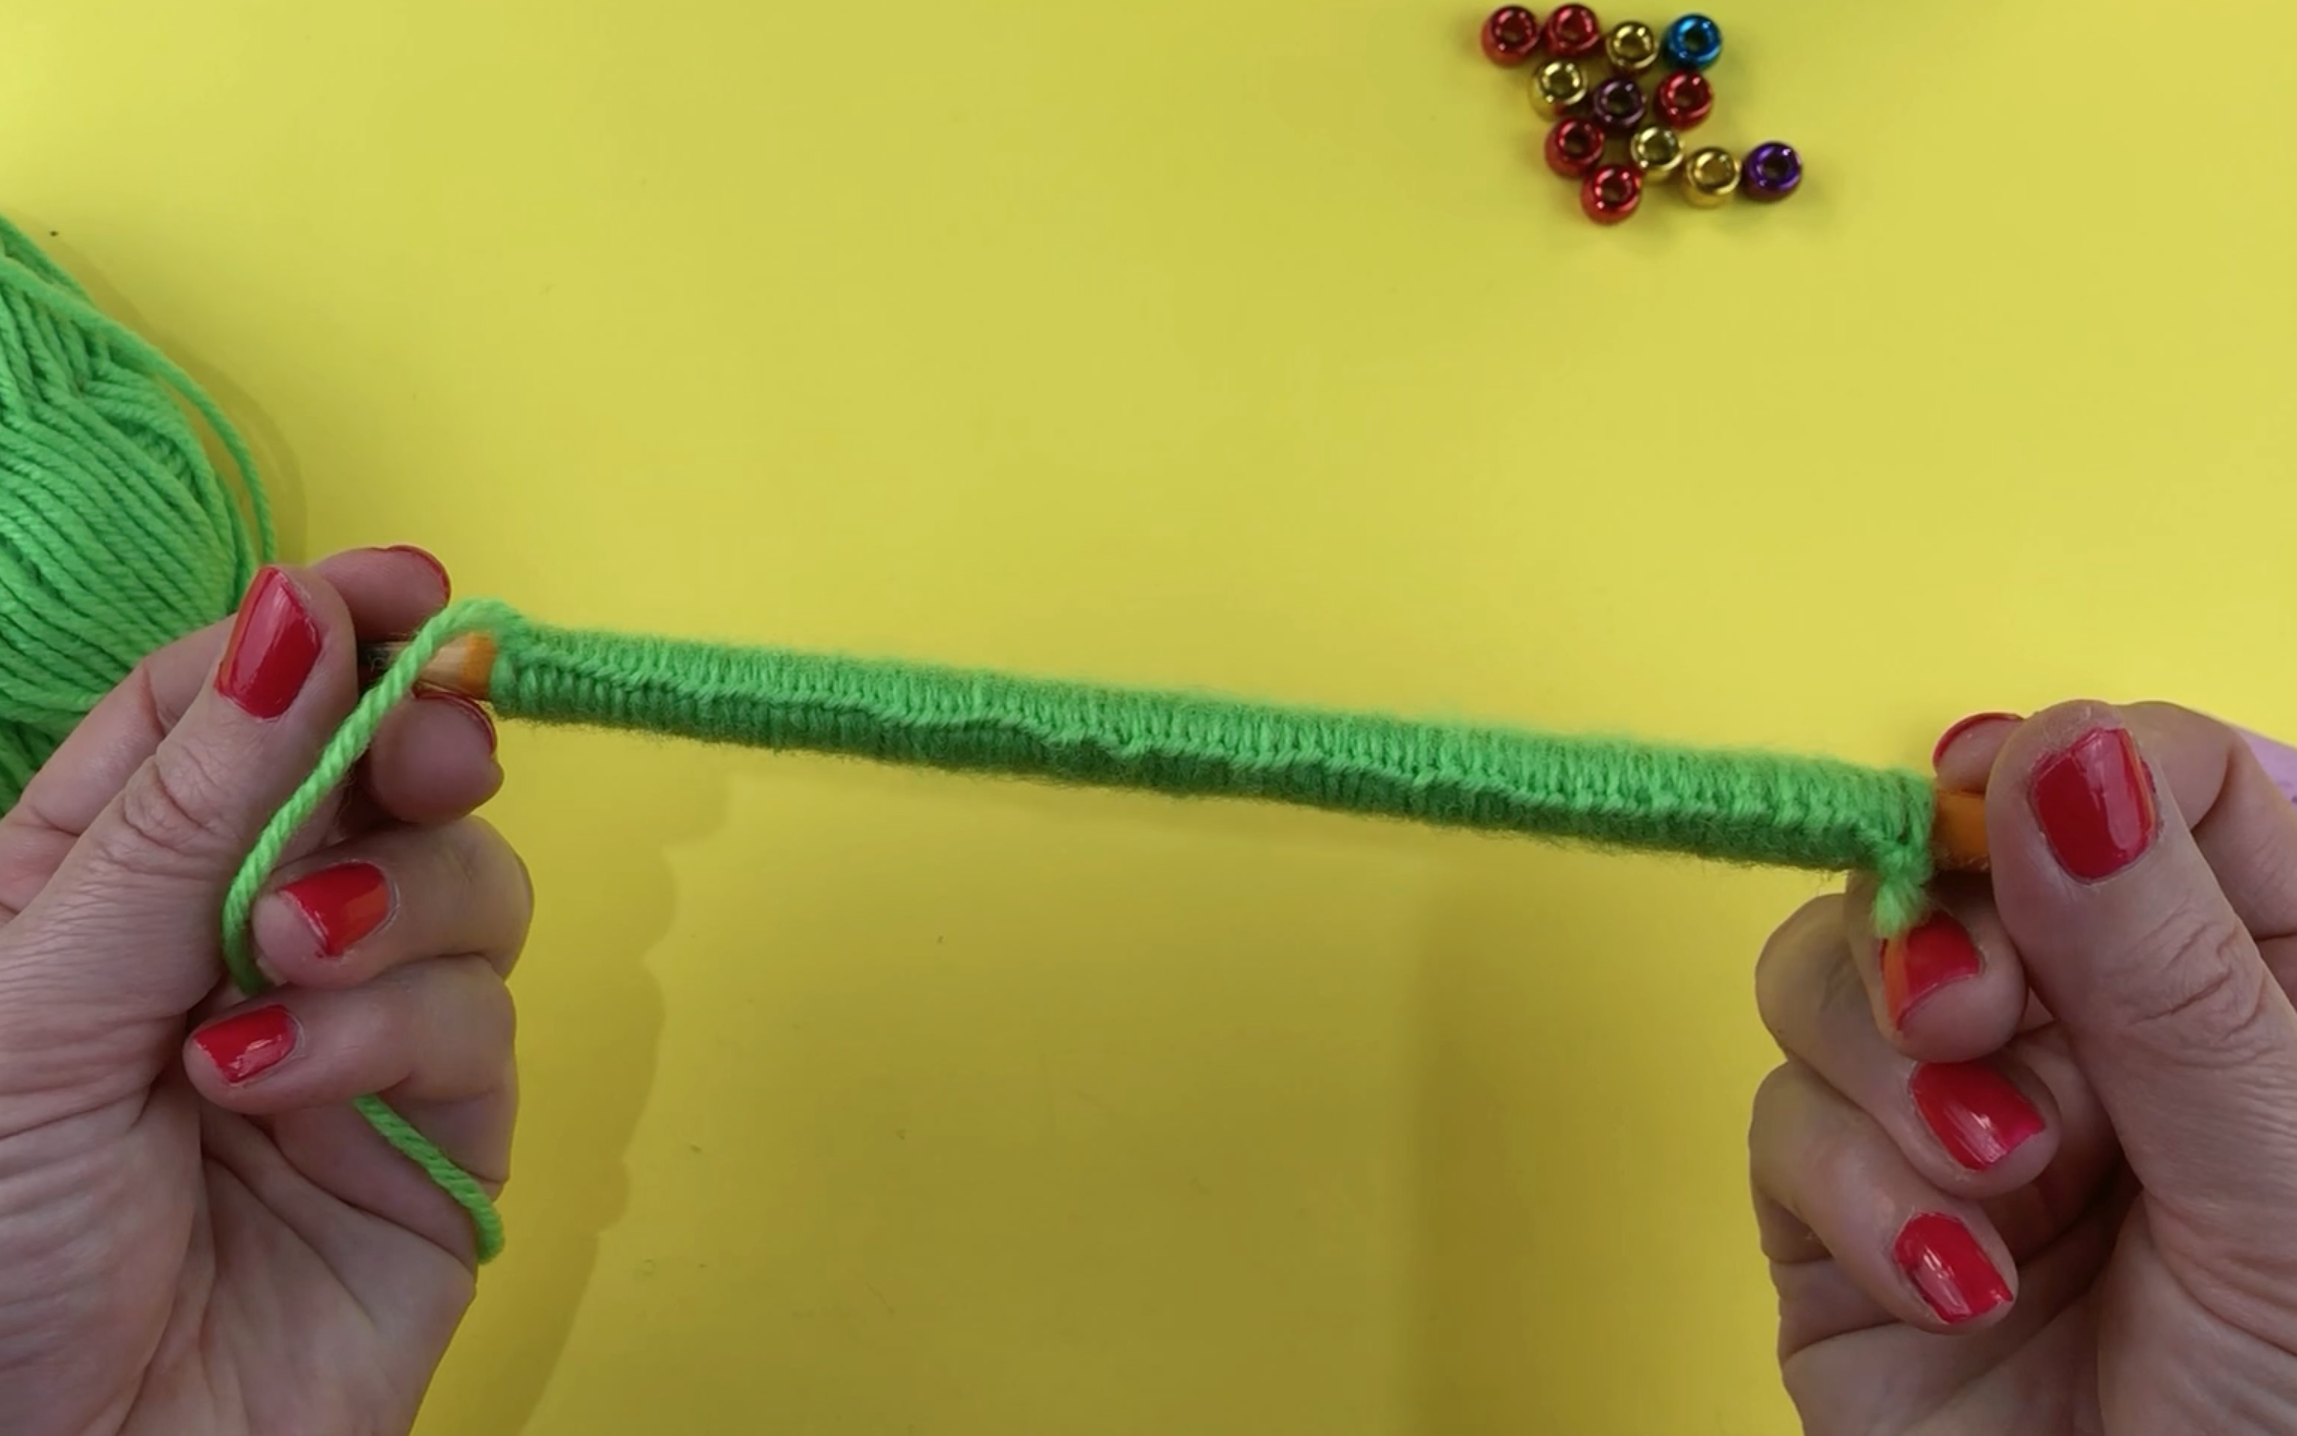
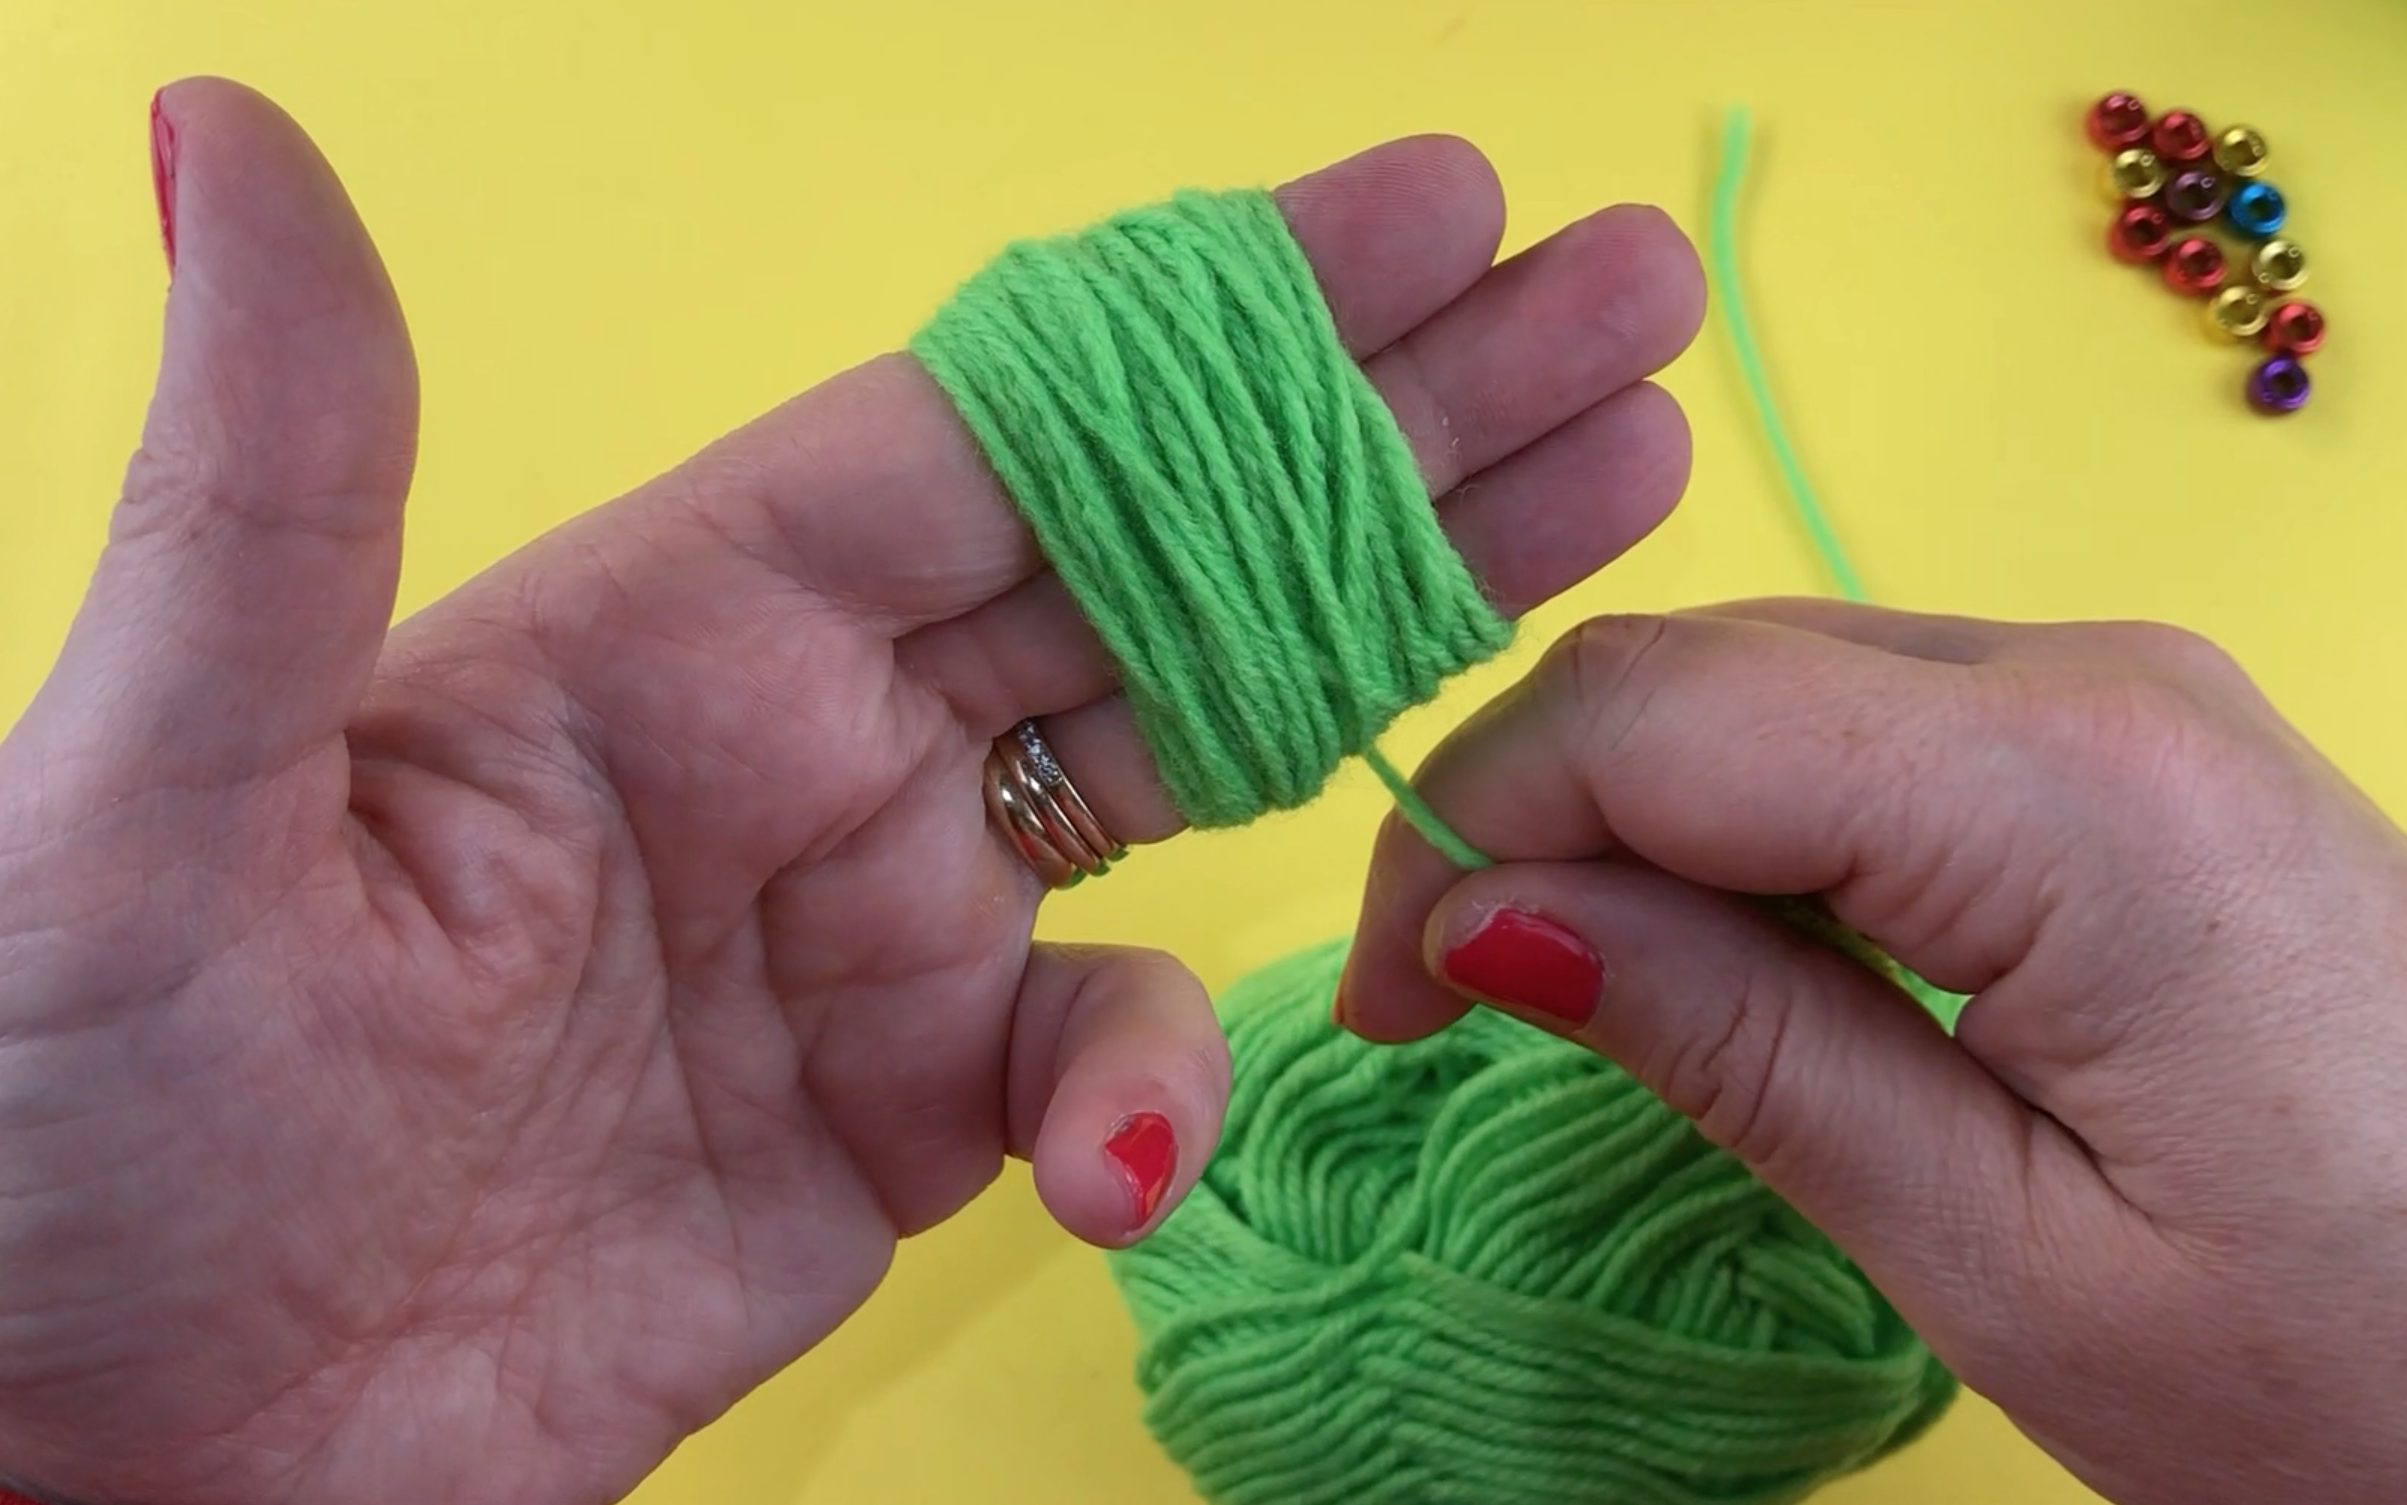
To get started, take 2 pencils and wrap the wool around the pencils and tie in a knot. Make sure the knot is tight as you want it stay tied up.
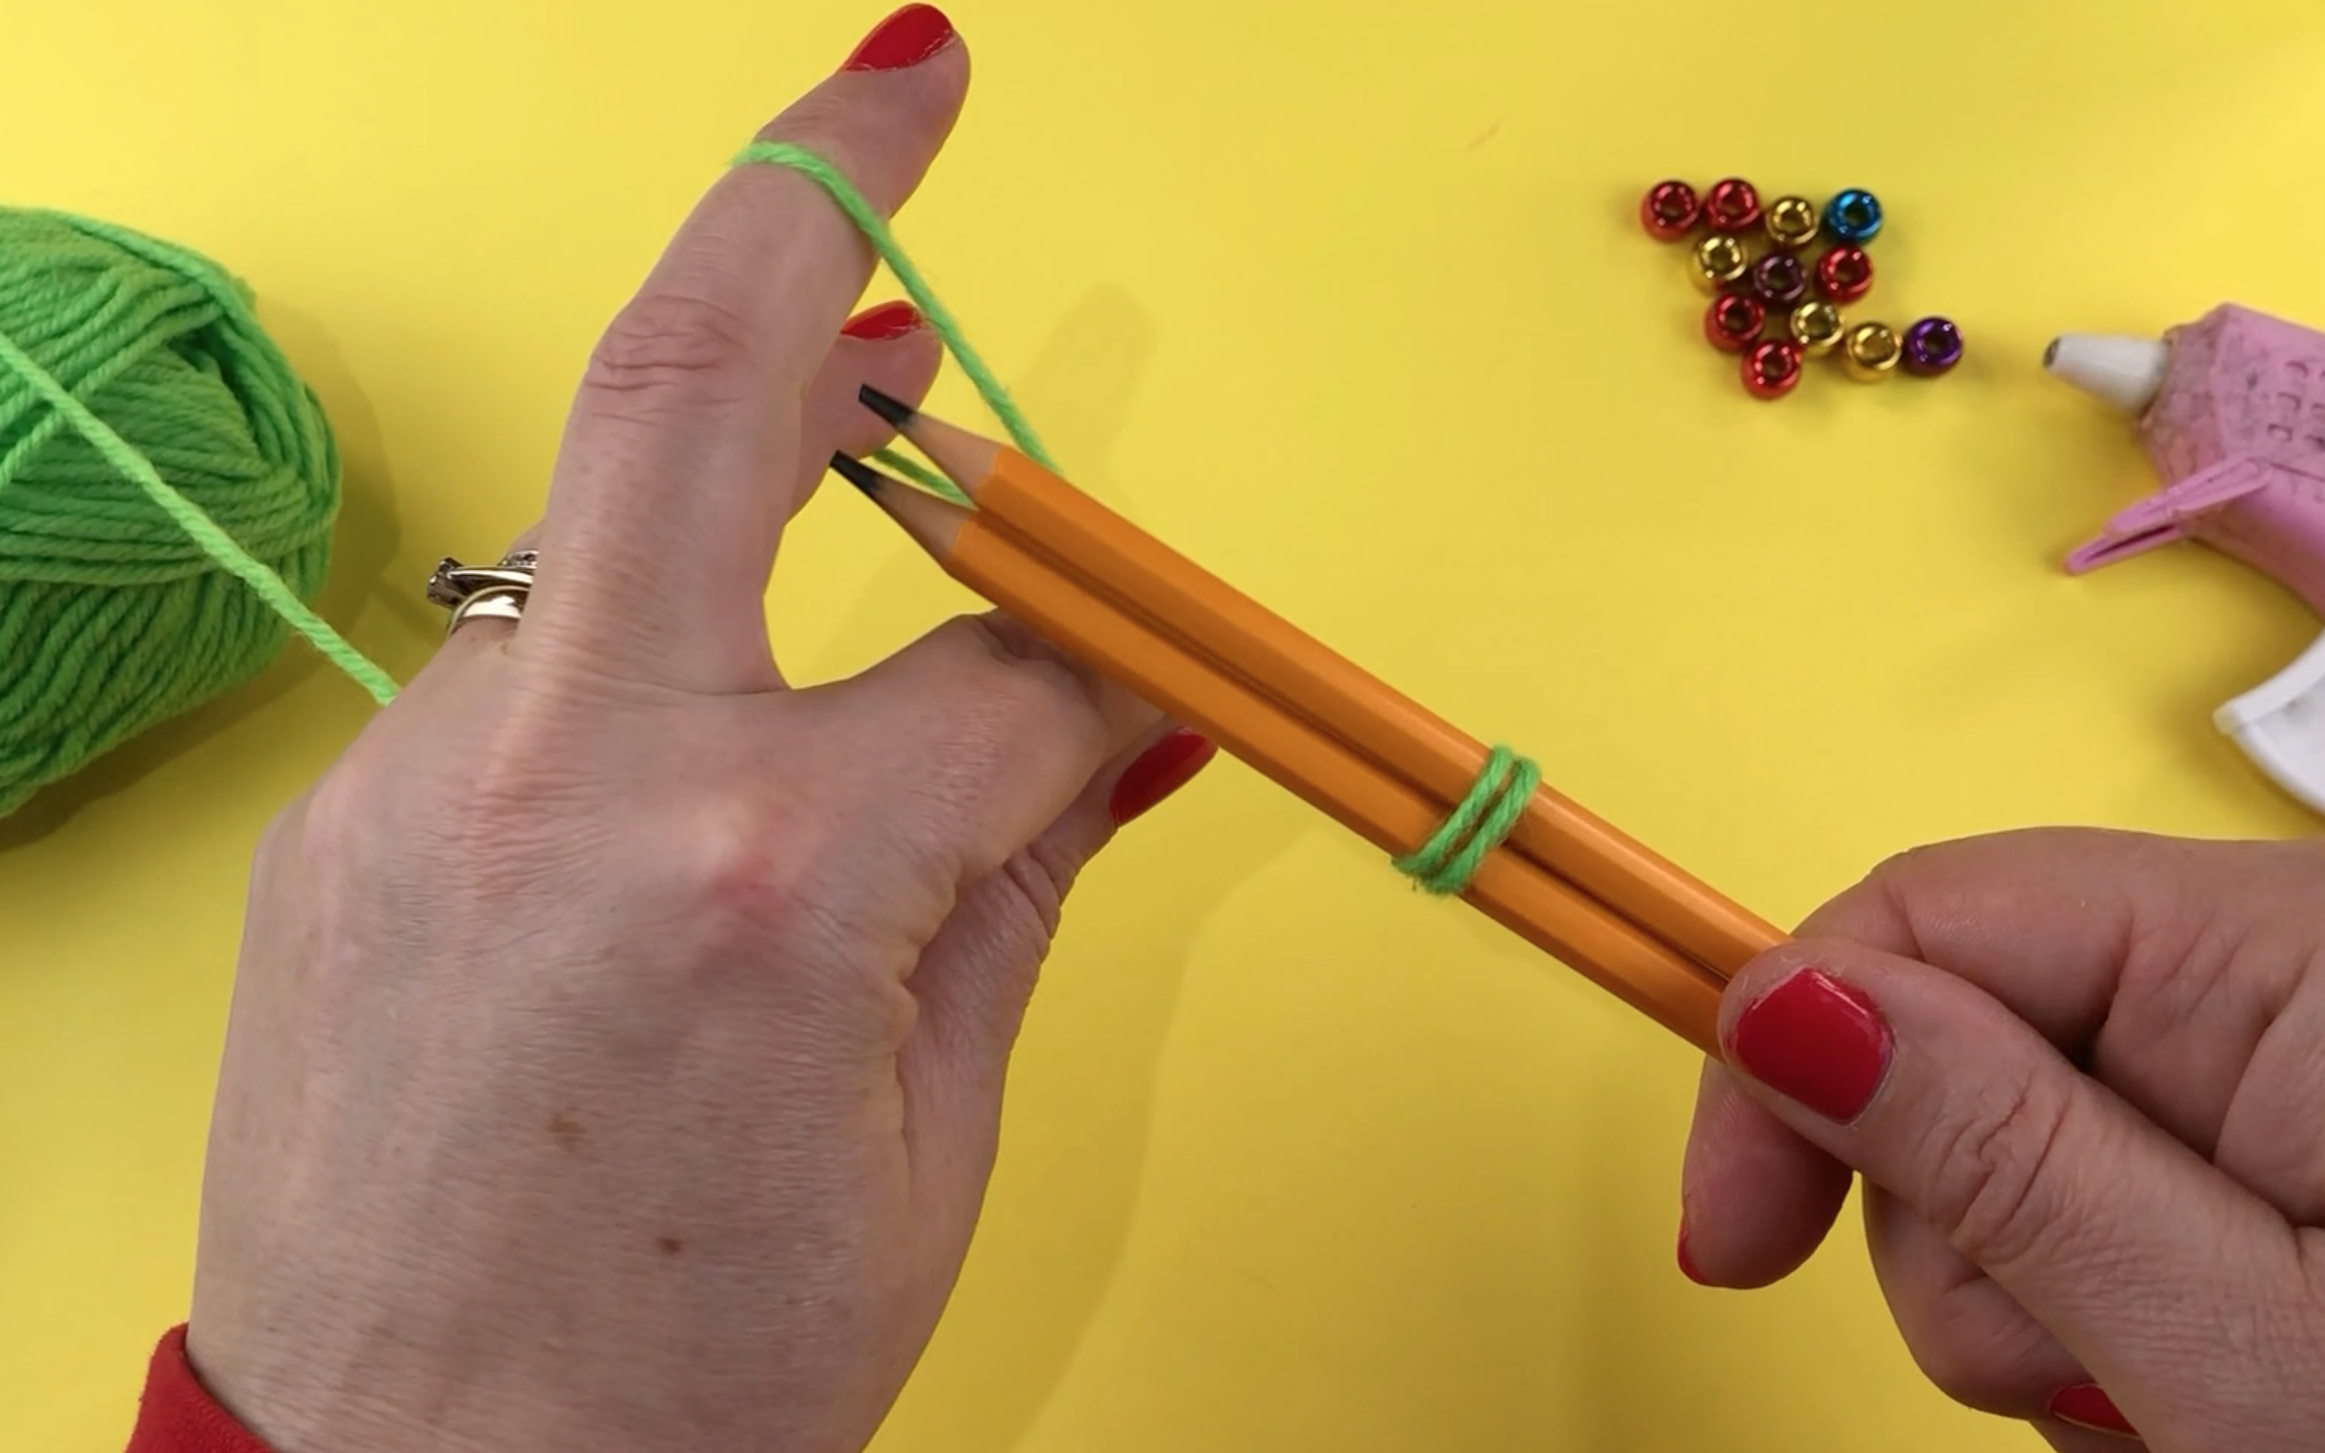
Step 2
Wrap the wool around the pencil and make a loop by wrapping the wool around your fingers.
Push the wool over the end of the pencils and pull the long end of the wool tight.
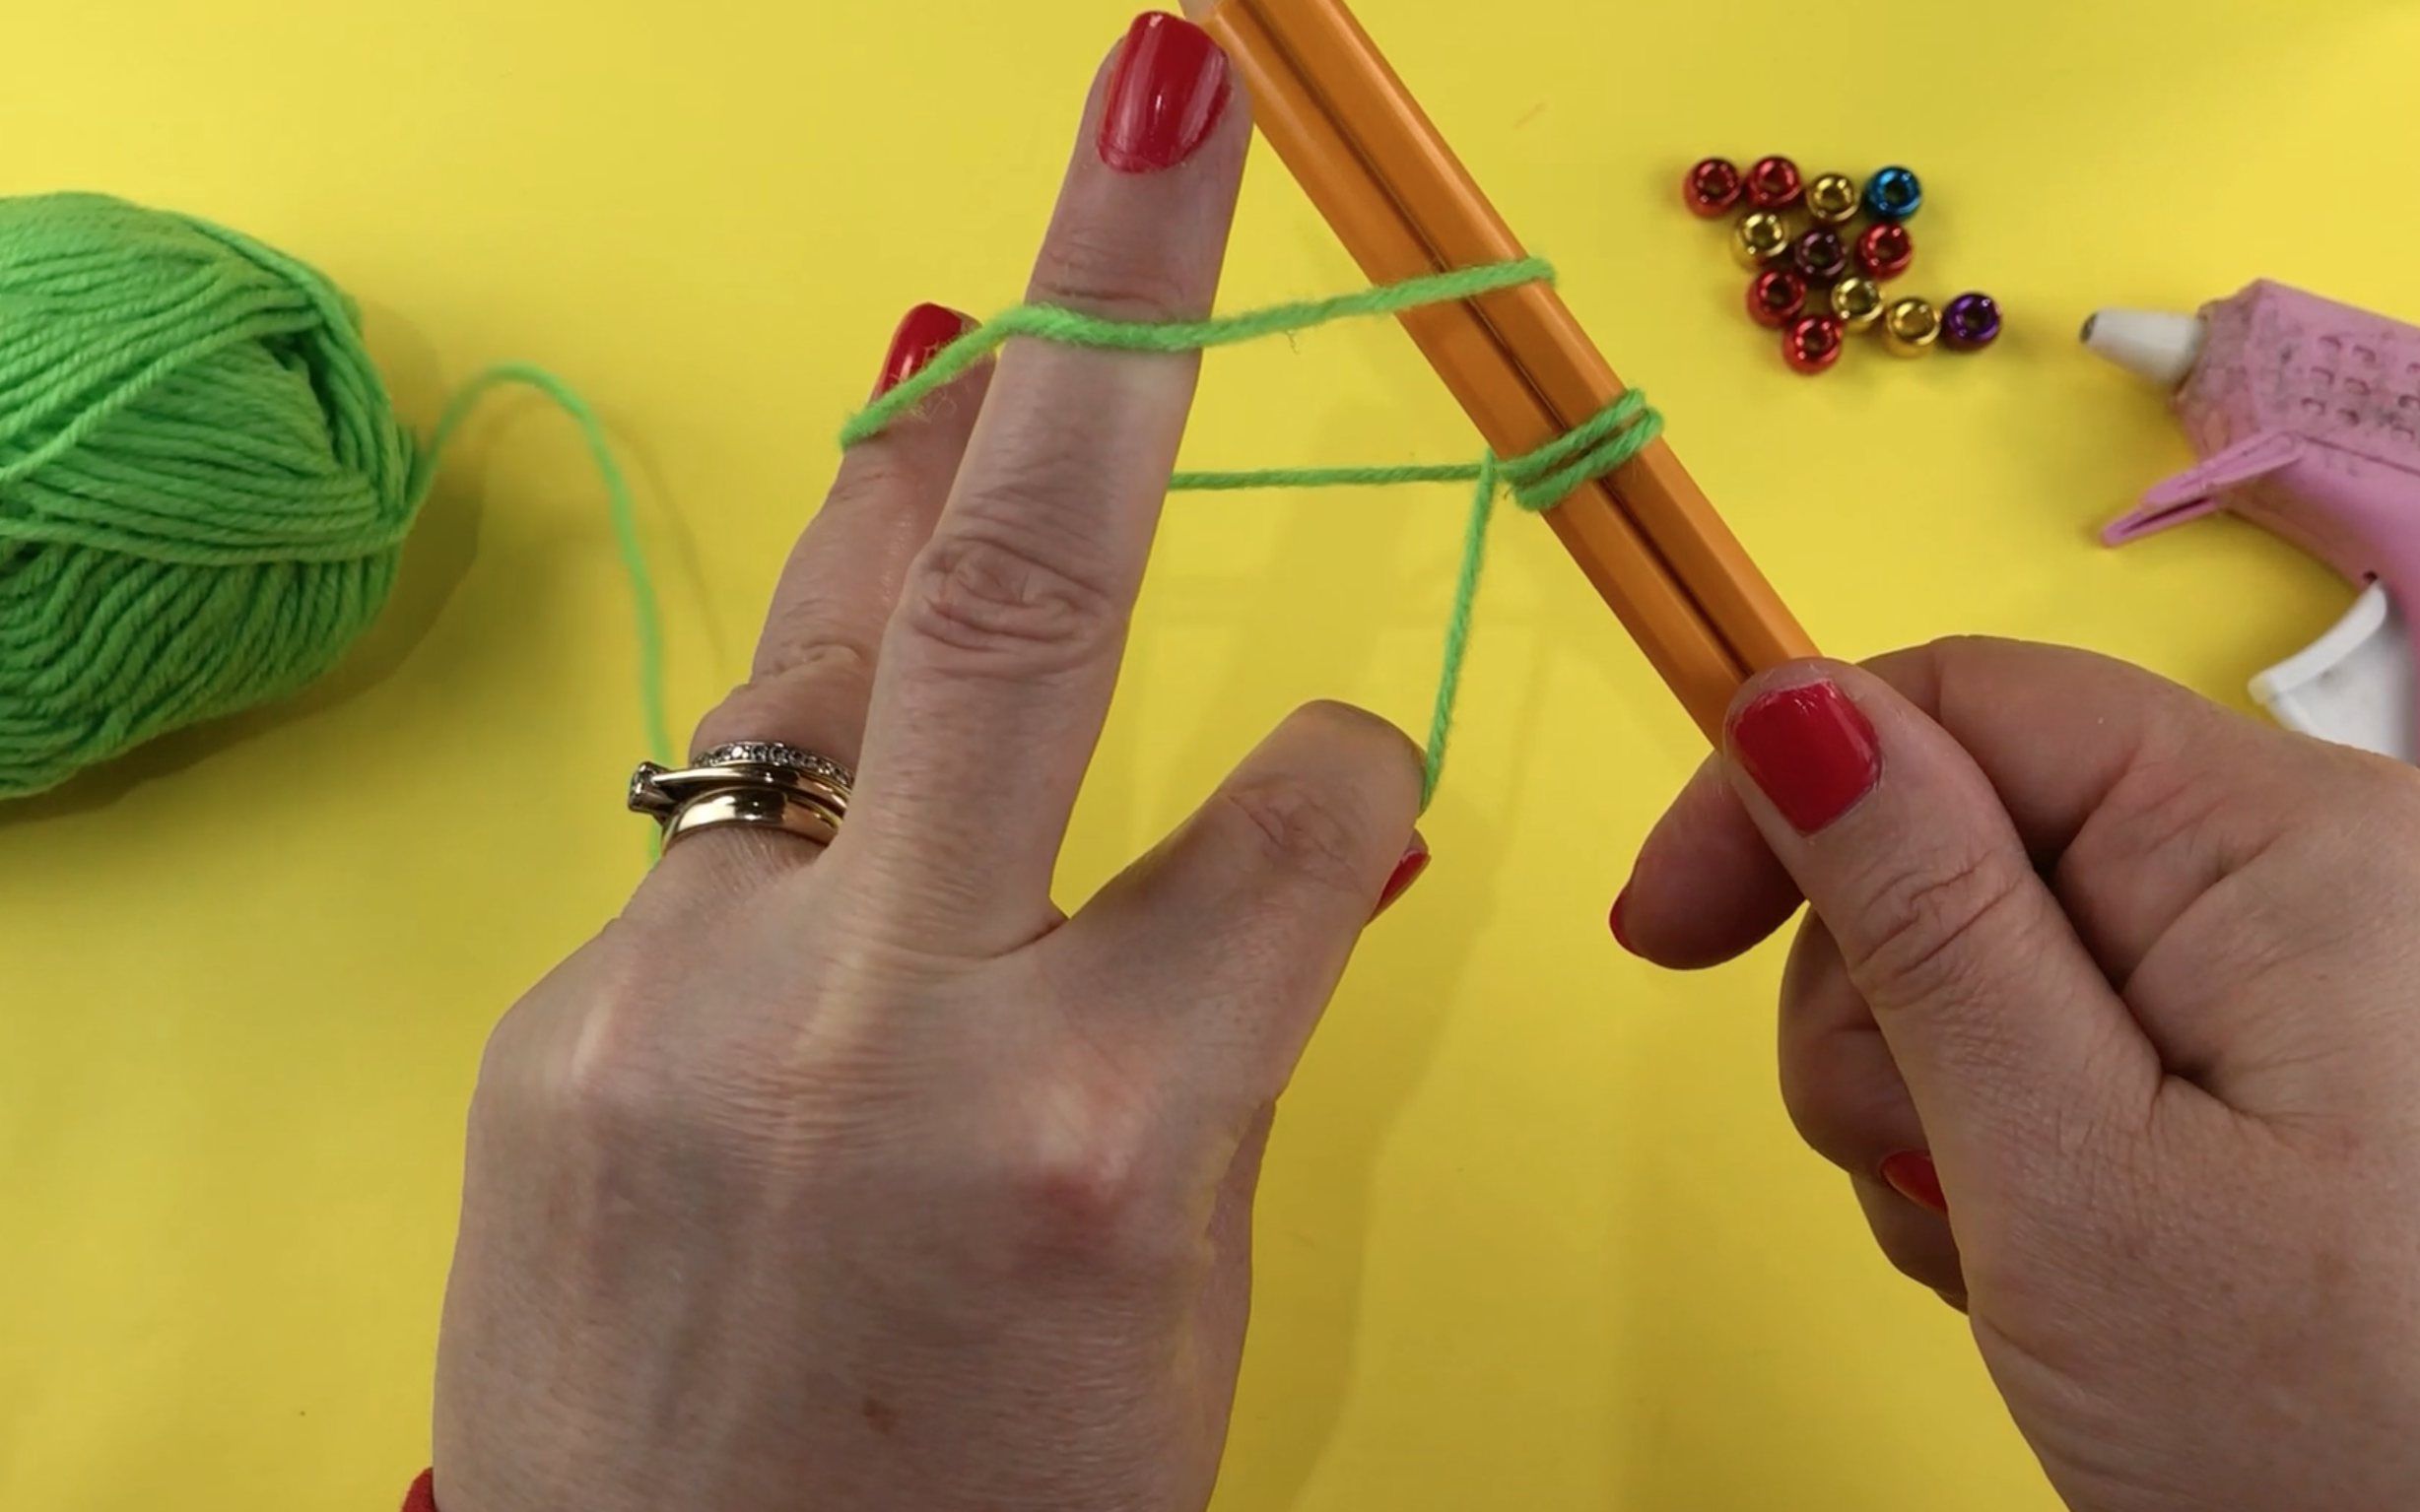
Once you have pulled the wool tight it should look like the picture below. This will now have made another loop of wool on the pencil.
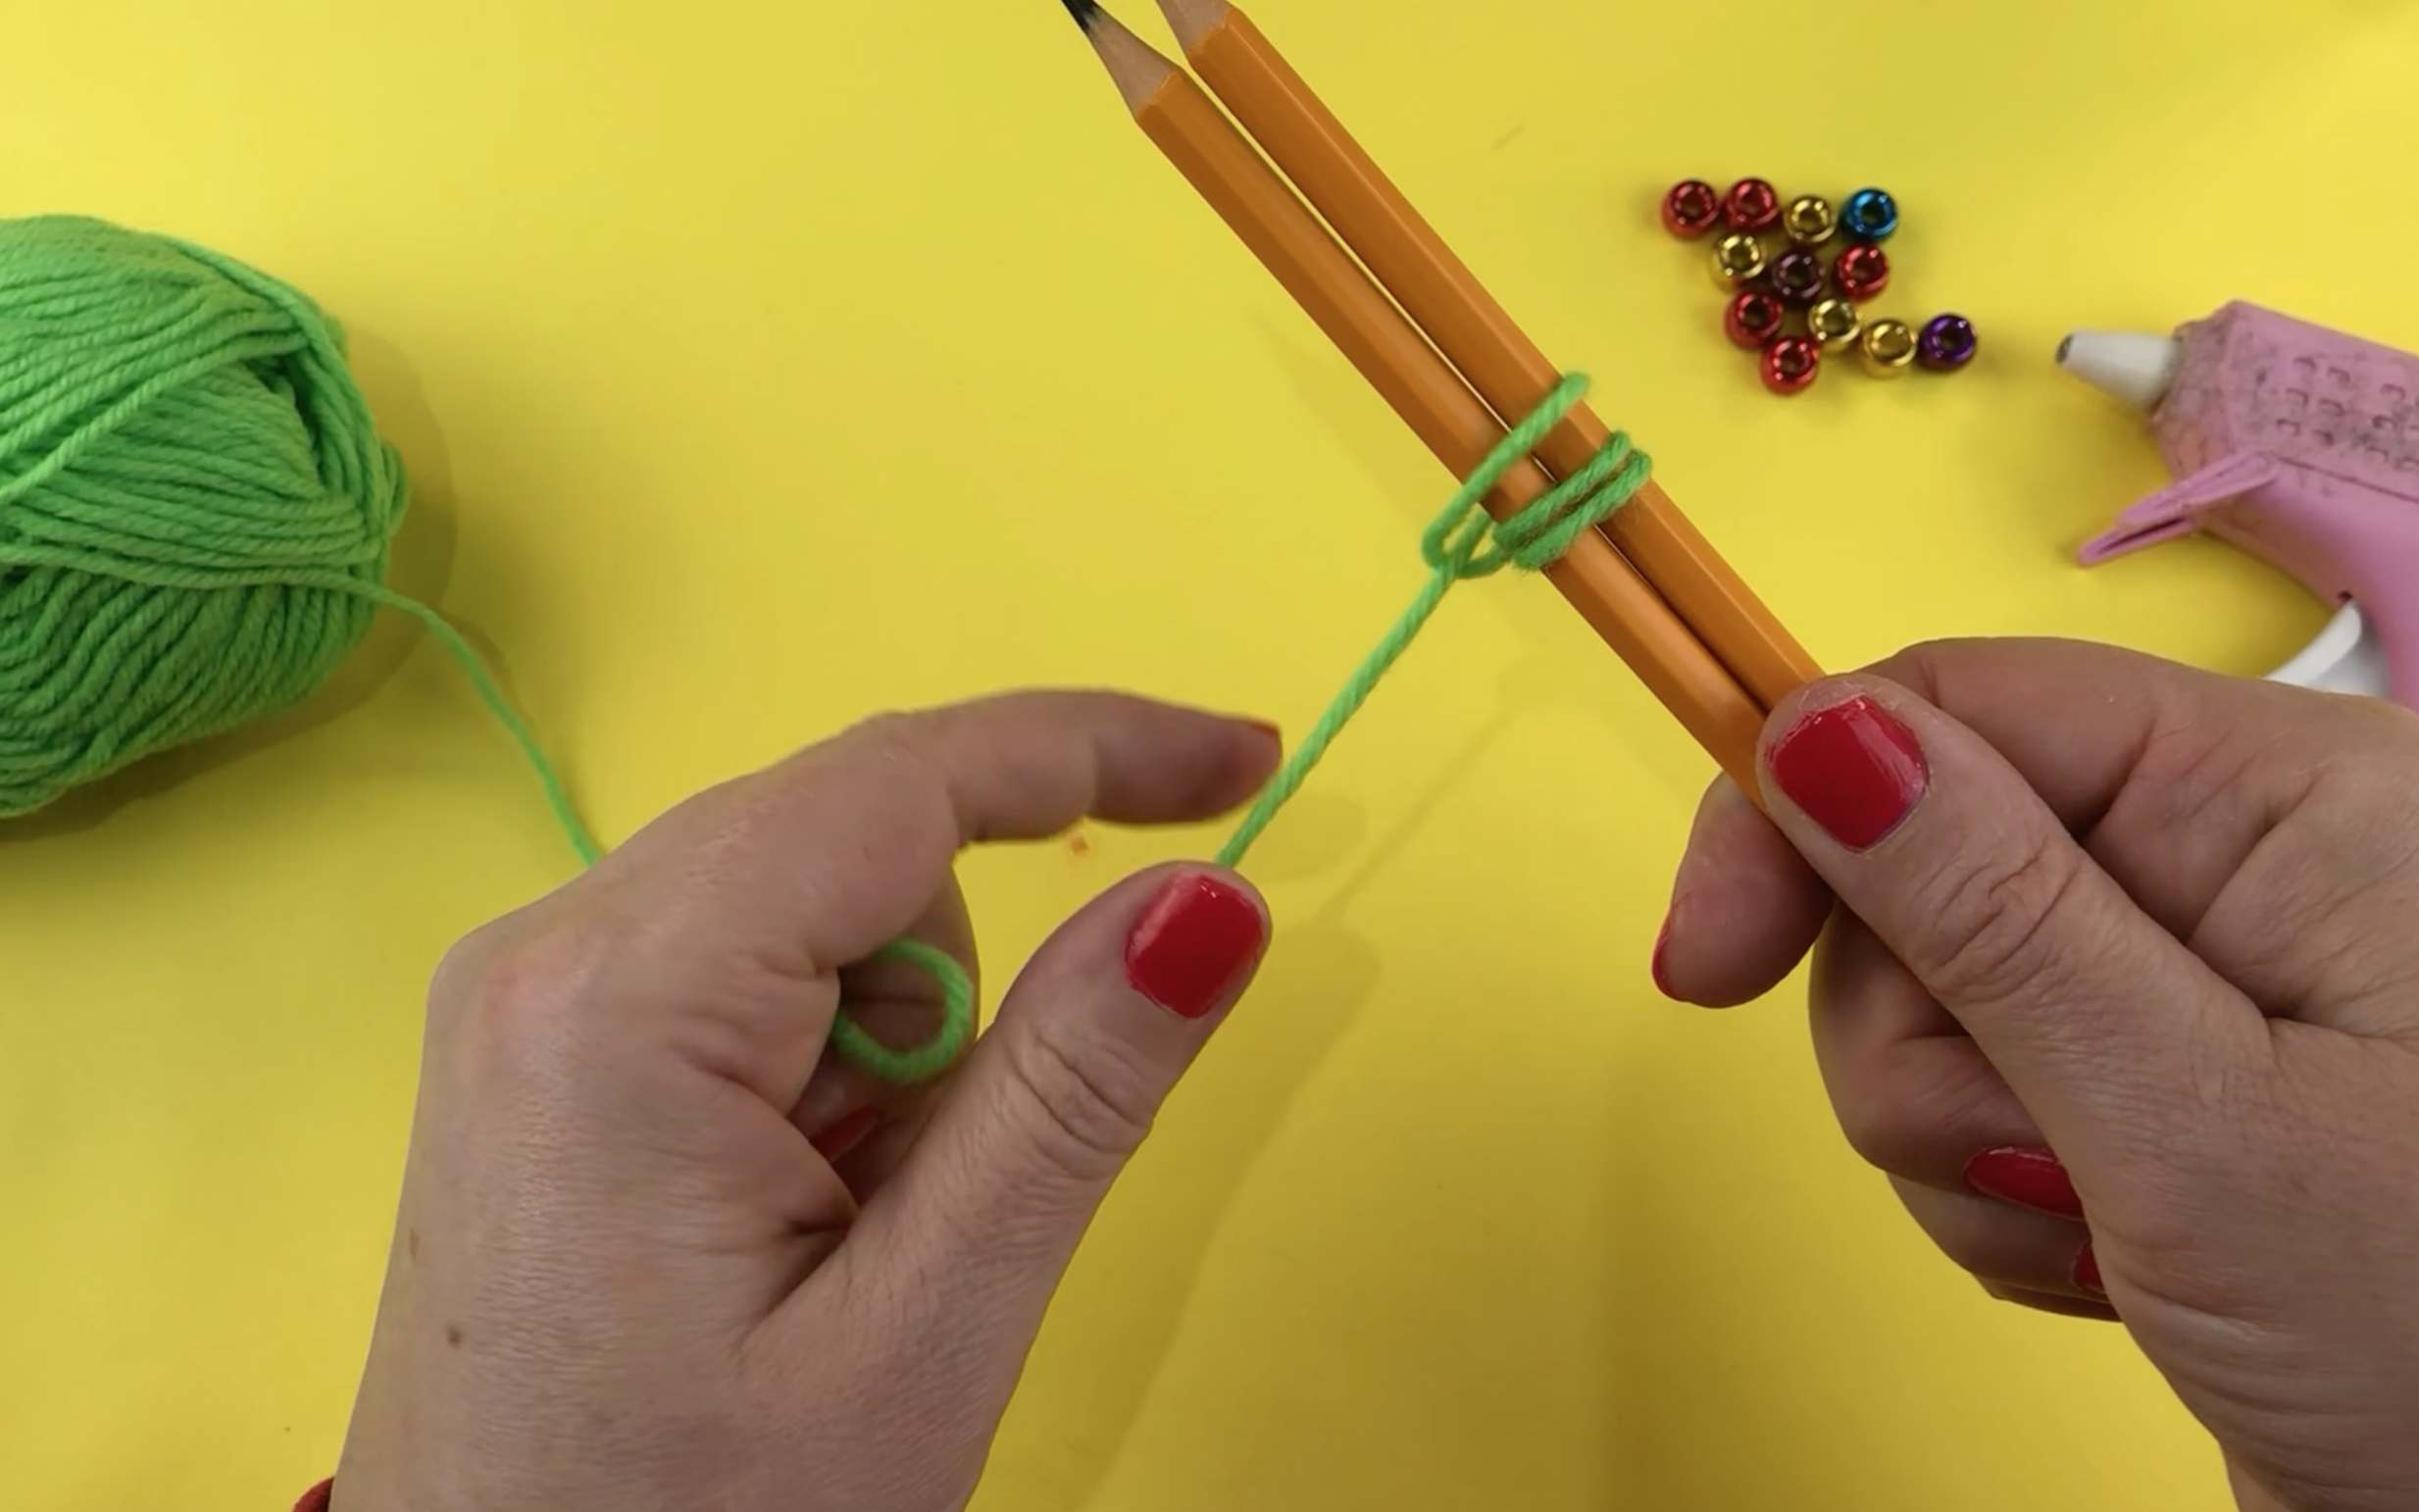
Continue to do this until you covered the whole of the pencil.
Step 3
Heat up the glue gun and add hot glue all the way down the underside of the wool. The underside of the wool will have the small twists of wool as apposed to the smooth wool on the other side.
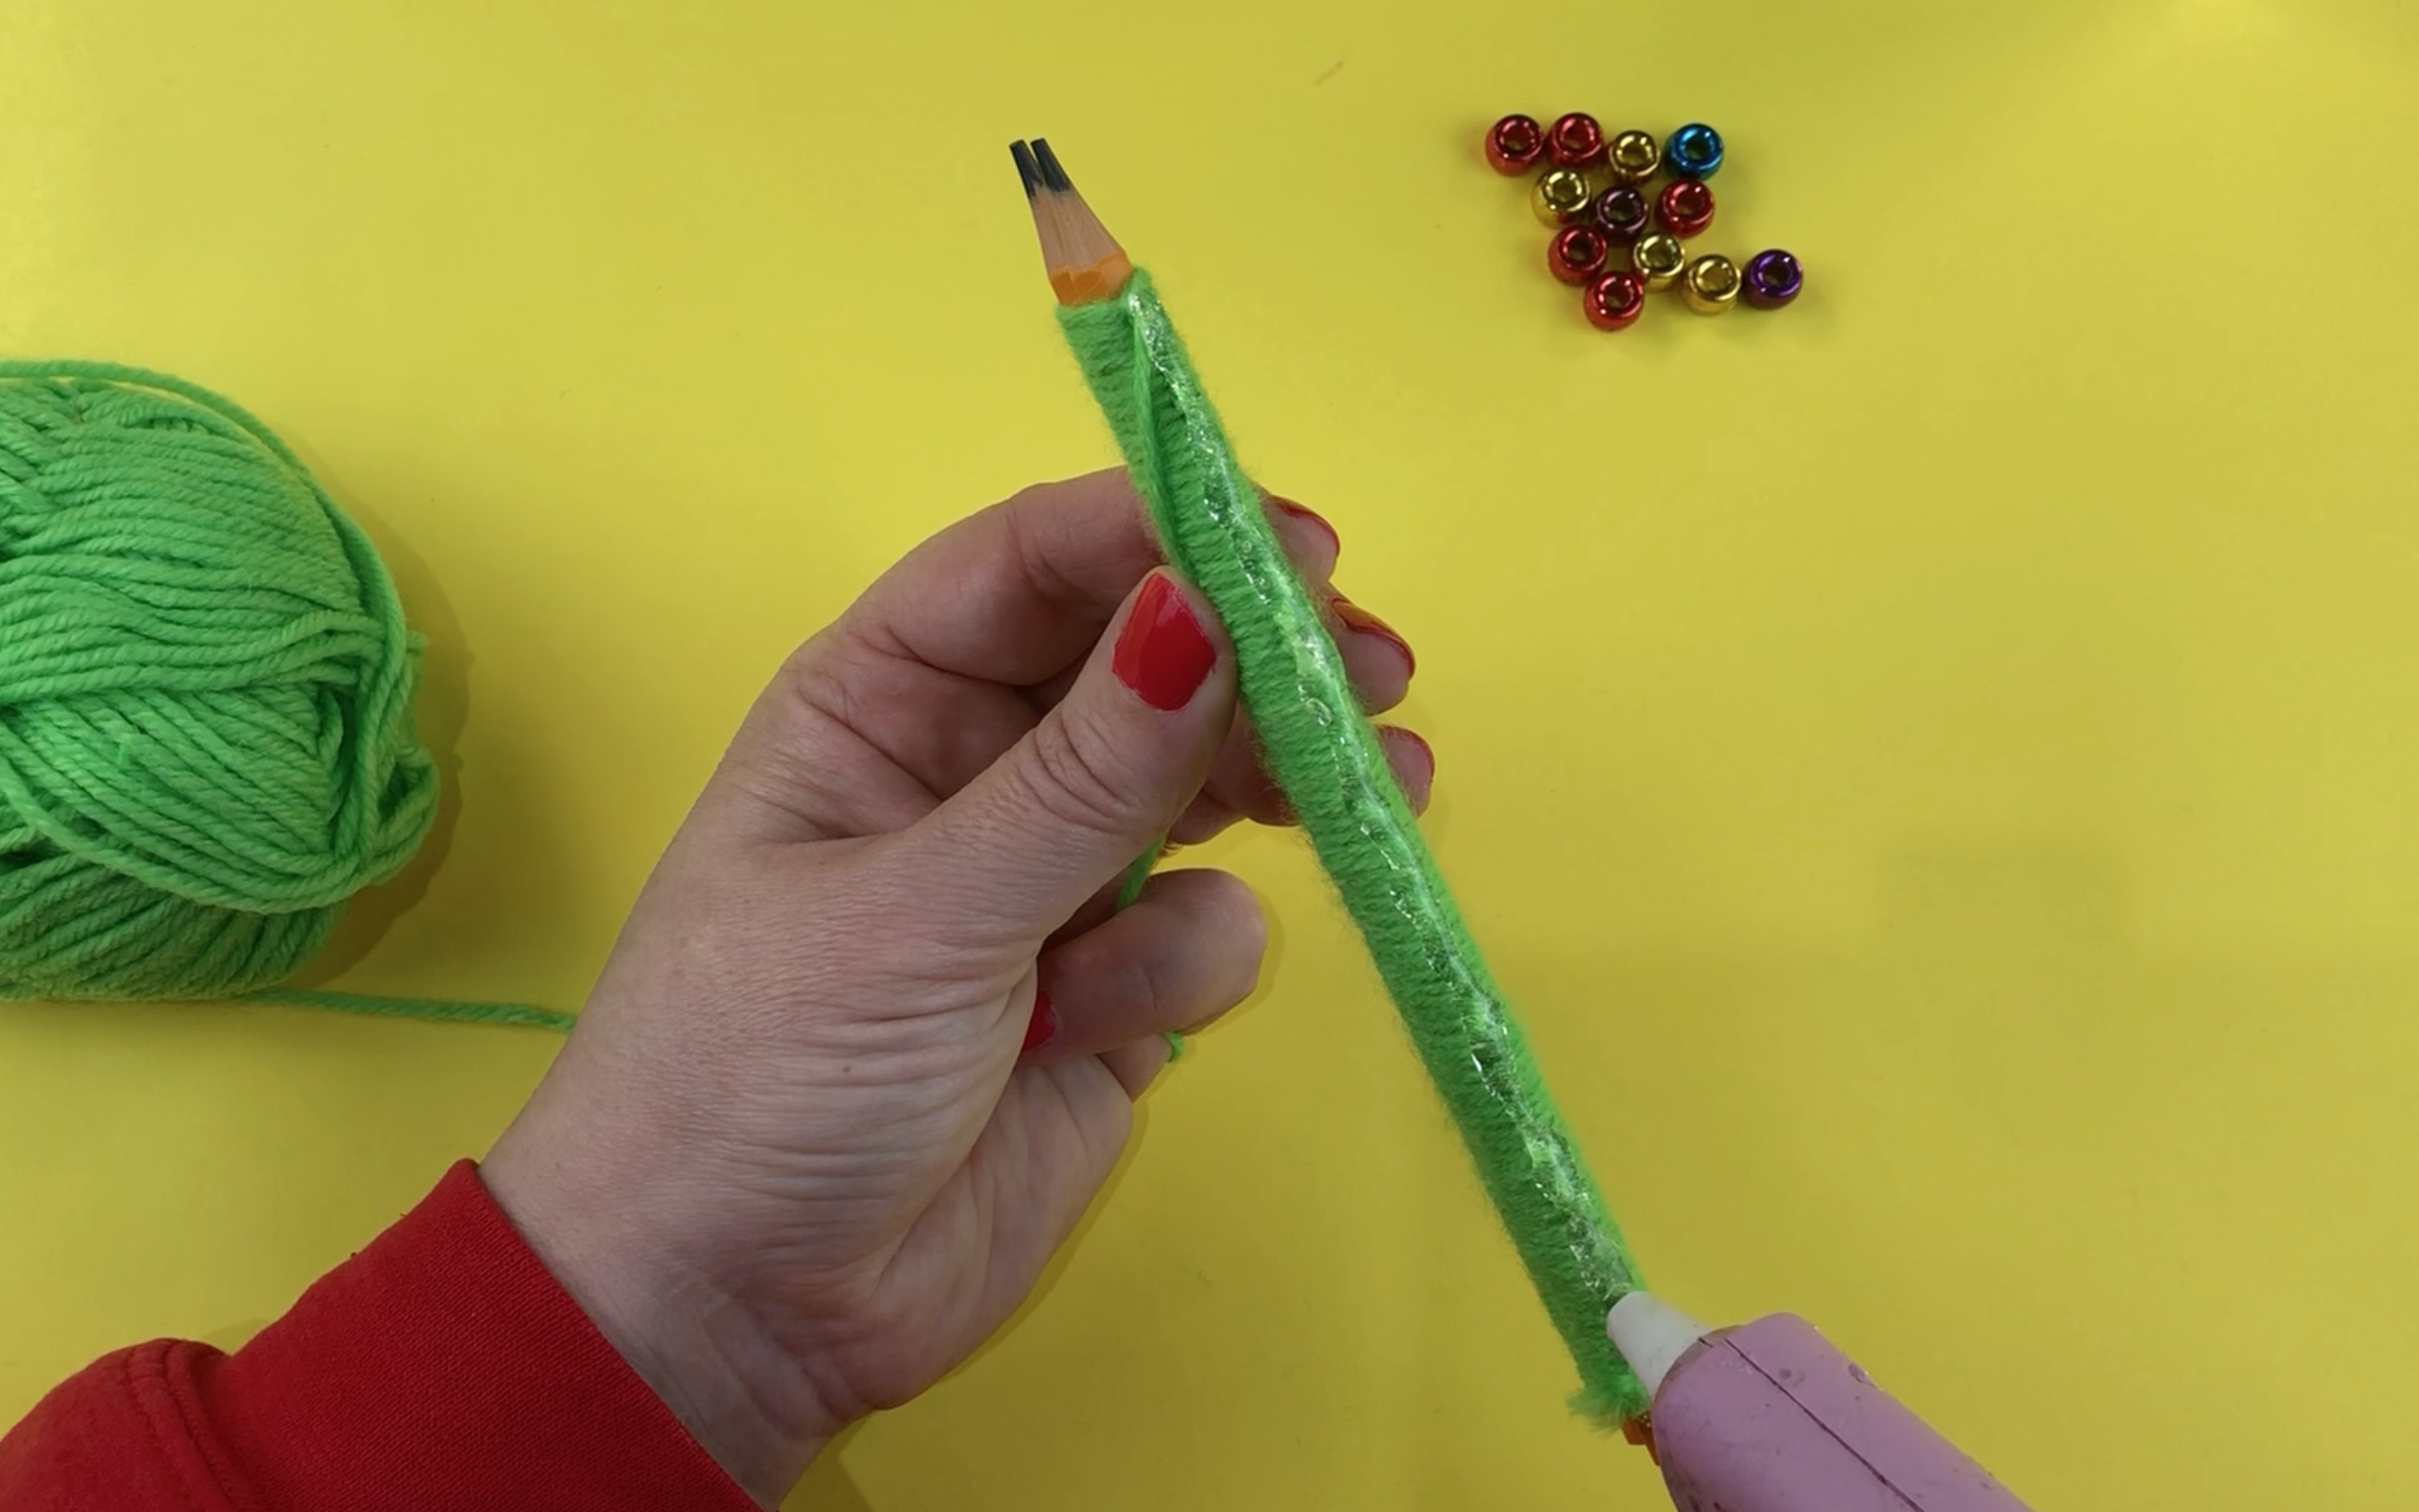
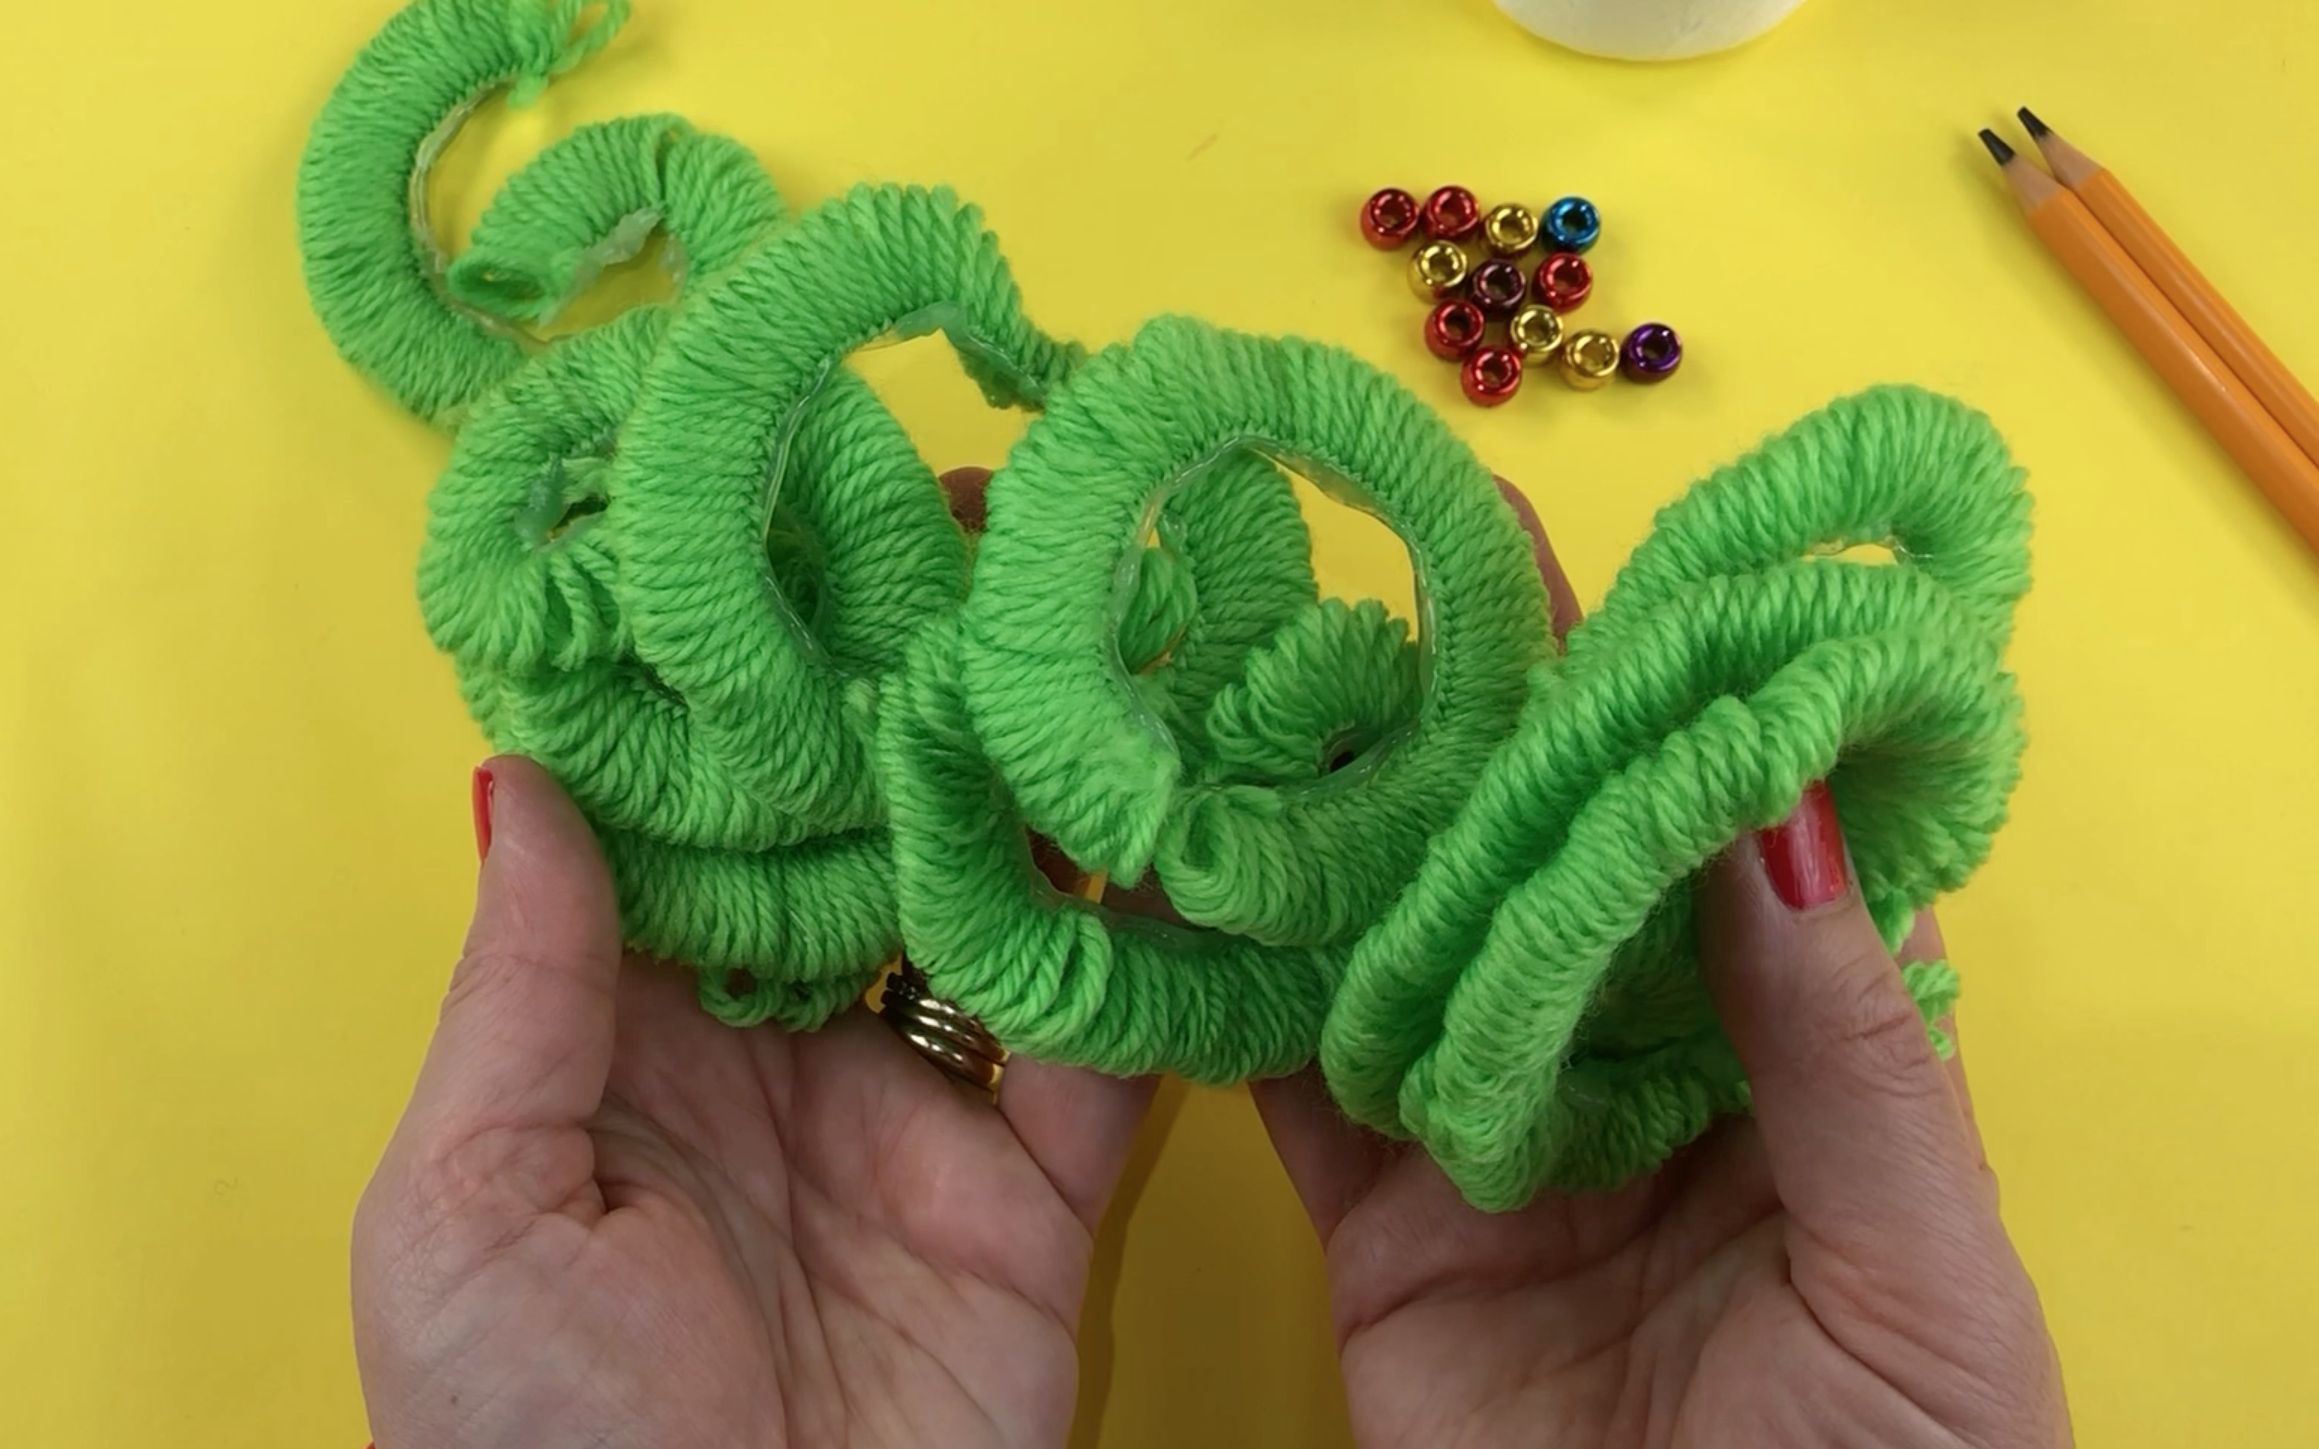
When you have glued the wool remove it from the pencil. The wool should easily slide off. When it has been removed it may curl up like the wool in the picture below but that is quite normal.
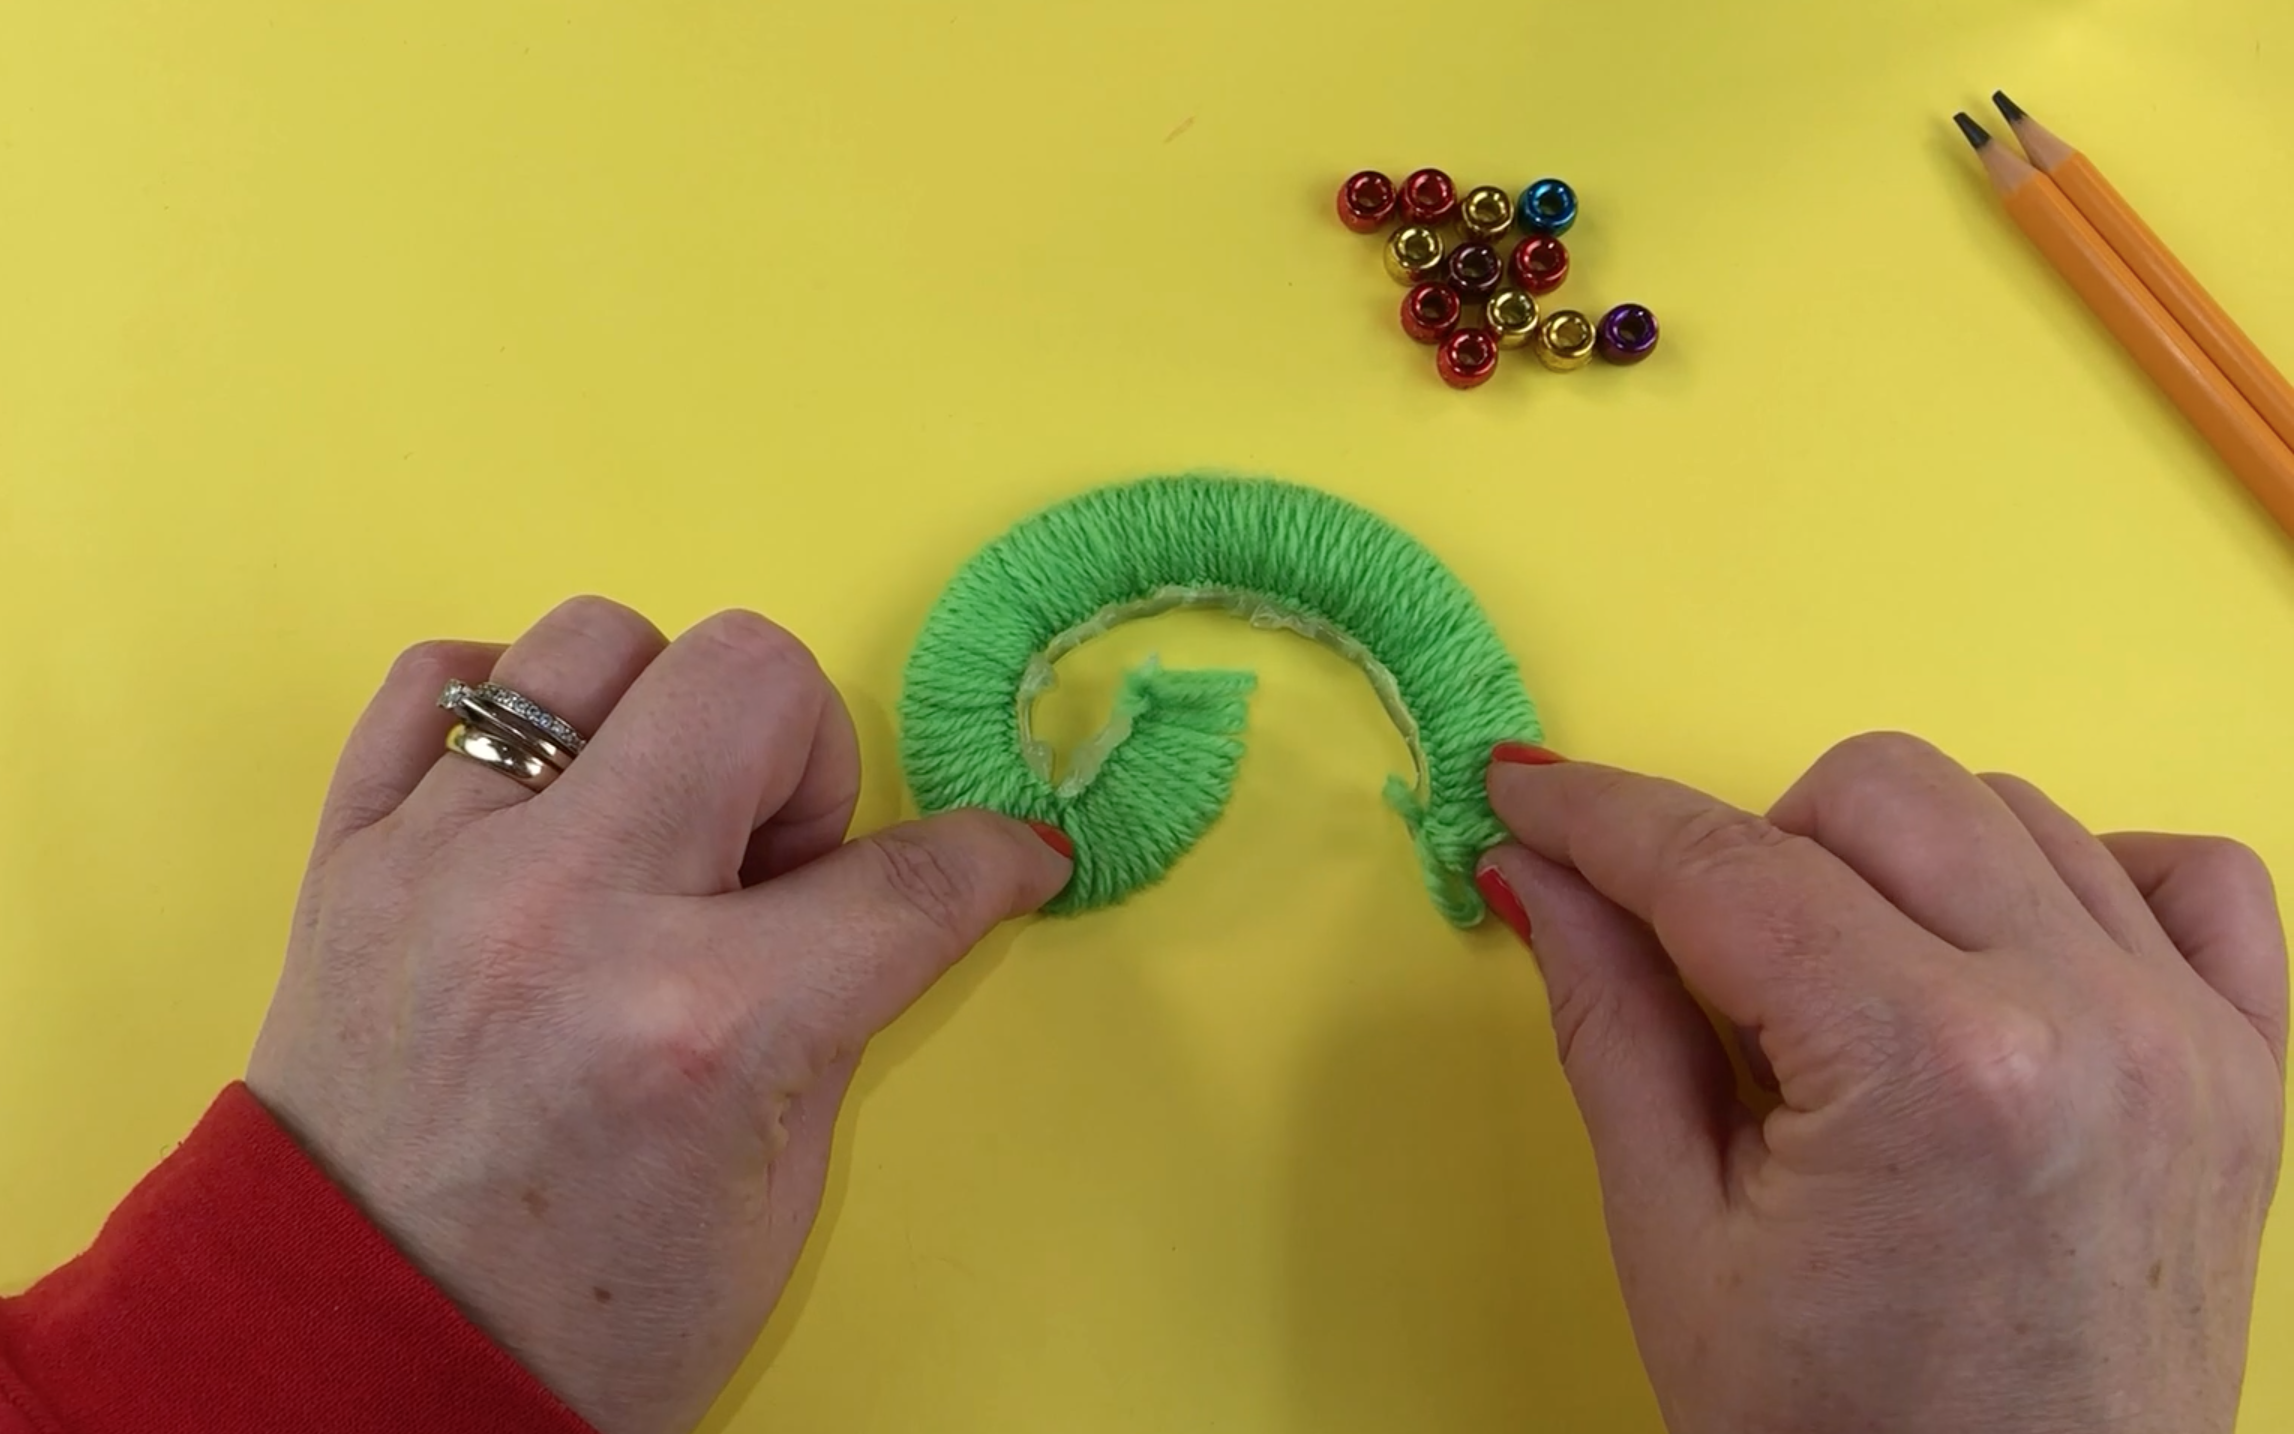
Repeat this process approximately 9 times. This should give you enough wool curls to cover the cone. If you have a larger or smaller cone, simply make less or more wool curls.
Step 4
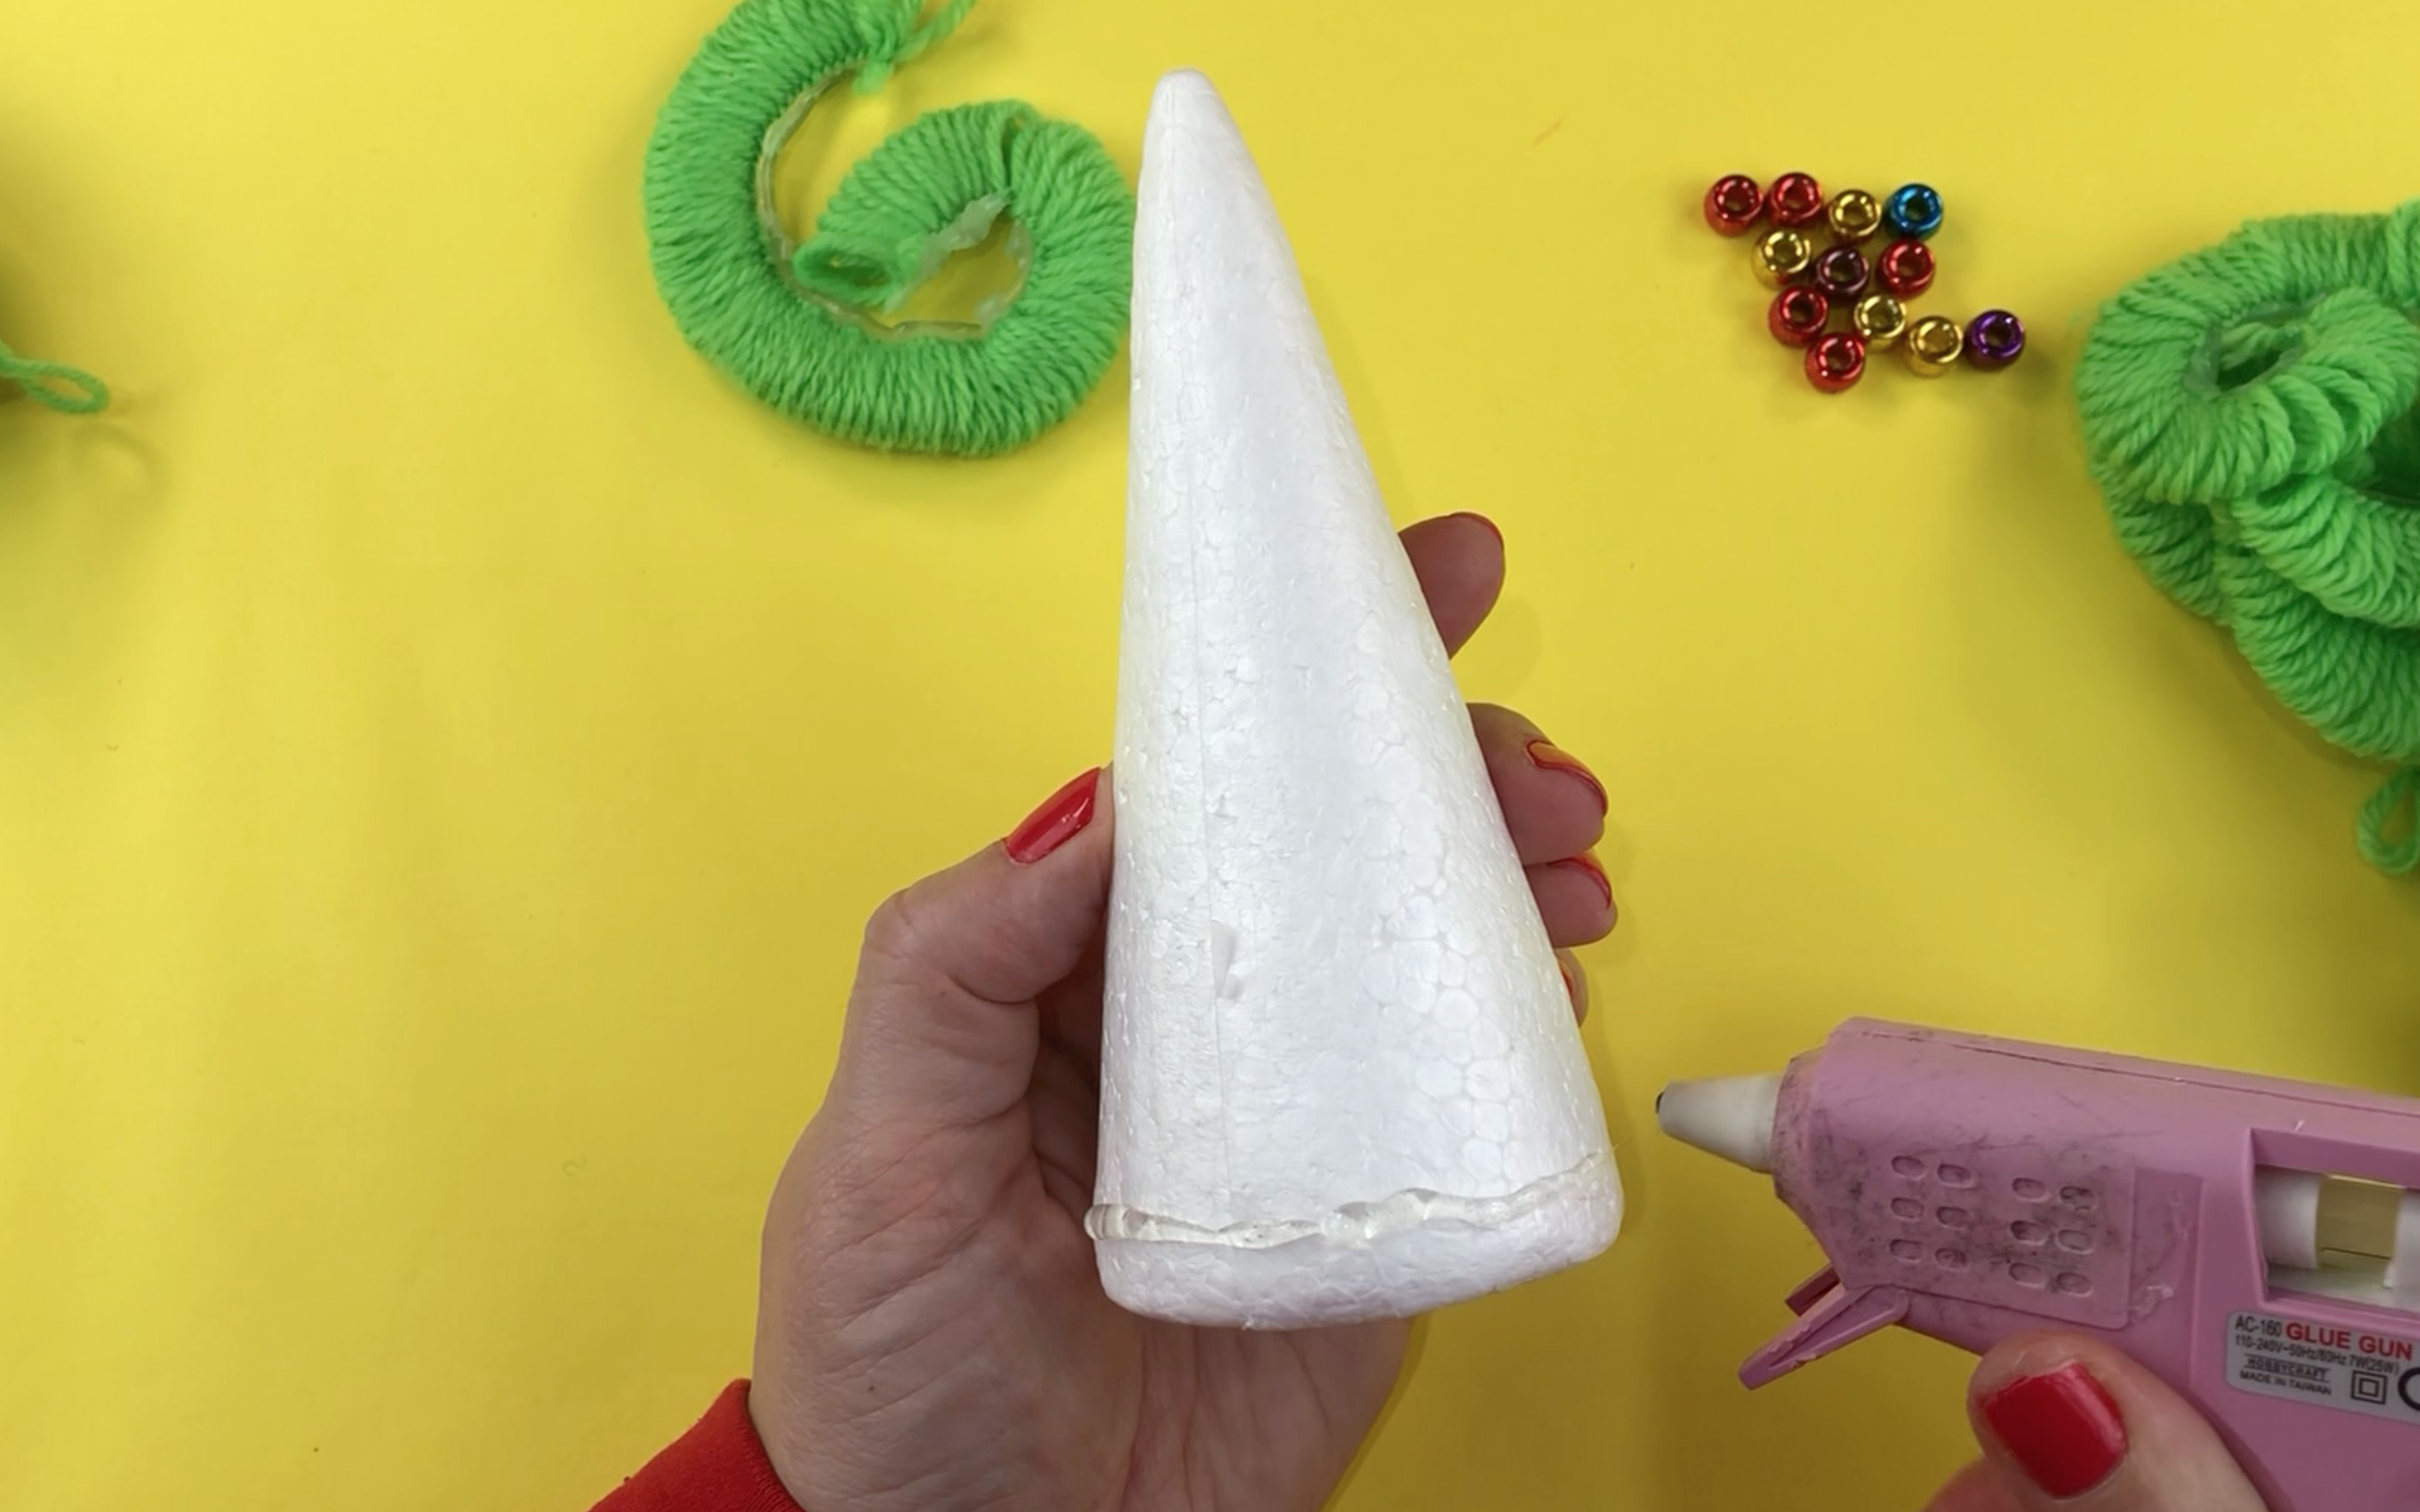
Now we need to add the wool to the cone. Heat up the hot glue gun and add the glue to the bottom of the cone.
Whilst the glue is hot add the wool. straighten out the wool and press it firmly into the glue.
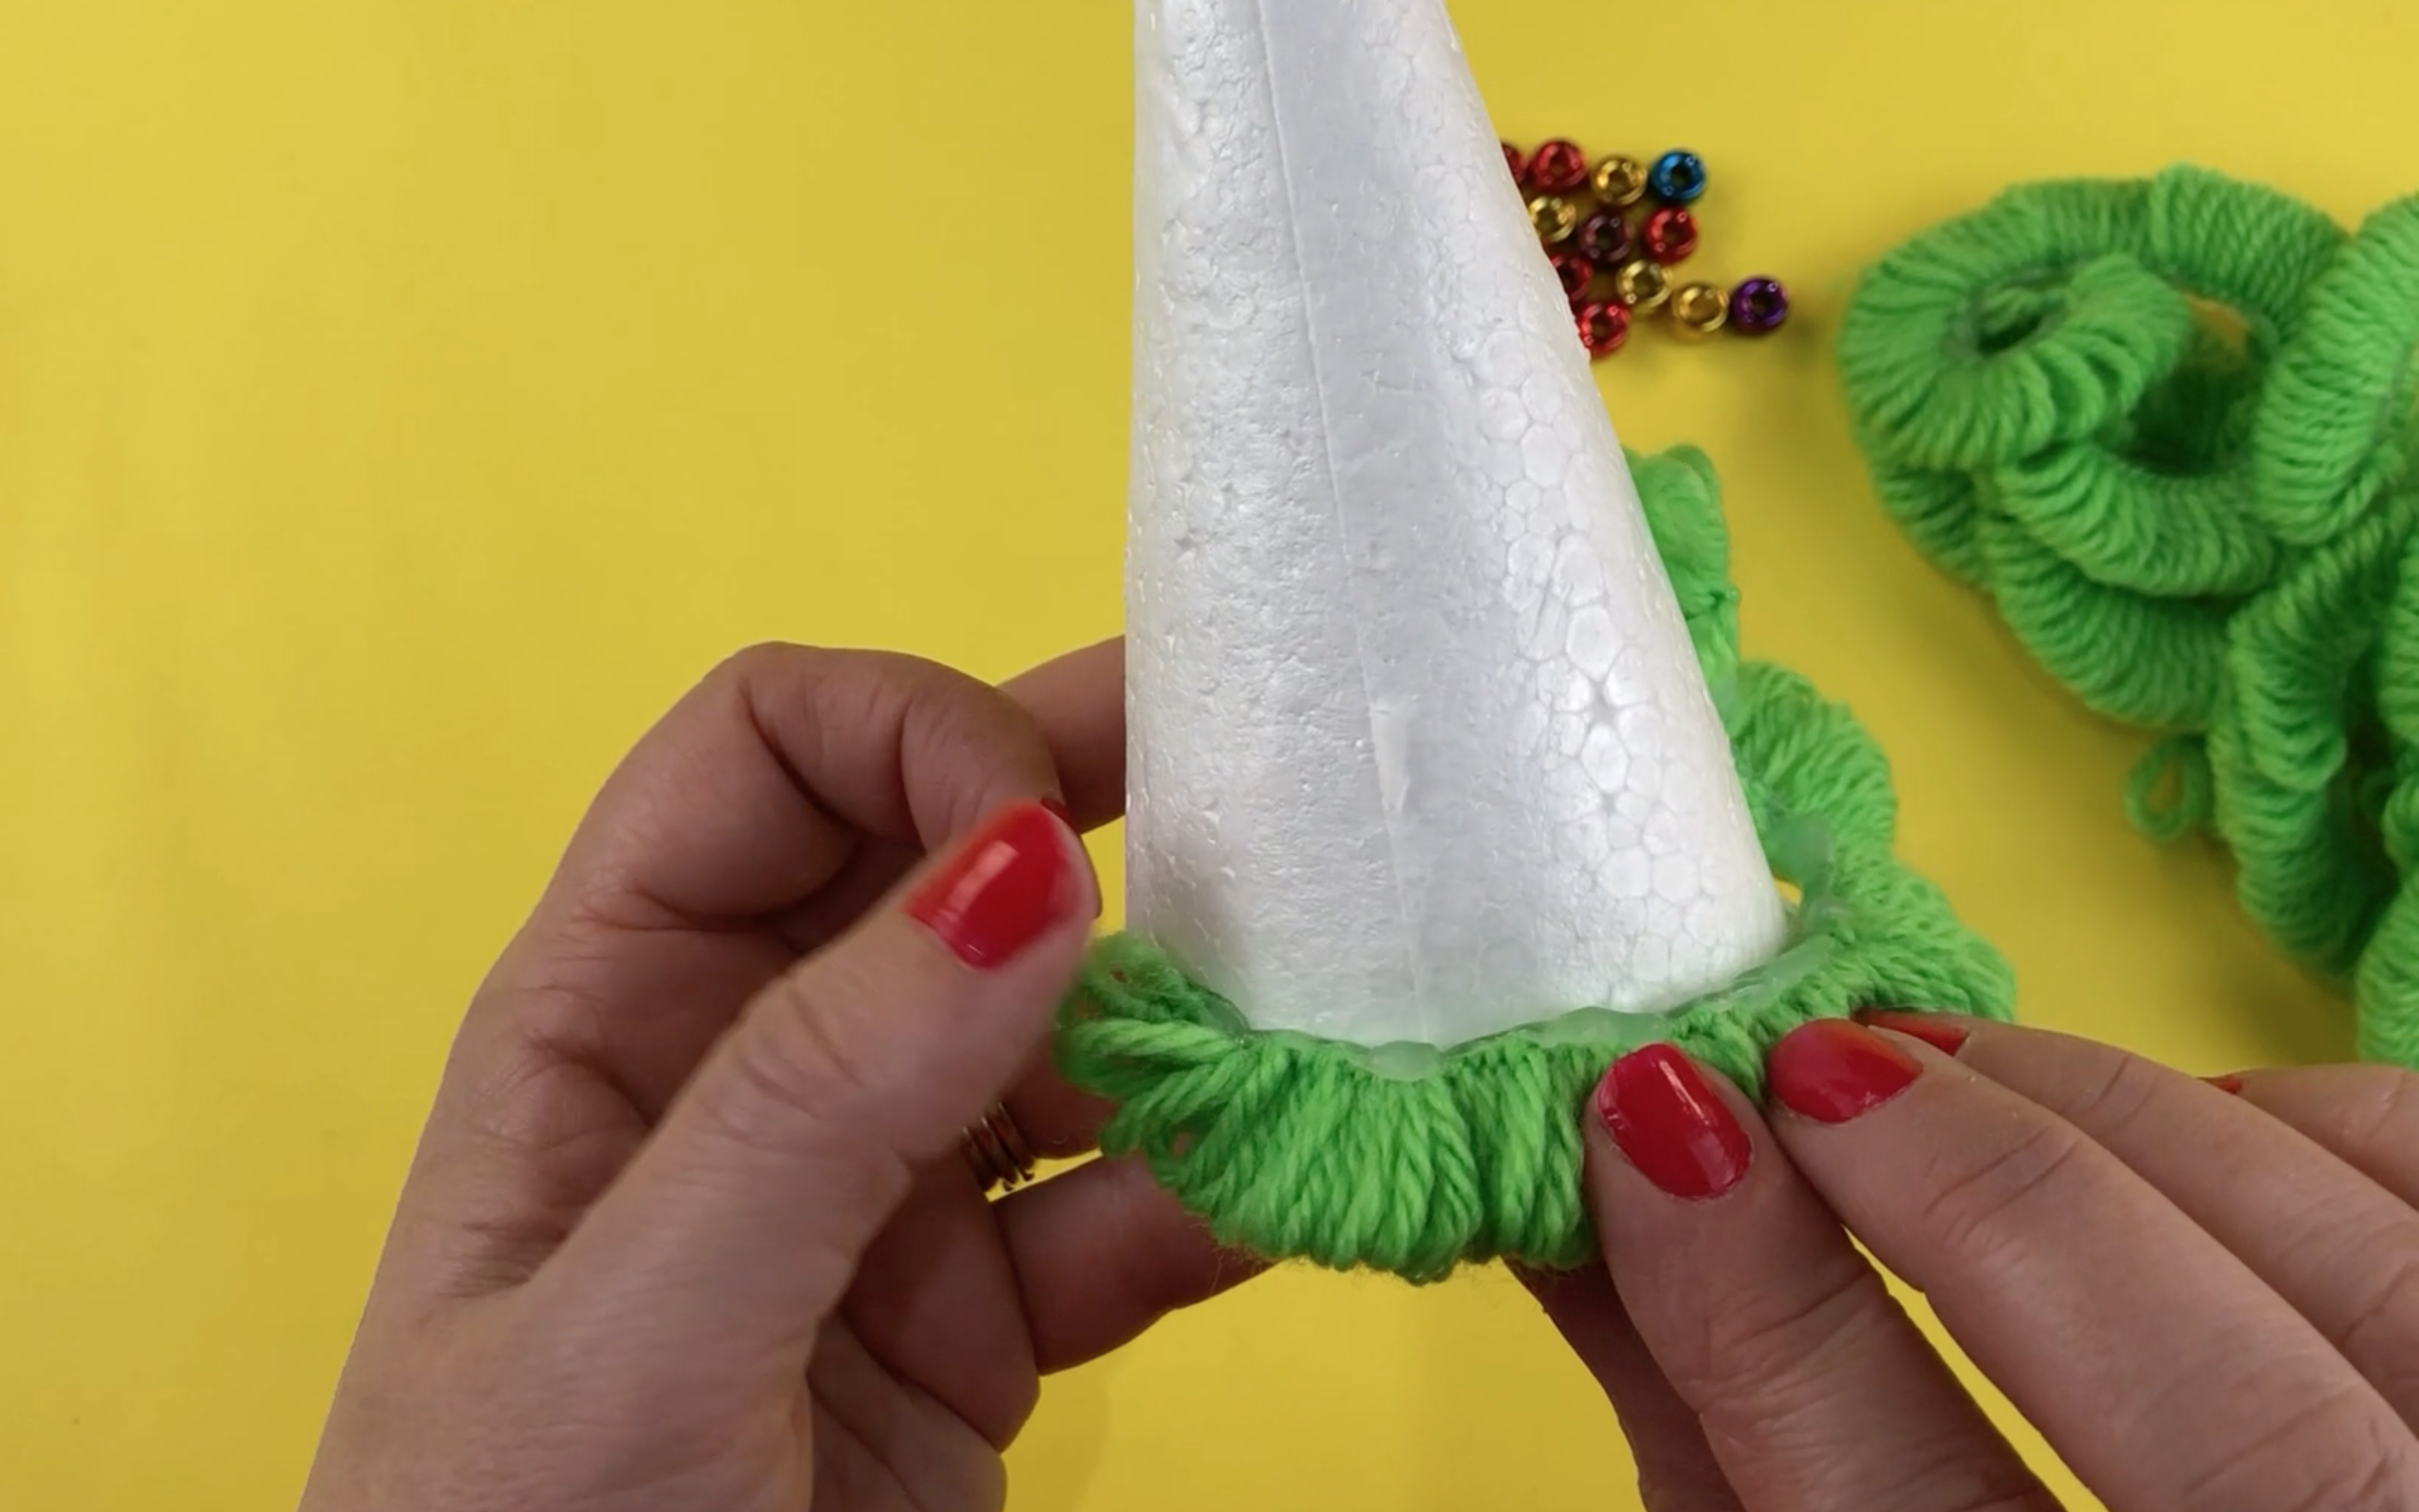
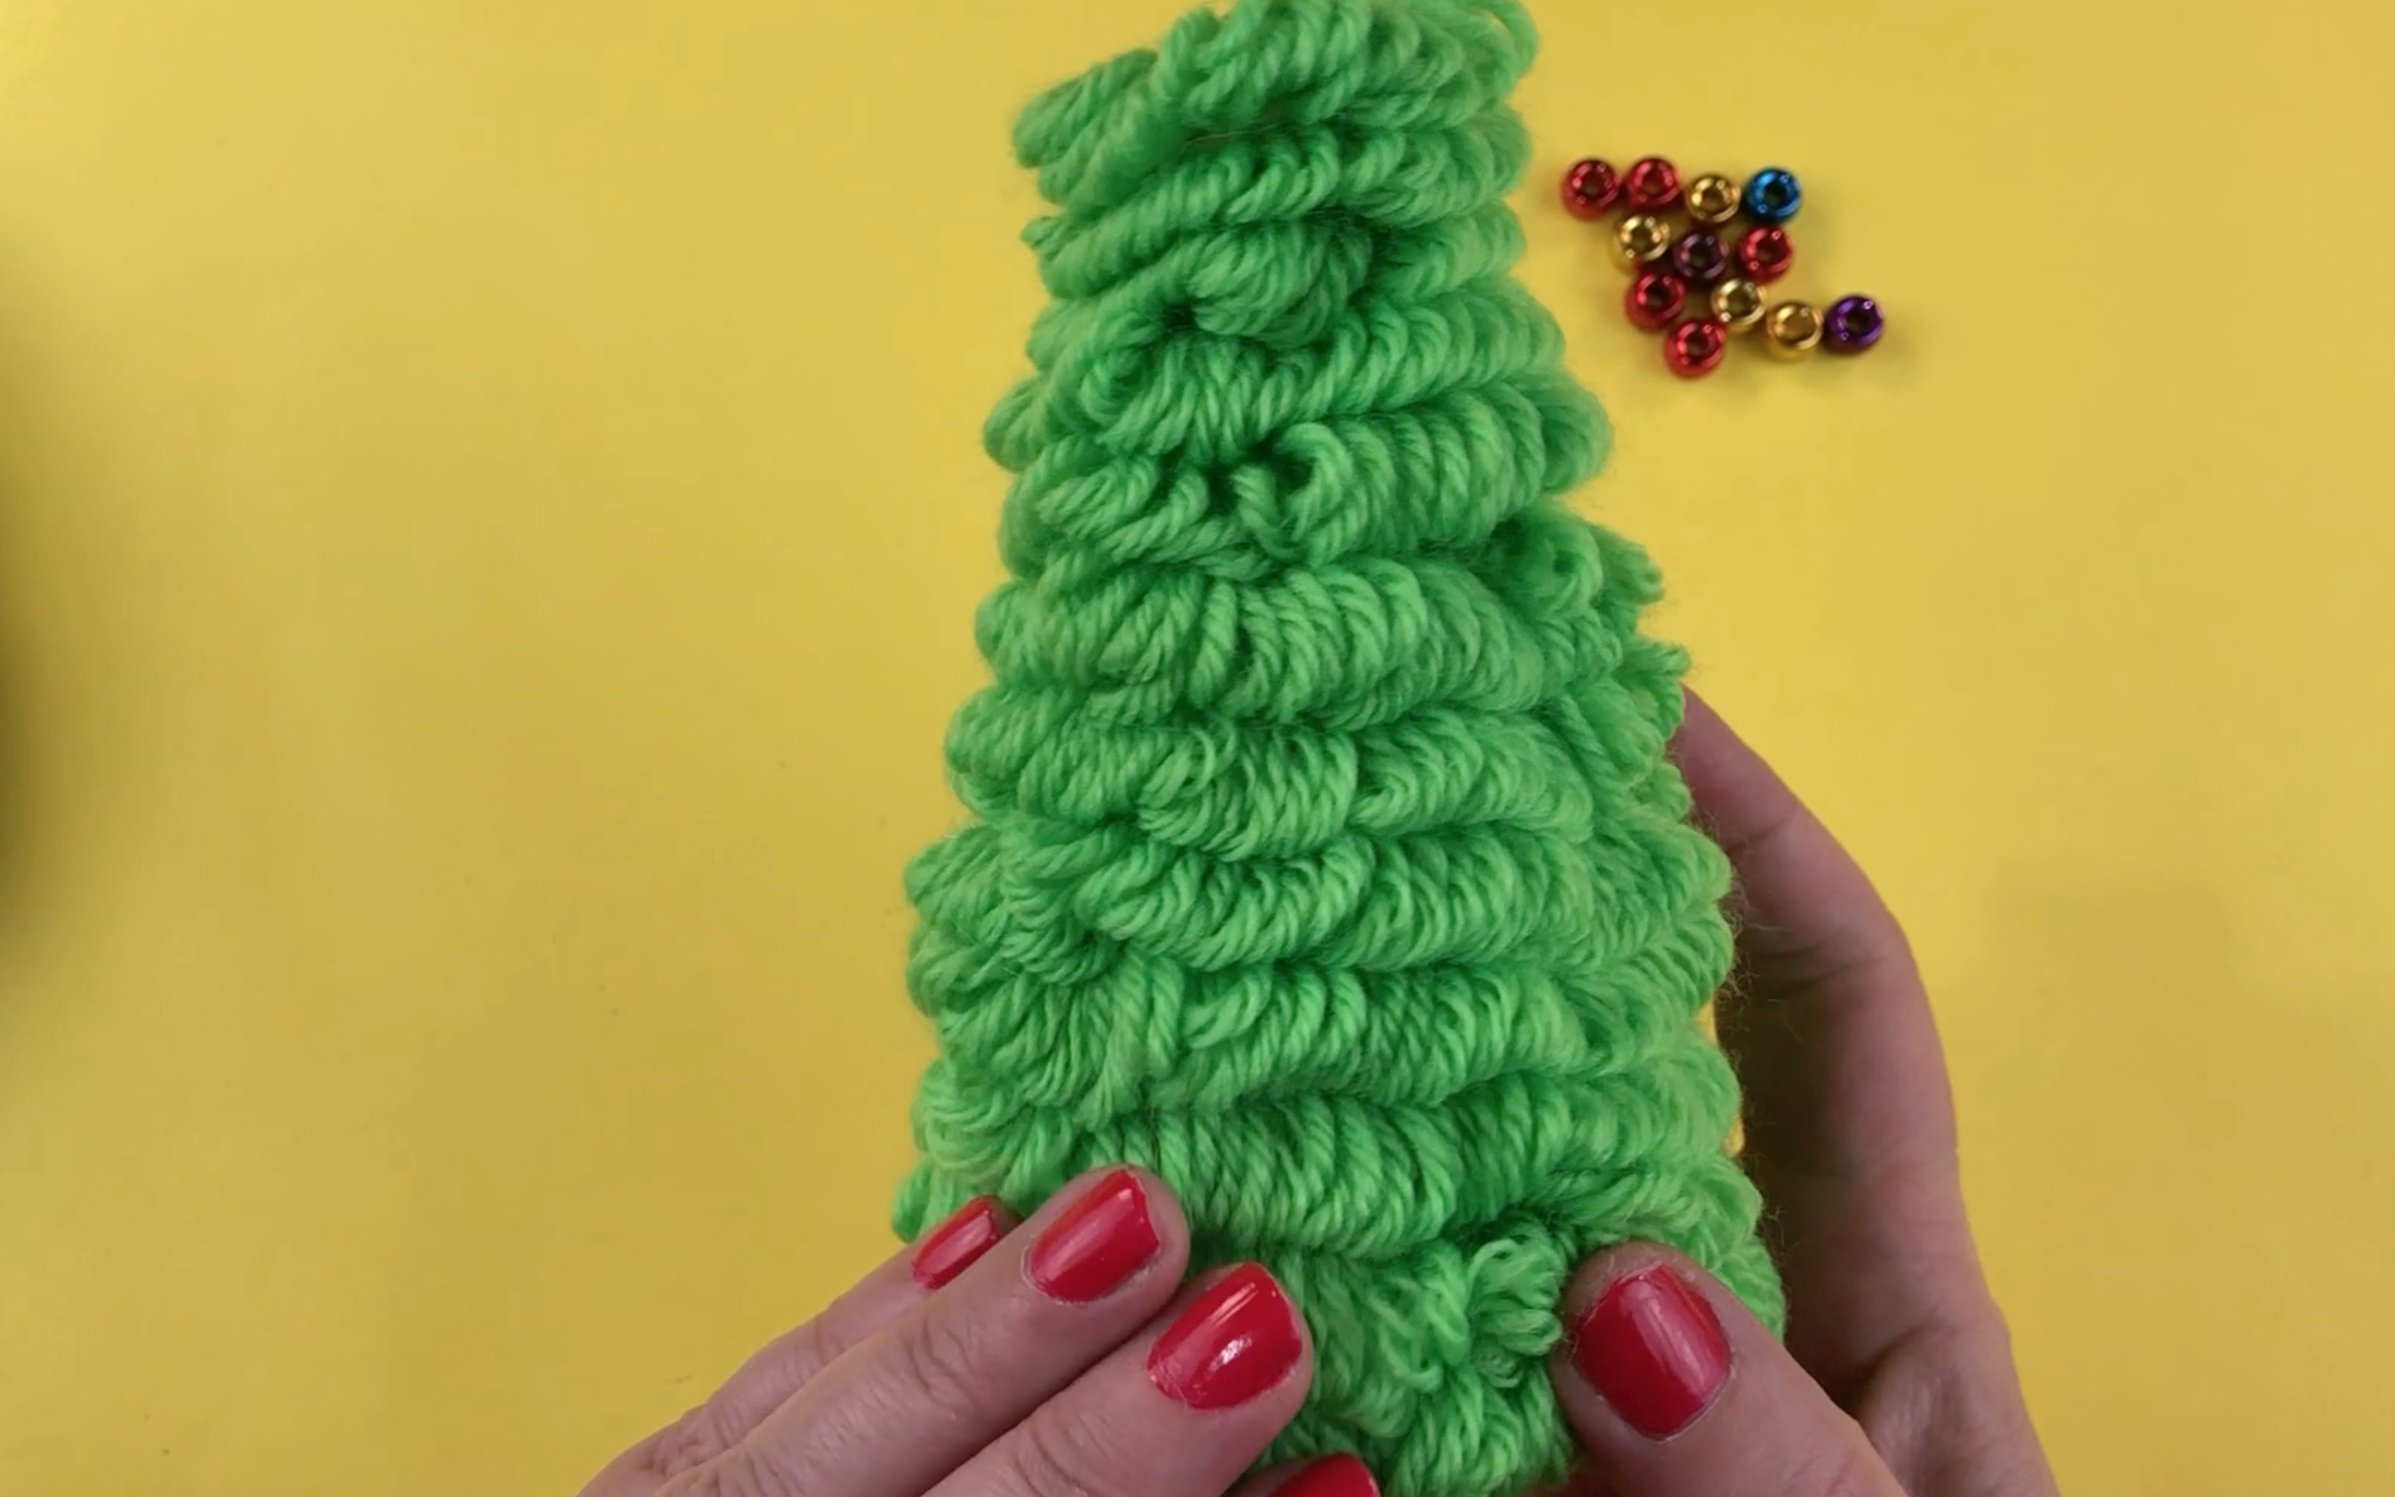
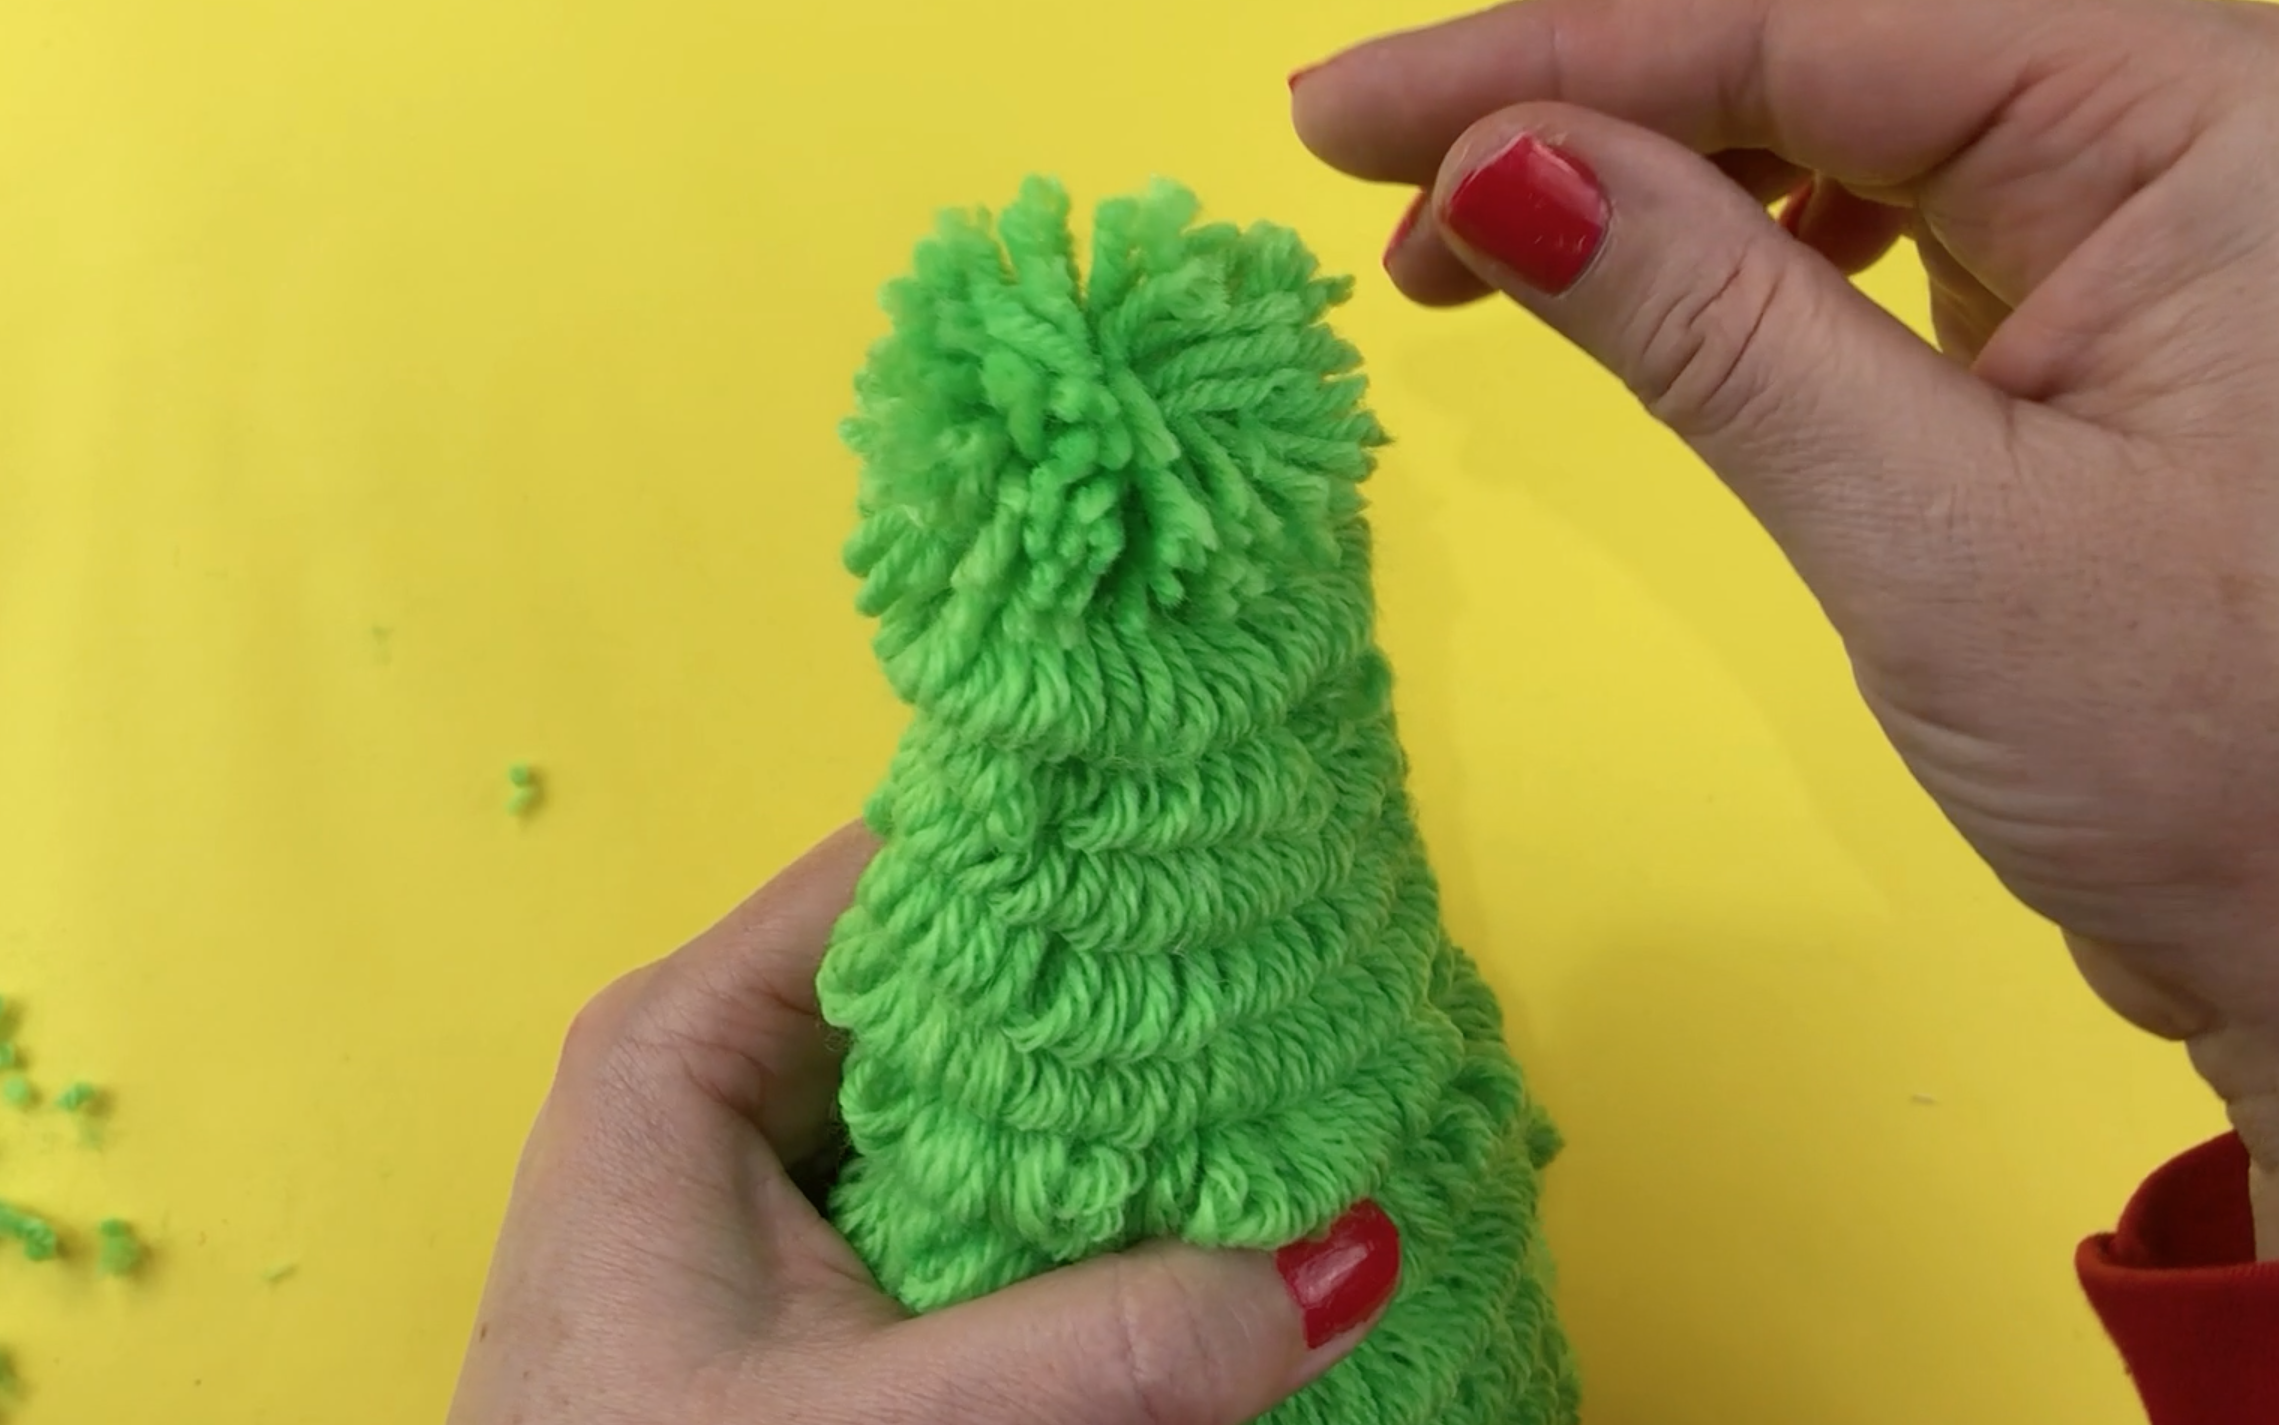
Keep repeating this process until all the cone is covered in the wool curls. Where one wool ends just start the next wool curl right next to it. The wool will curl around the cone and naturally work its way up to the top of the cone.
Step 5
Next make the pompom to go on the top of the cone. To make the pompom wrap the wool around your 3 fingers. Wrap the wool approx 50 times.
Remove the wool from your fingers and tie another piece of wool through the middle. cut through the hoops with the scissors.
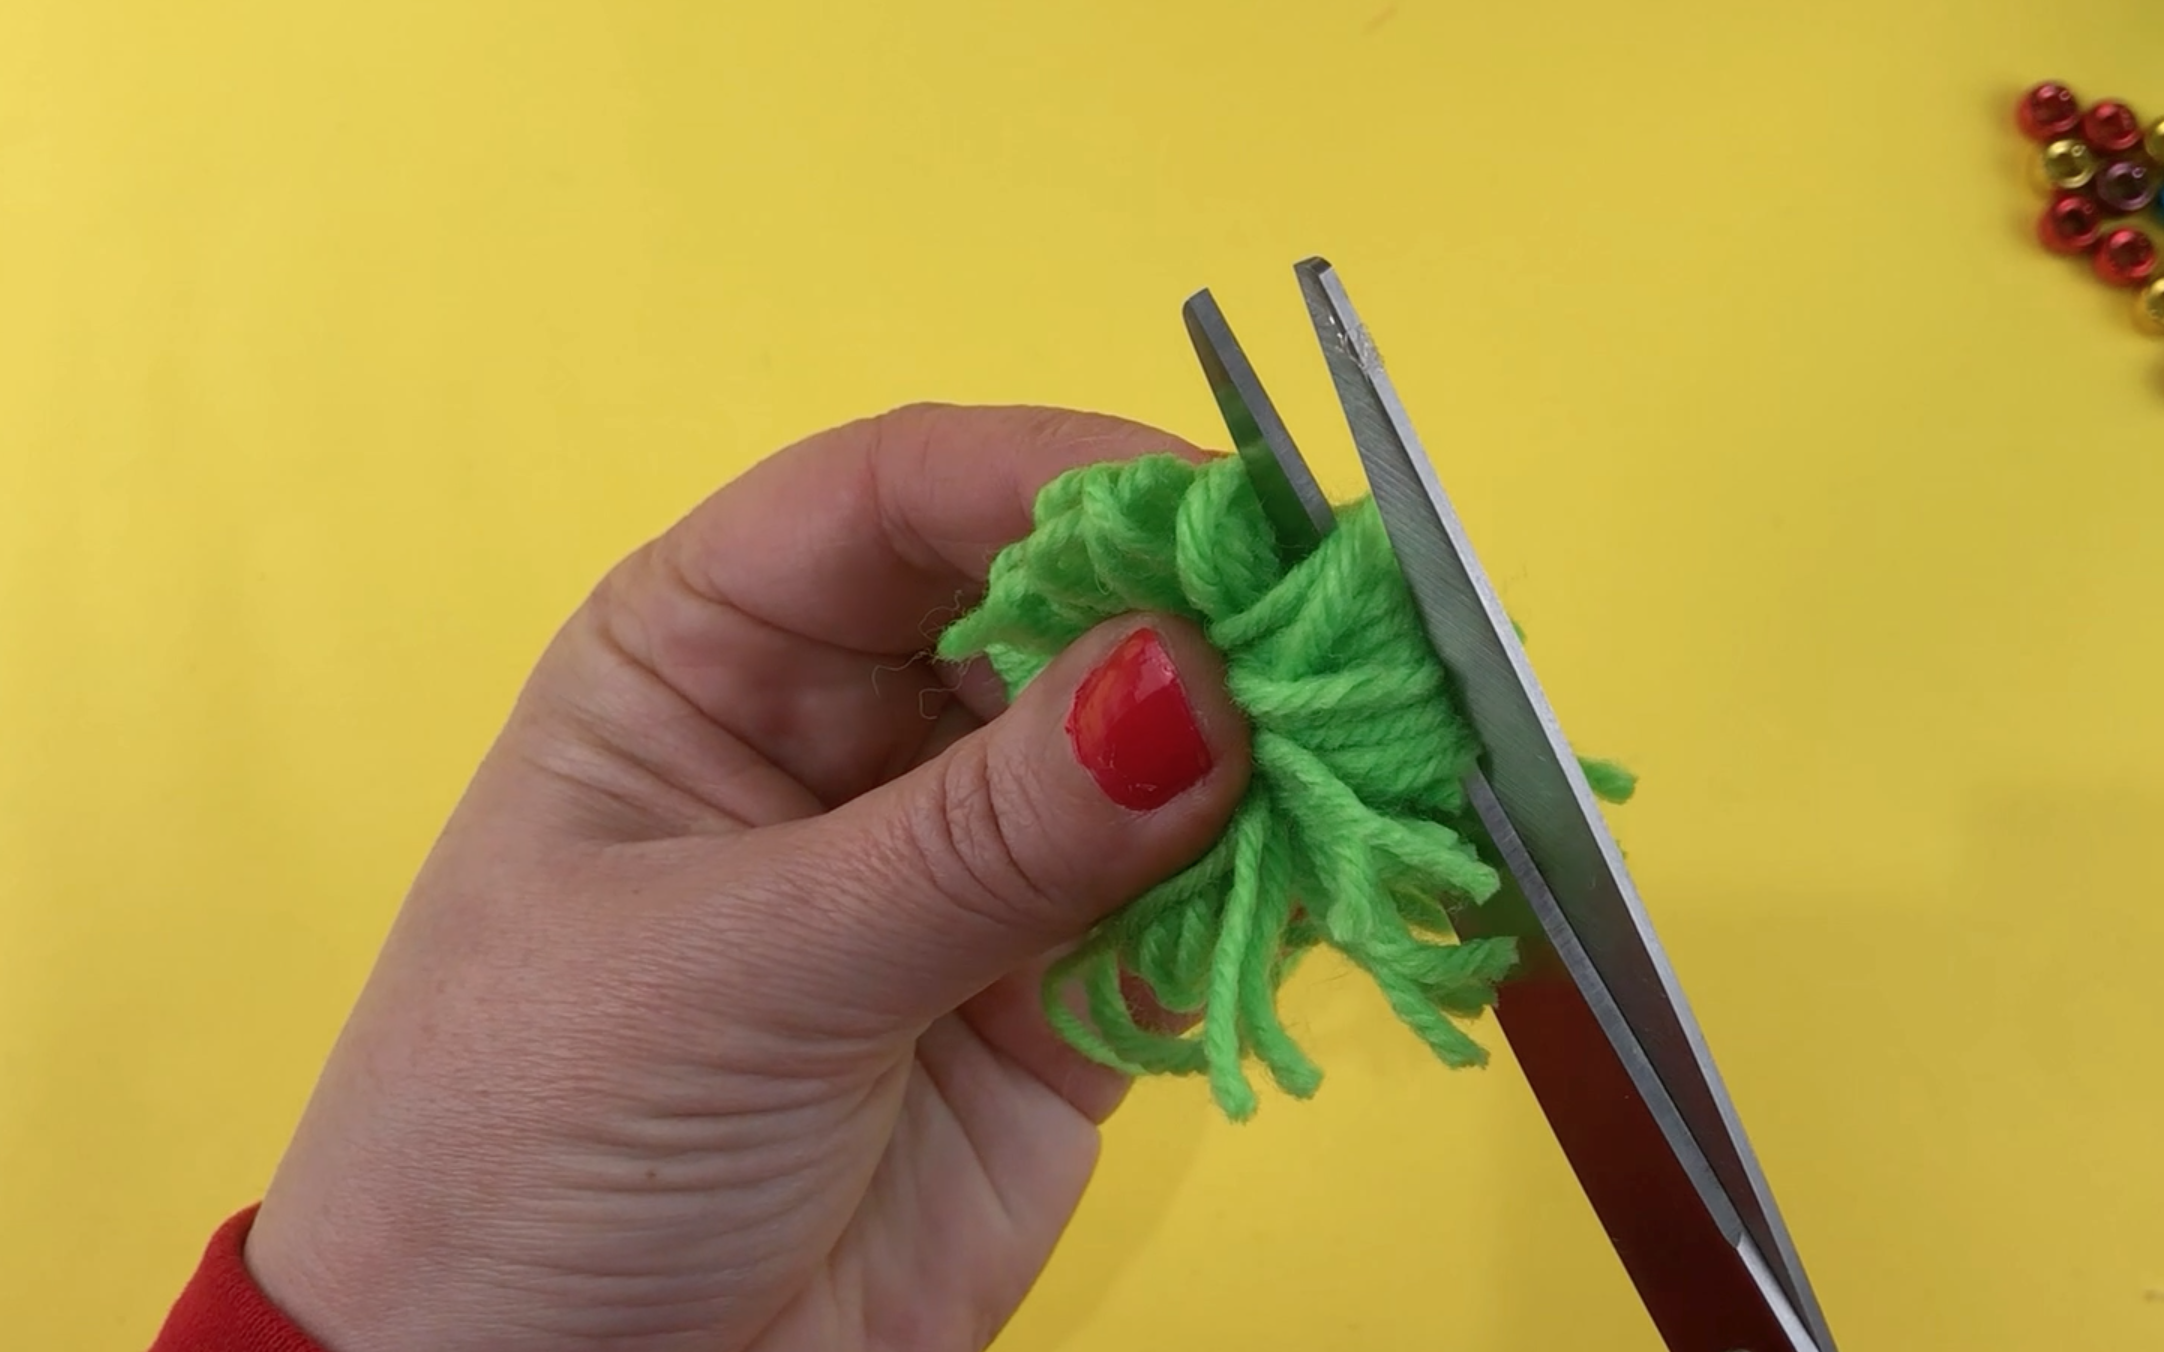
Trim the pompom to make it look neat, like the pompom in the picture below.
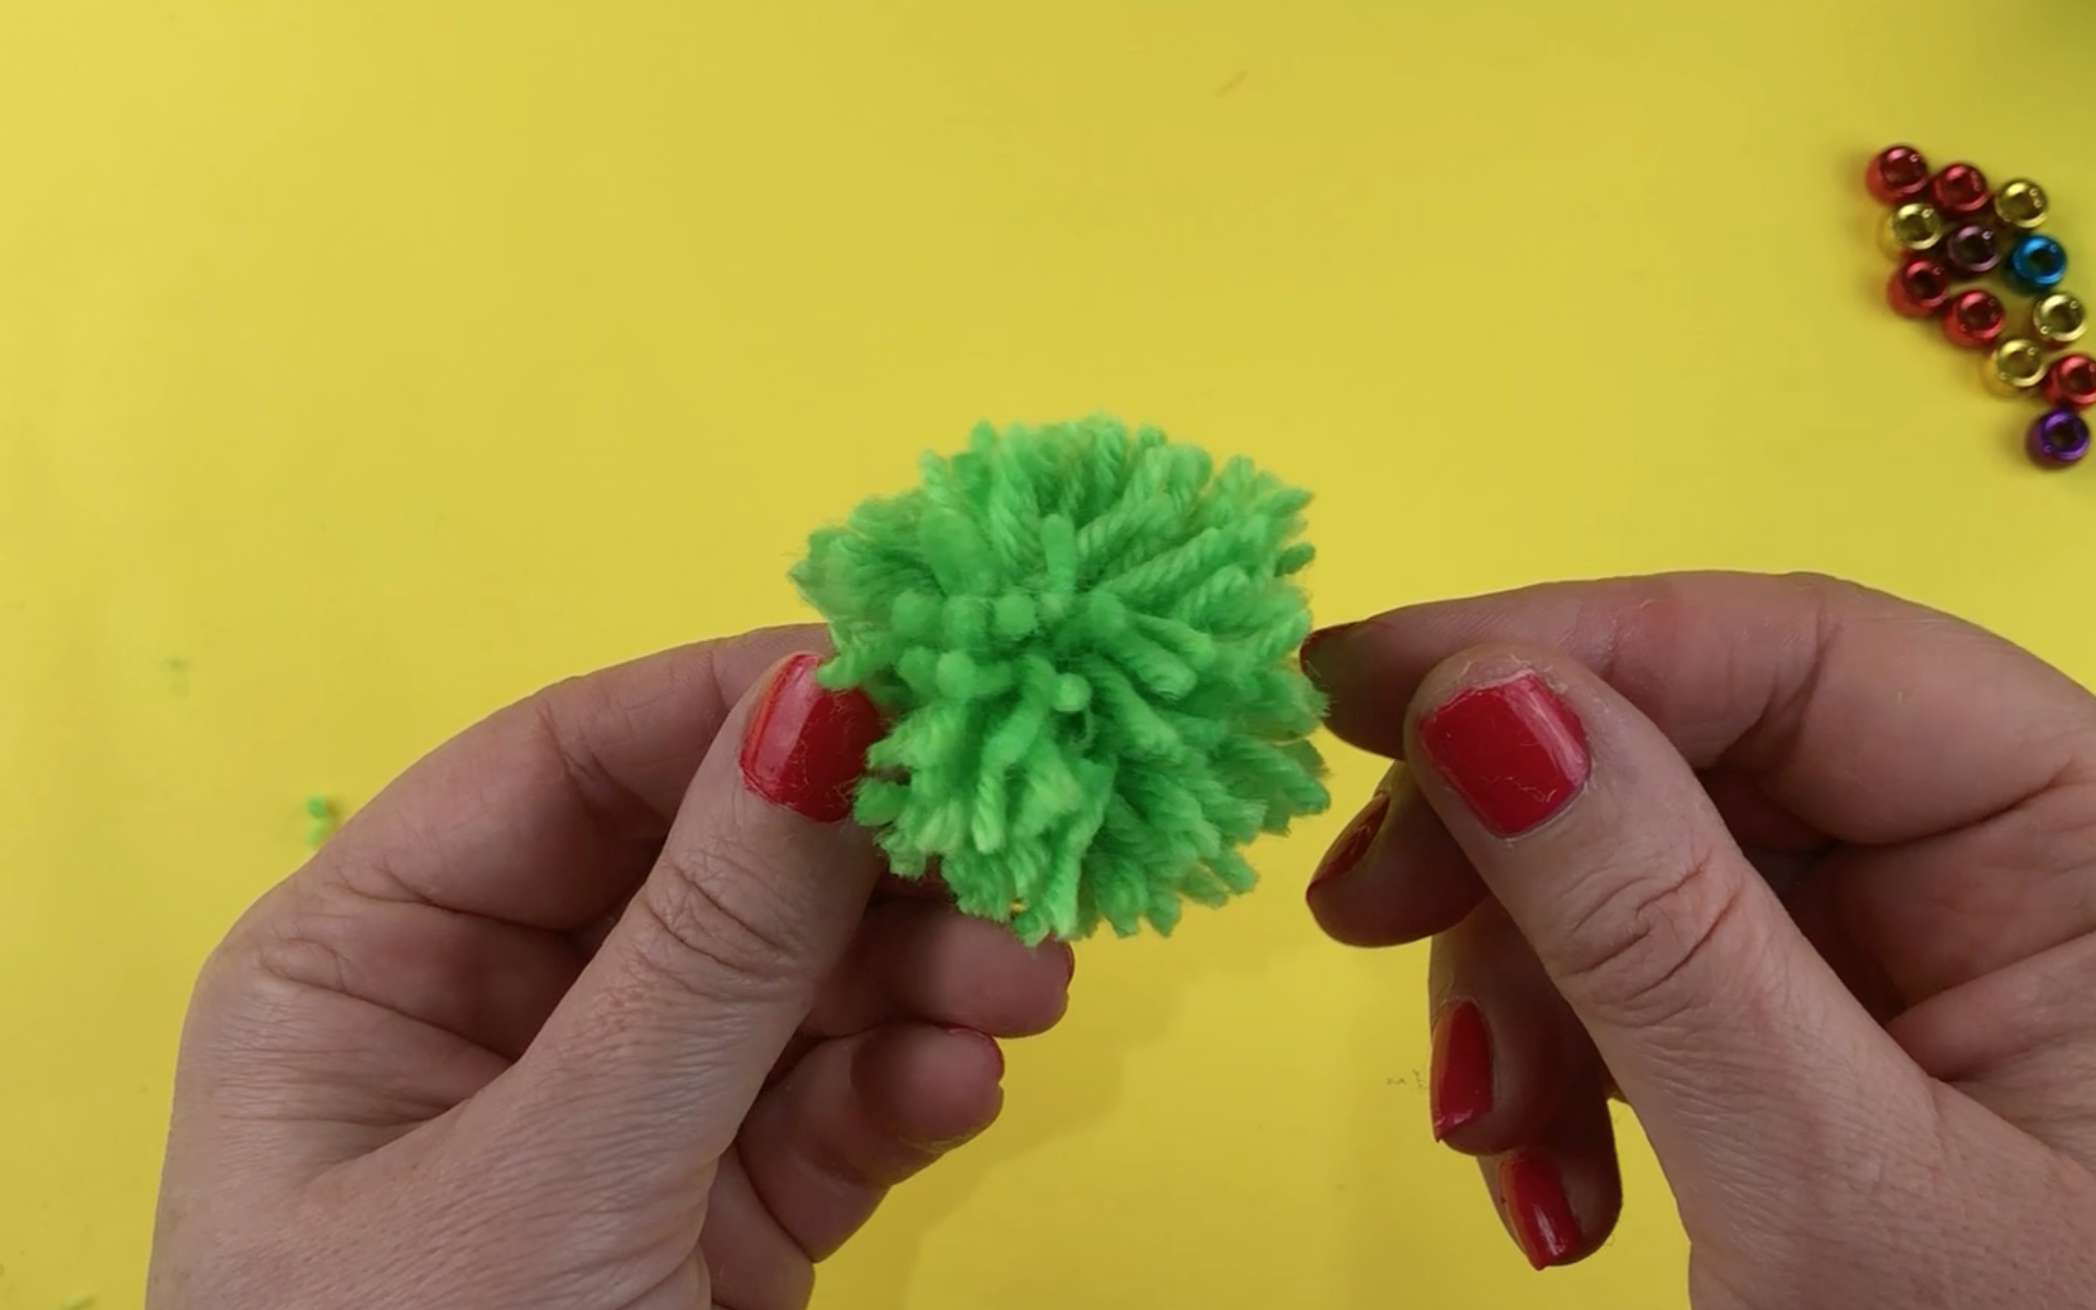
Using hot glue, glue the pompom to the top of the cone.
Step 6
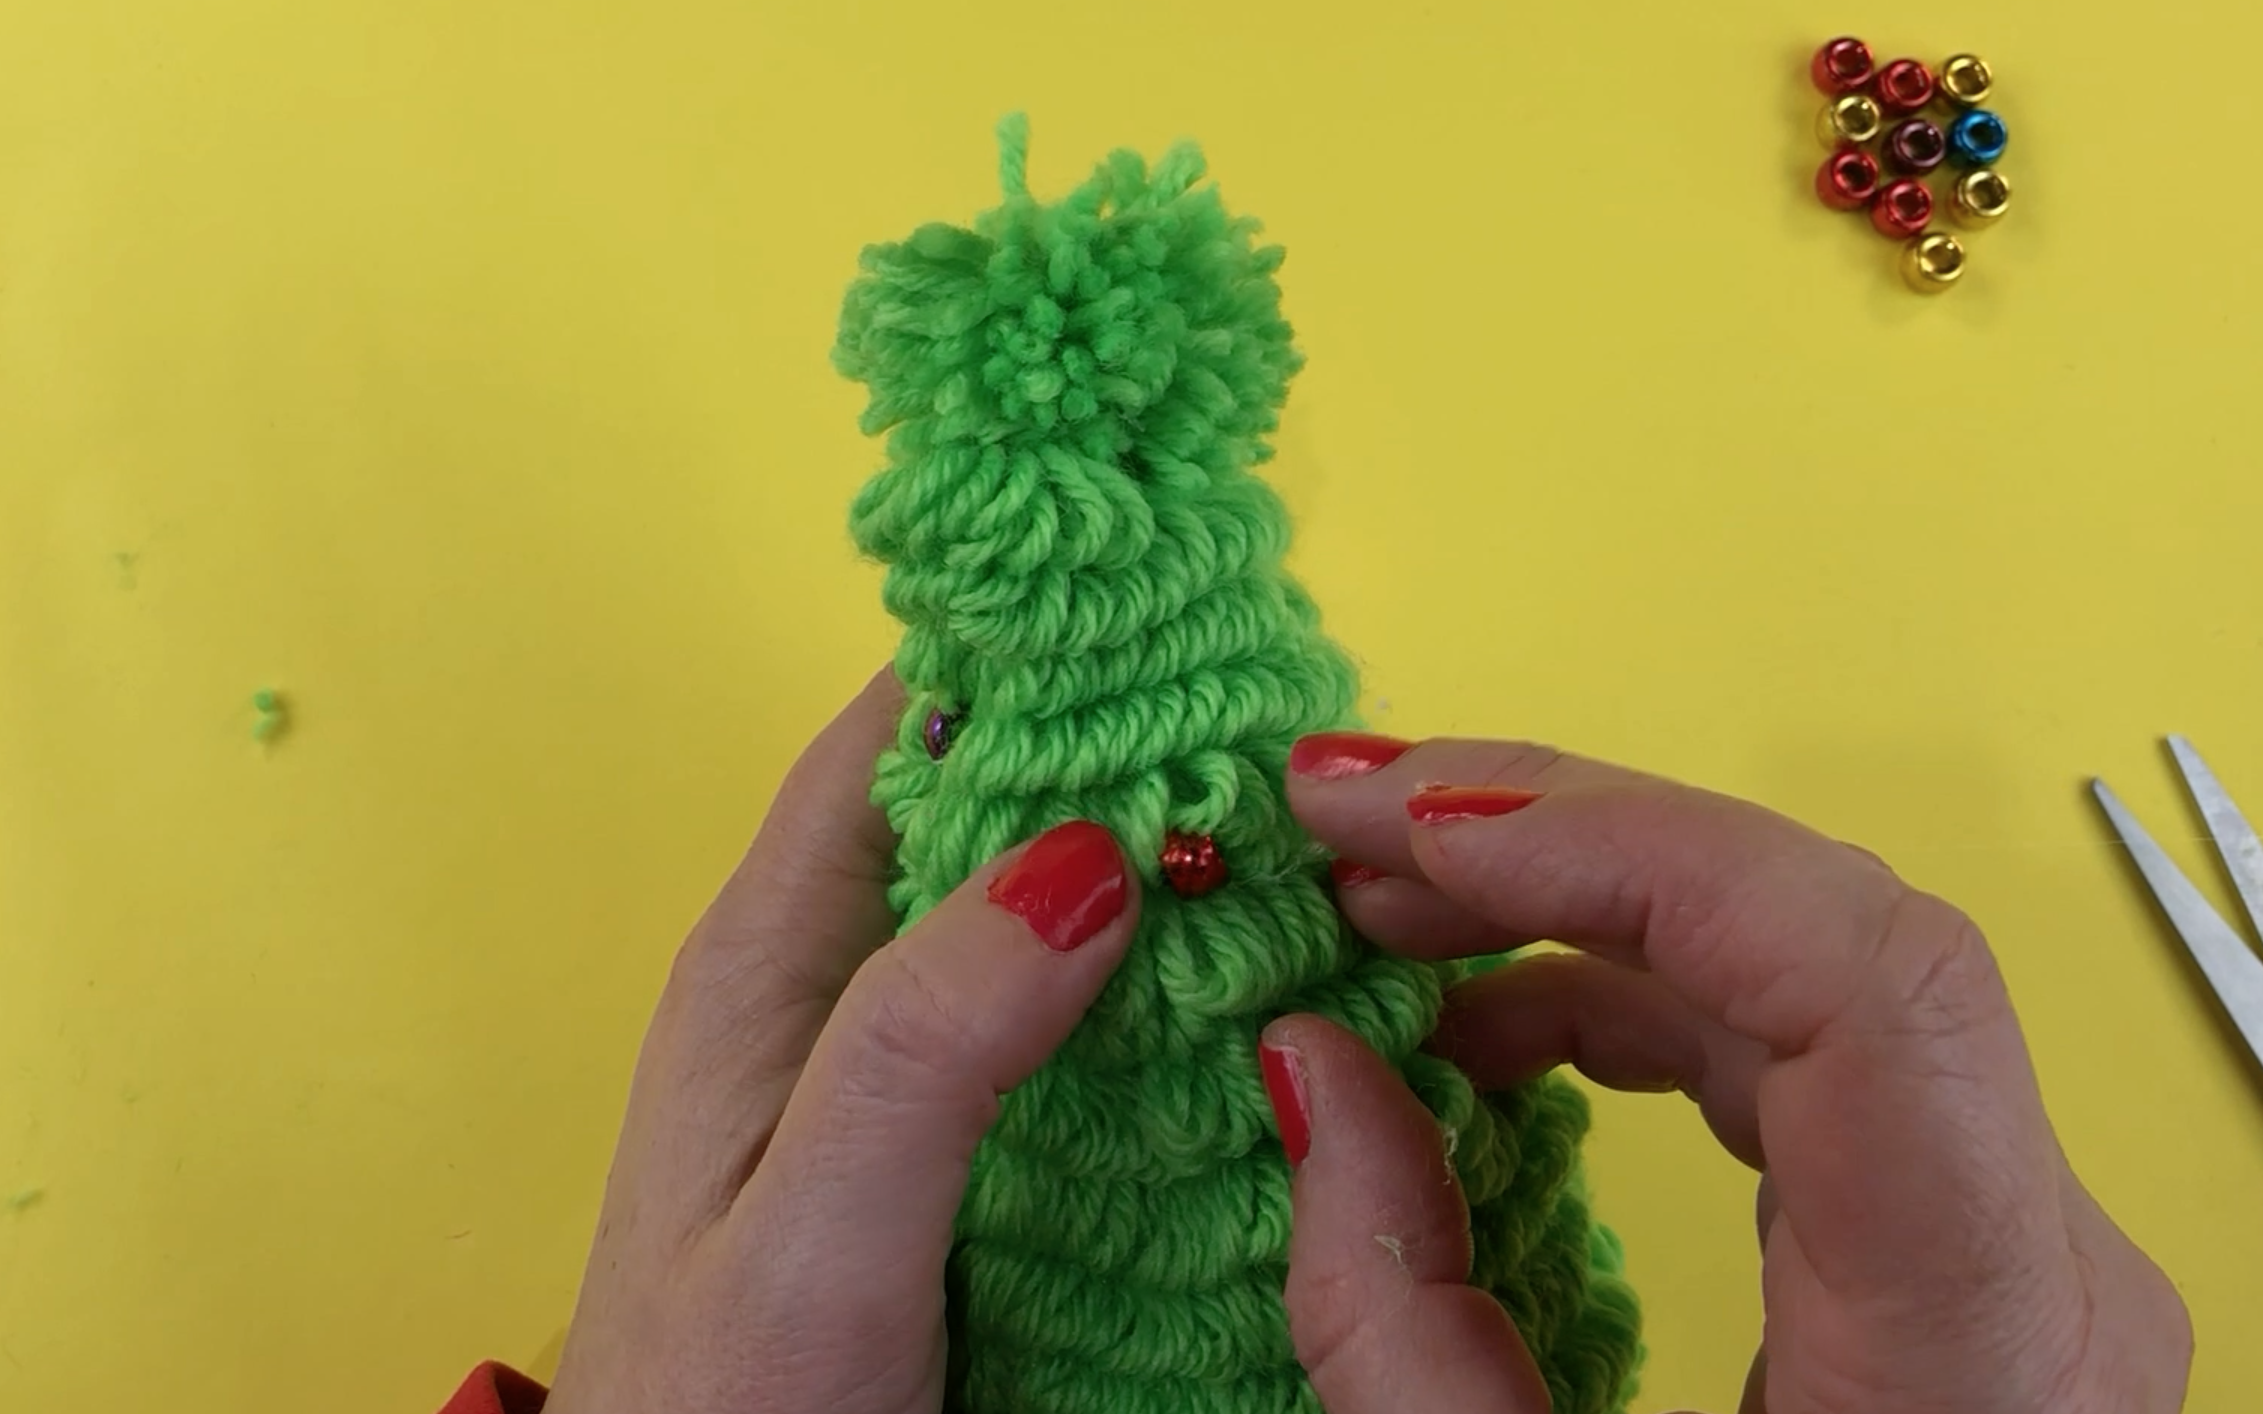
To finish off the Christmas tree add some coloured beads in random places to make them look like decorations. Use small amounts of hot glue to stick them to the wool tree. This step is totally optional.
Now you have your finished cute wool Christmas tree.

If you would like to watch how i made these cute wool Christmas trees then please check out the video below
If you enjoyed this blog please check out my other blog posts:
How to make a pompom Christmas tree