
With halloween just around the corner, why not have a go at making some cute spooky halloween toilet rolls. These are a great little craft that you could get the kids involved with making, or just sit and make them yourself. You also only need minimal supplies which helps to keep the cost down. Check out the rest of this blog as i show you how to make my easy to make halloween toilet rolls.
Supplies you will need are:
Toilet rolls - Any supermarket
=============================================================================
DISCLAIMER: Links included in this description might be affiliate links. If you purchase a product or service with the links that I provide I may receive a small commission. There is no additional charge to you. Thank you so much for helping to support my channel, you are awesome.
=========================================================================
Step 1
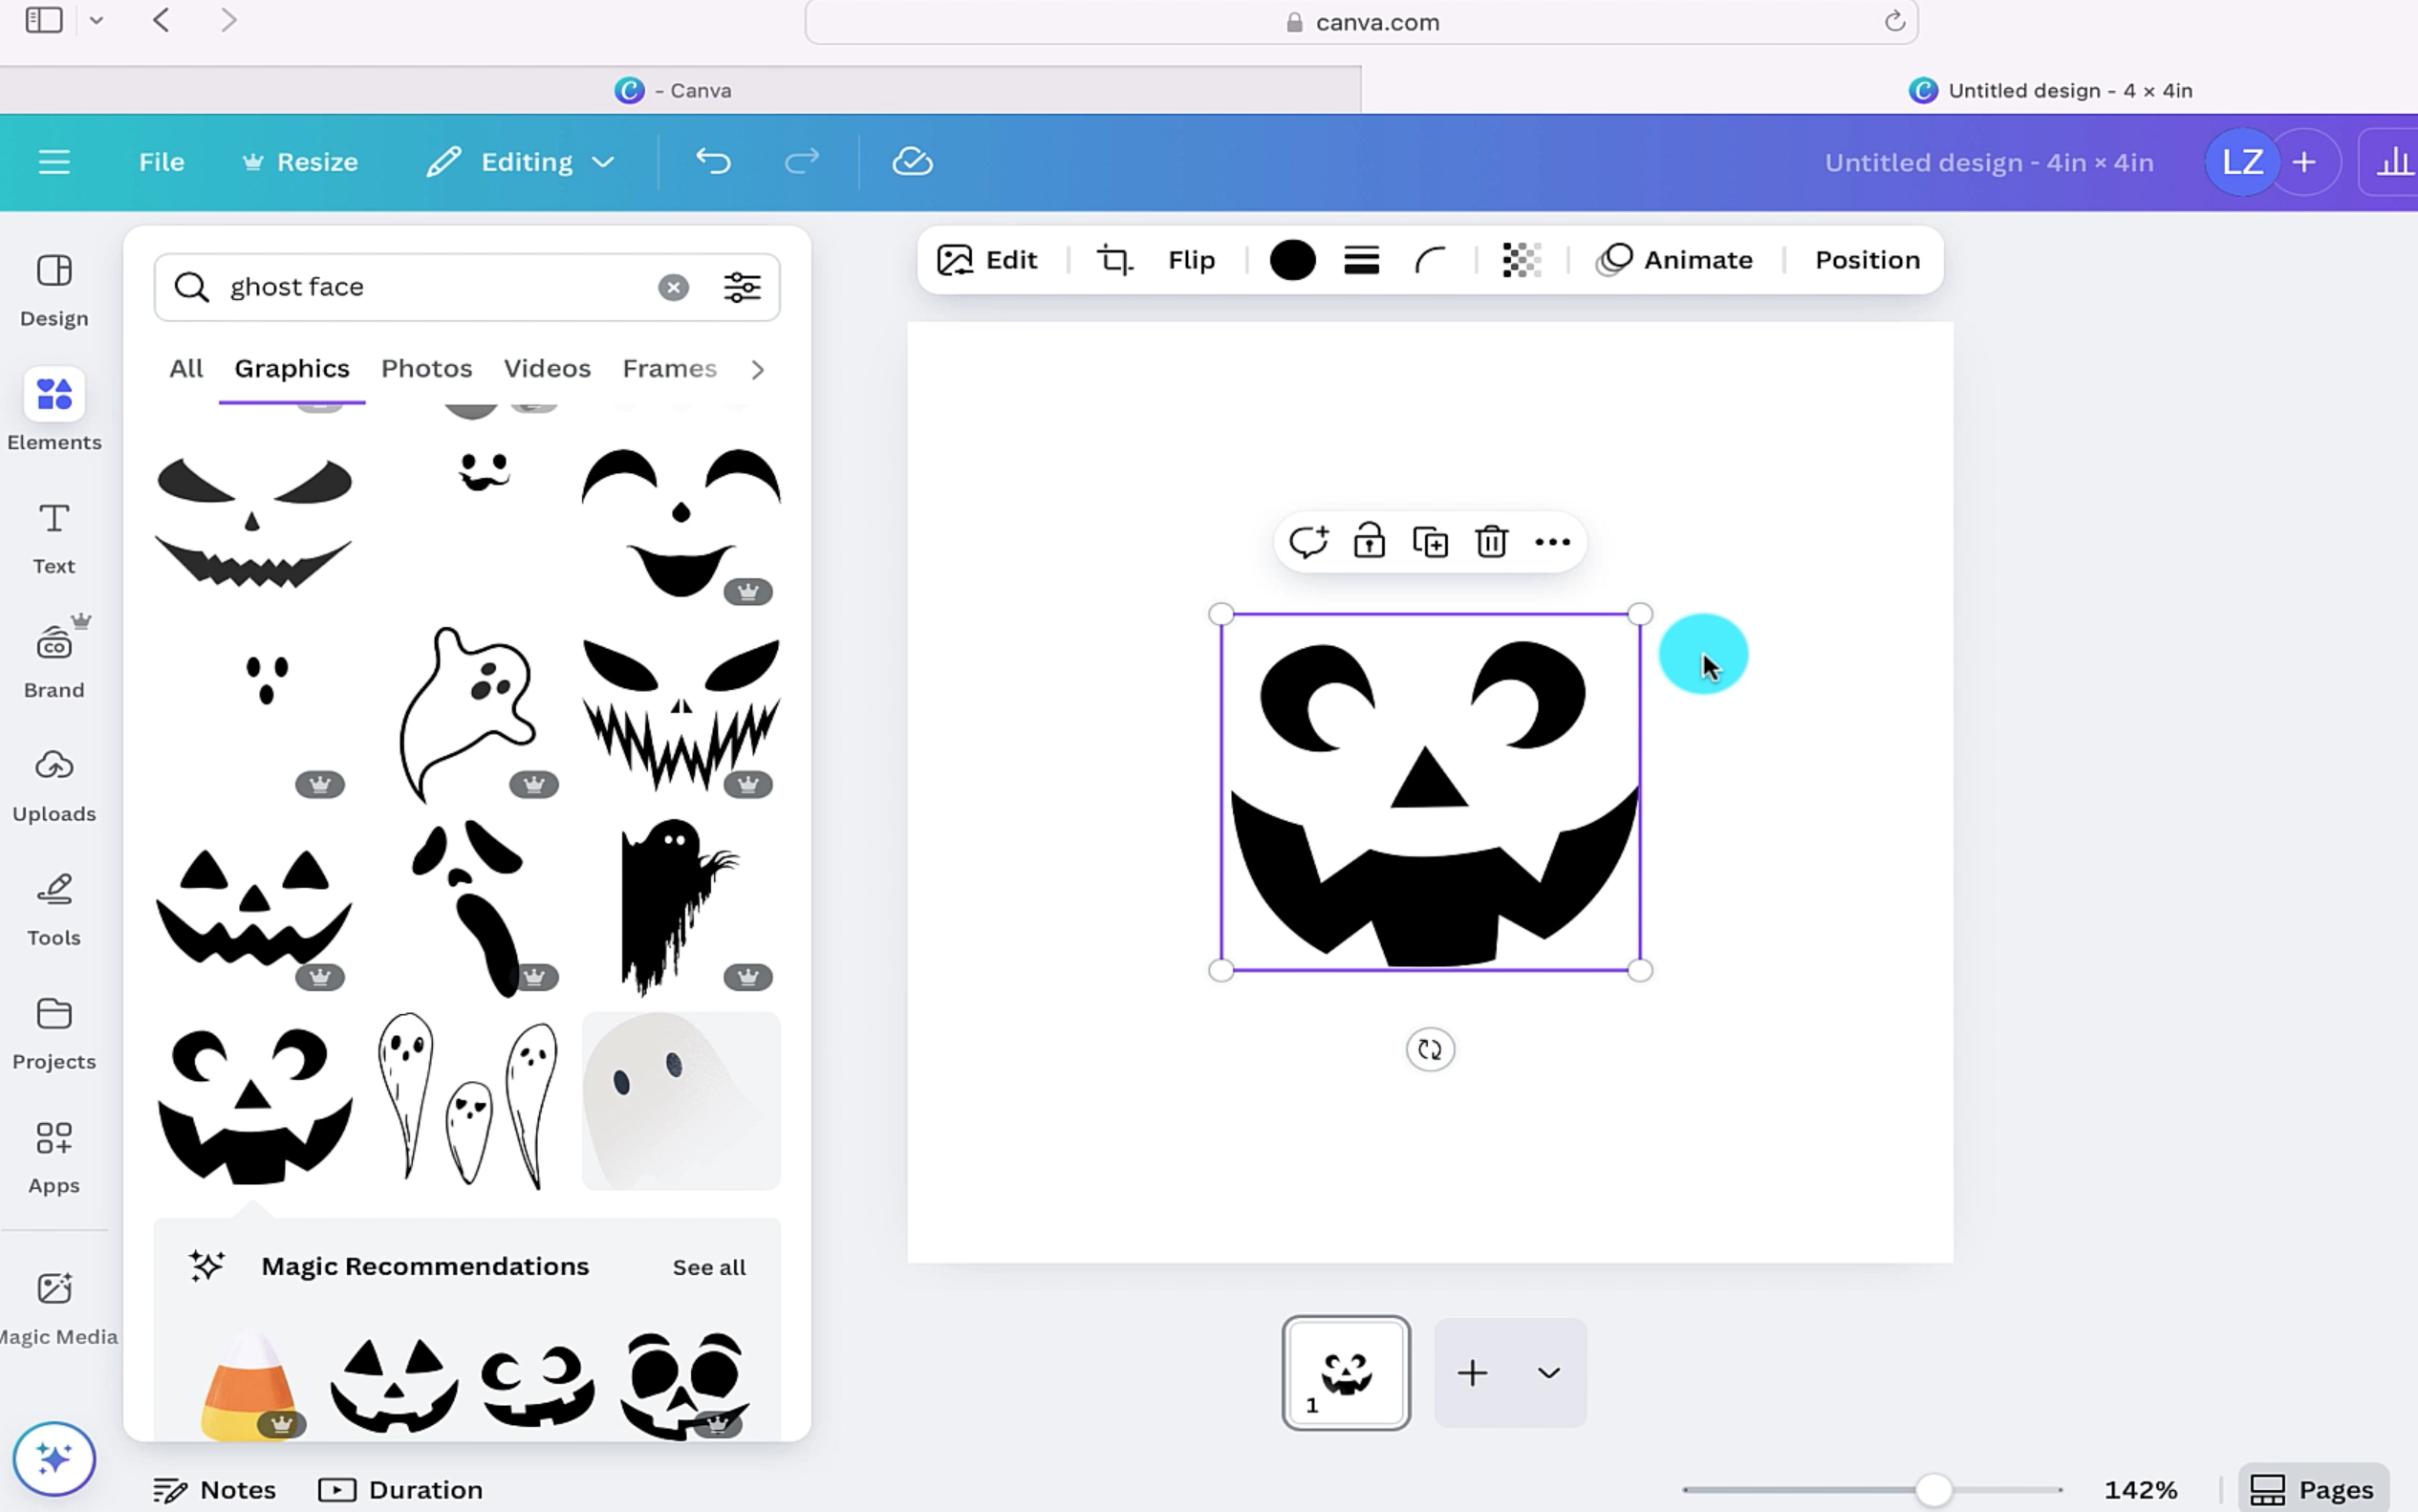
Load up canva, create a blank canvas, i made mine 4x4 inches. Head over to elements and type in ghost faces. This will bring you up lots of graphics that can be used. Select a cute ghost face that you would like to use on your toilet roll. Add it to your canvas.
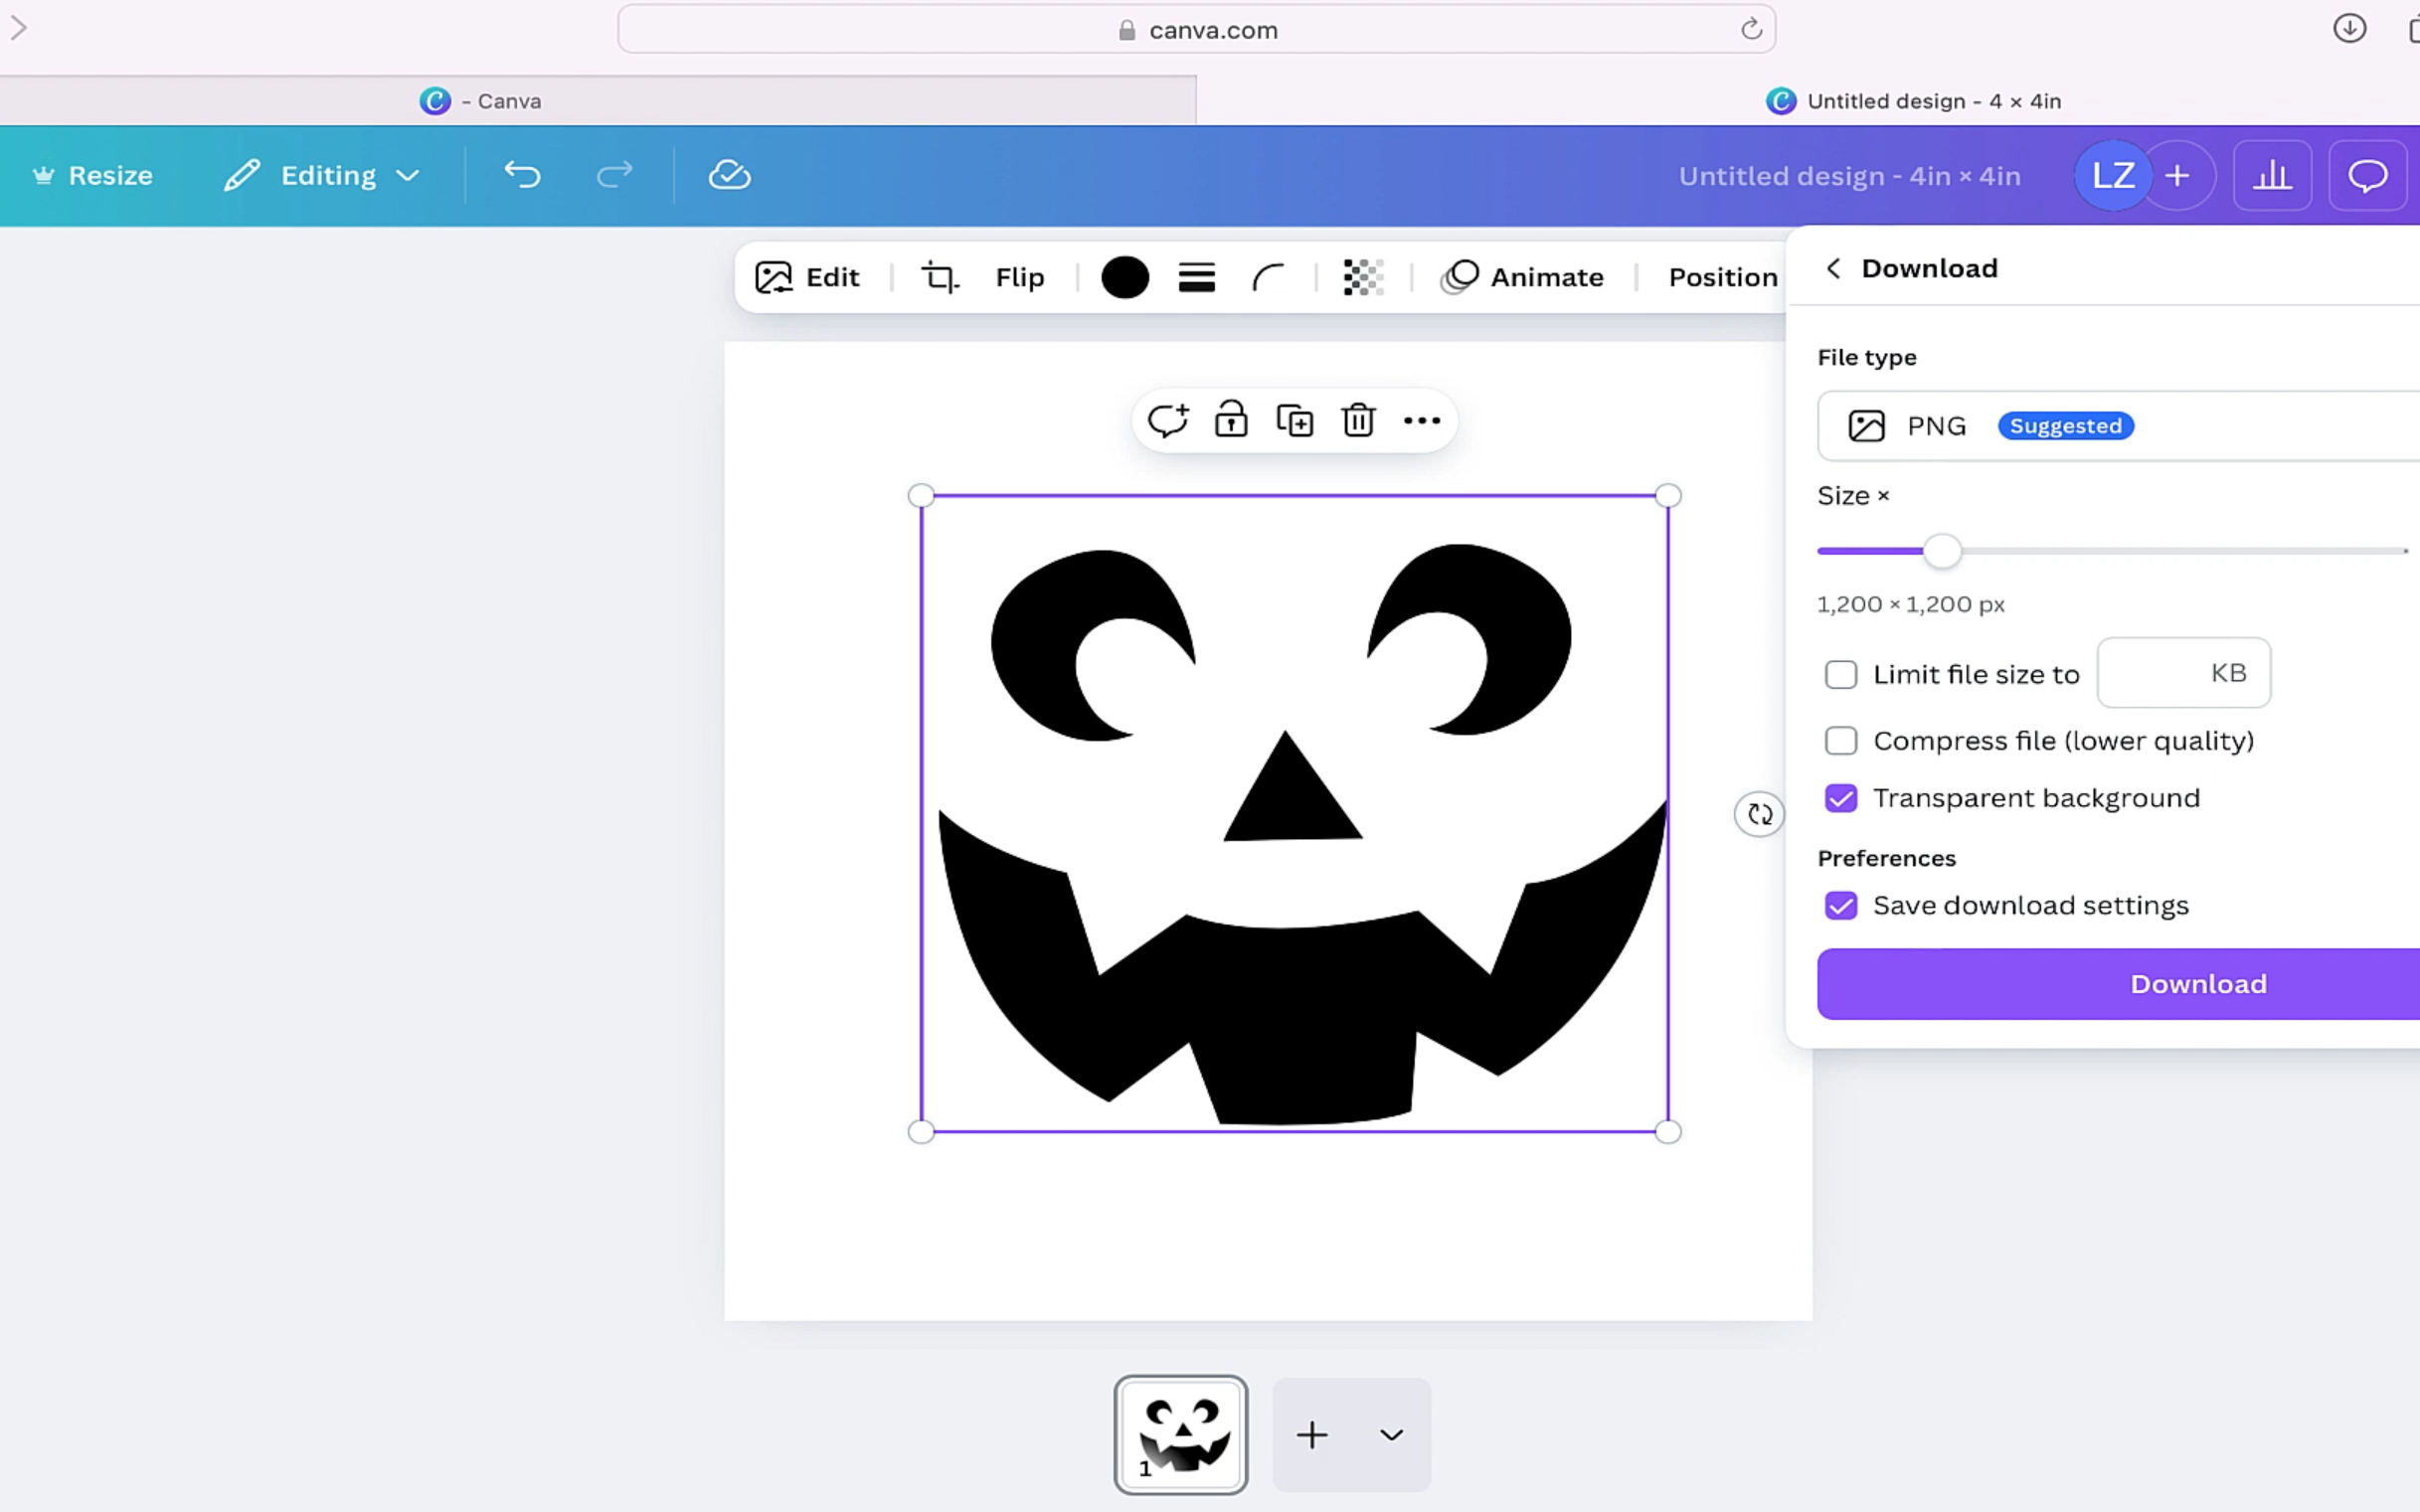
Click on share, select PNG as the file type. Make sure that you have selected transparent background. Select download. This will download your image and pop it in your downloads folder.
Step 2
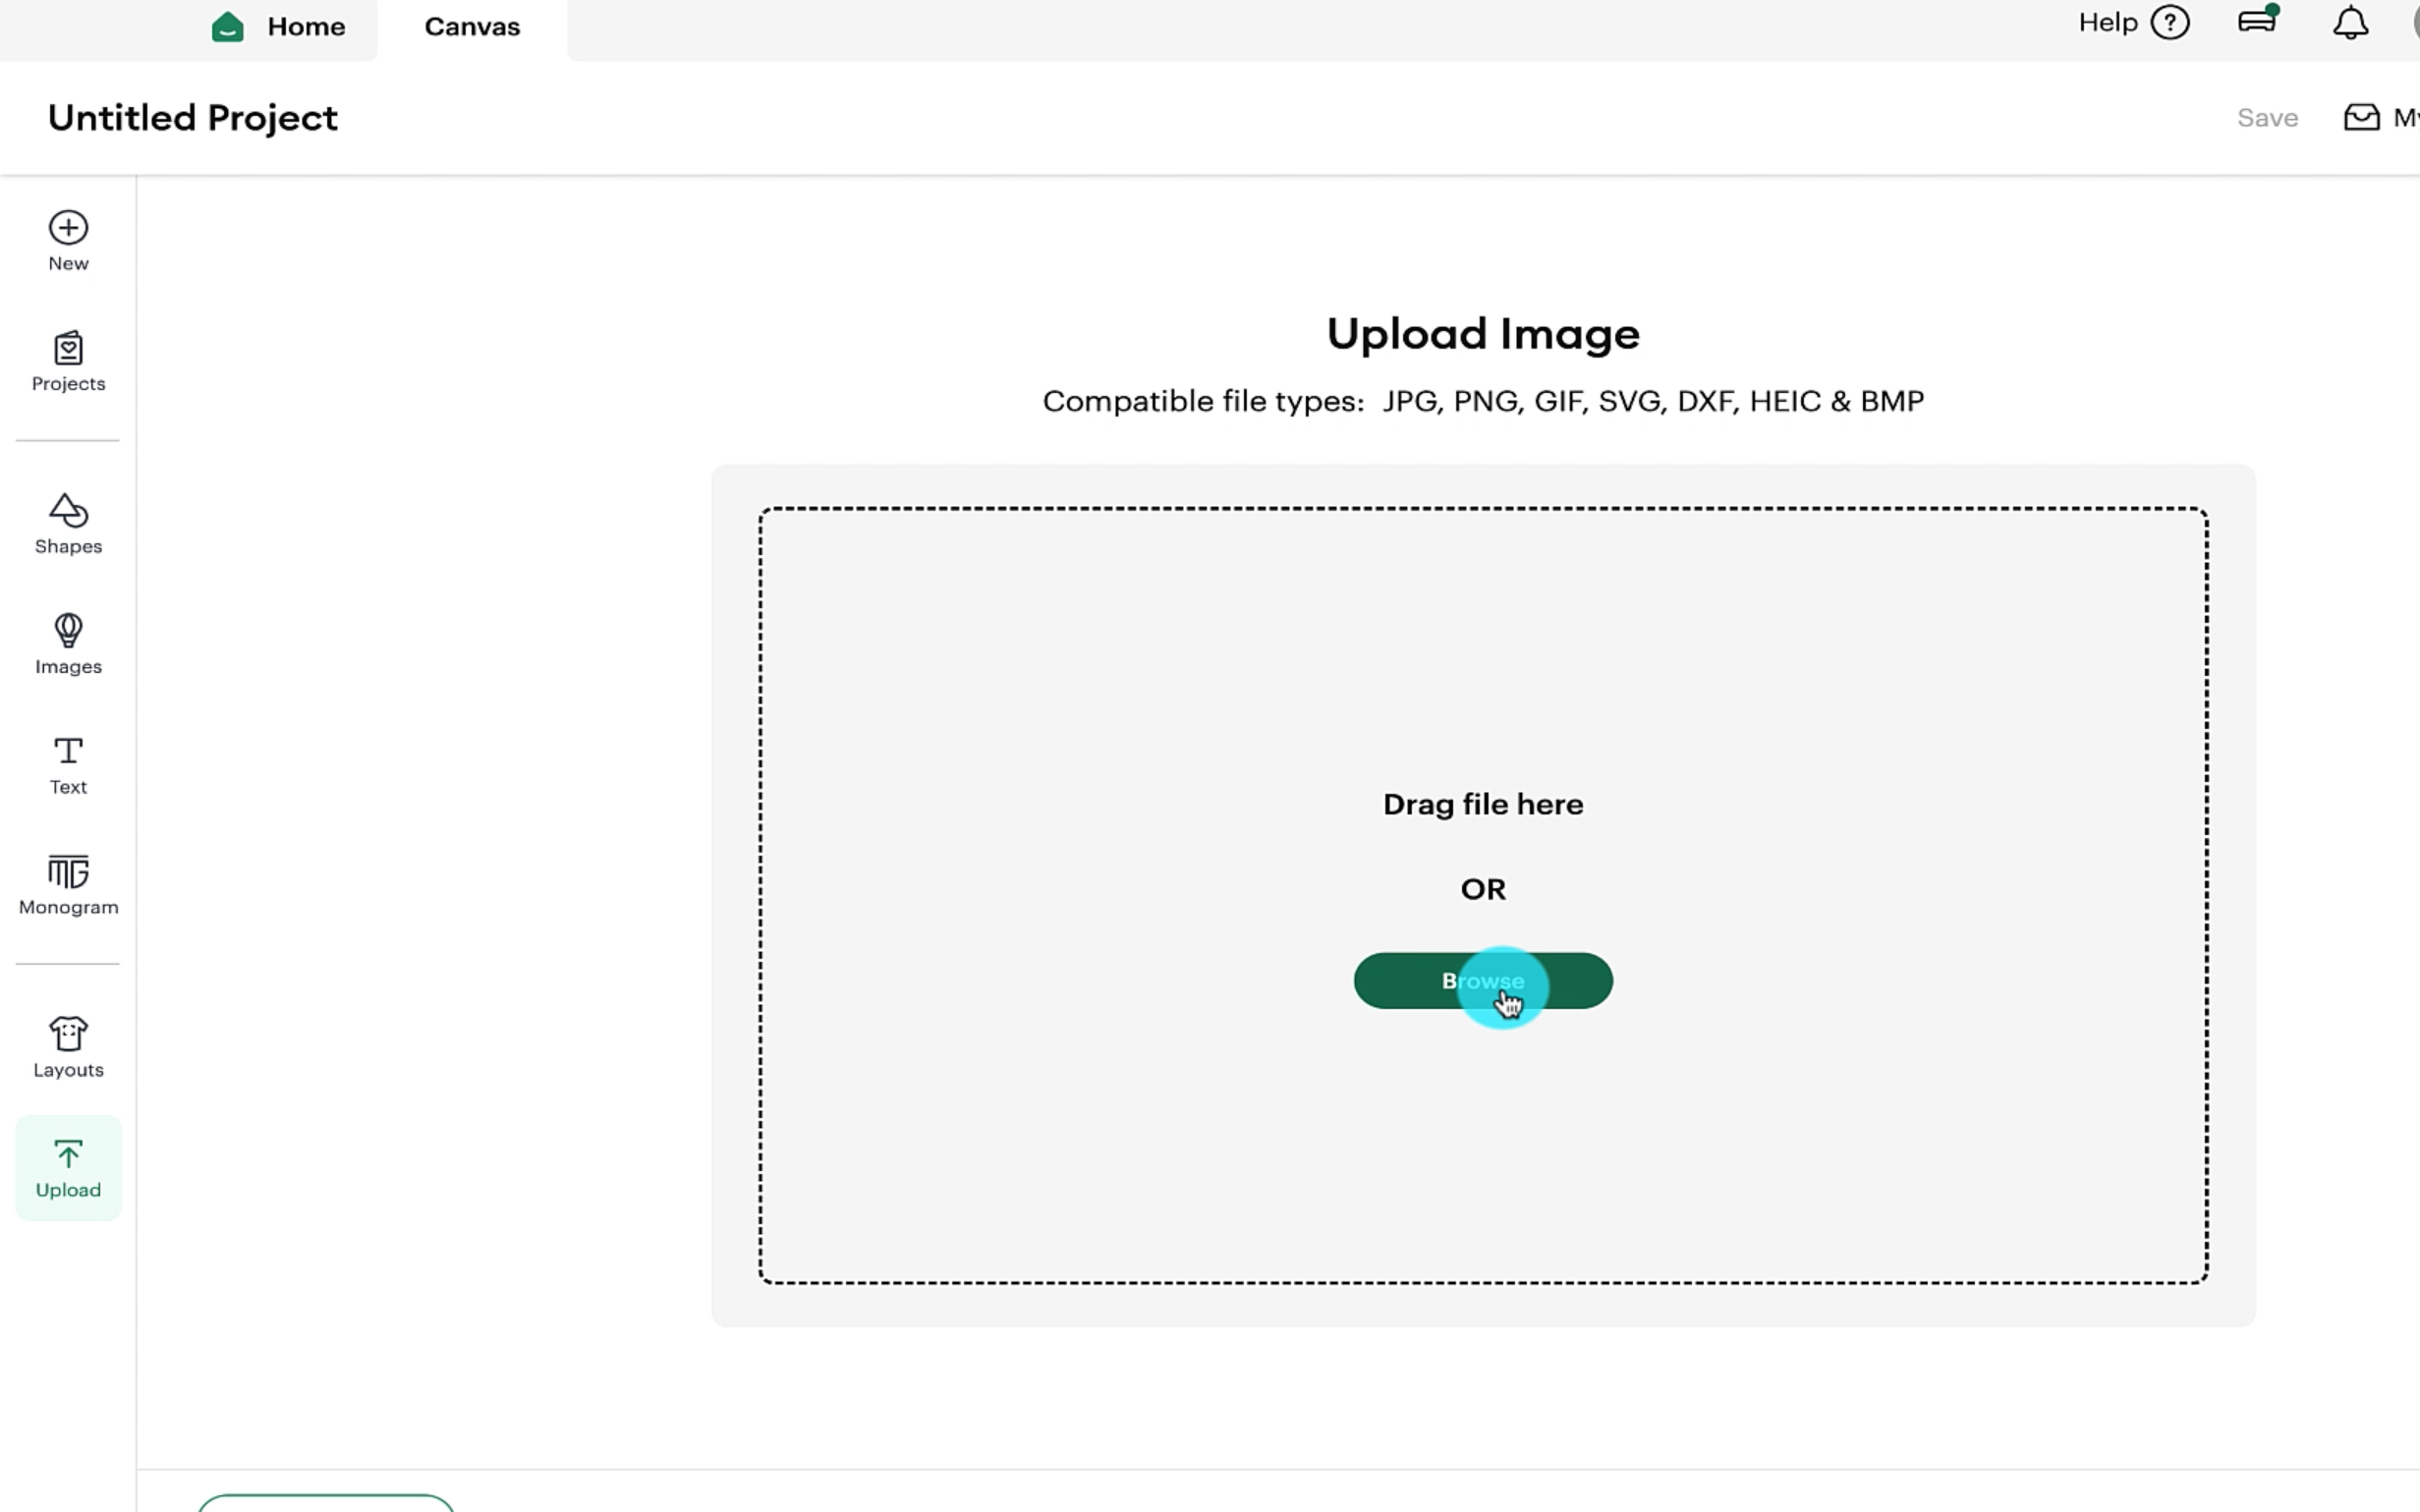
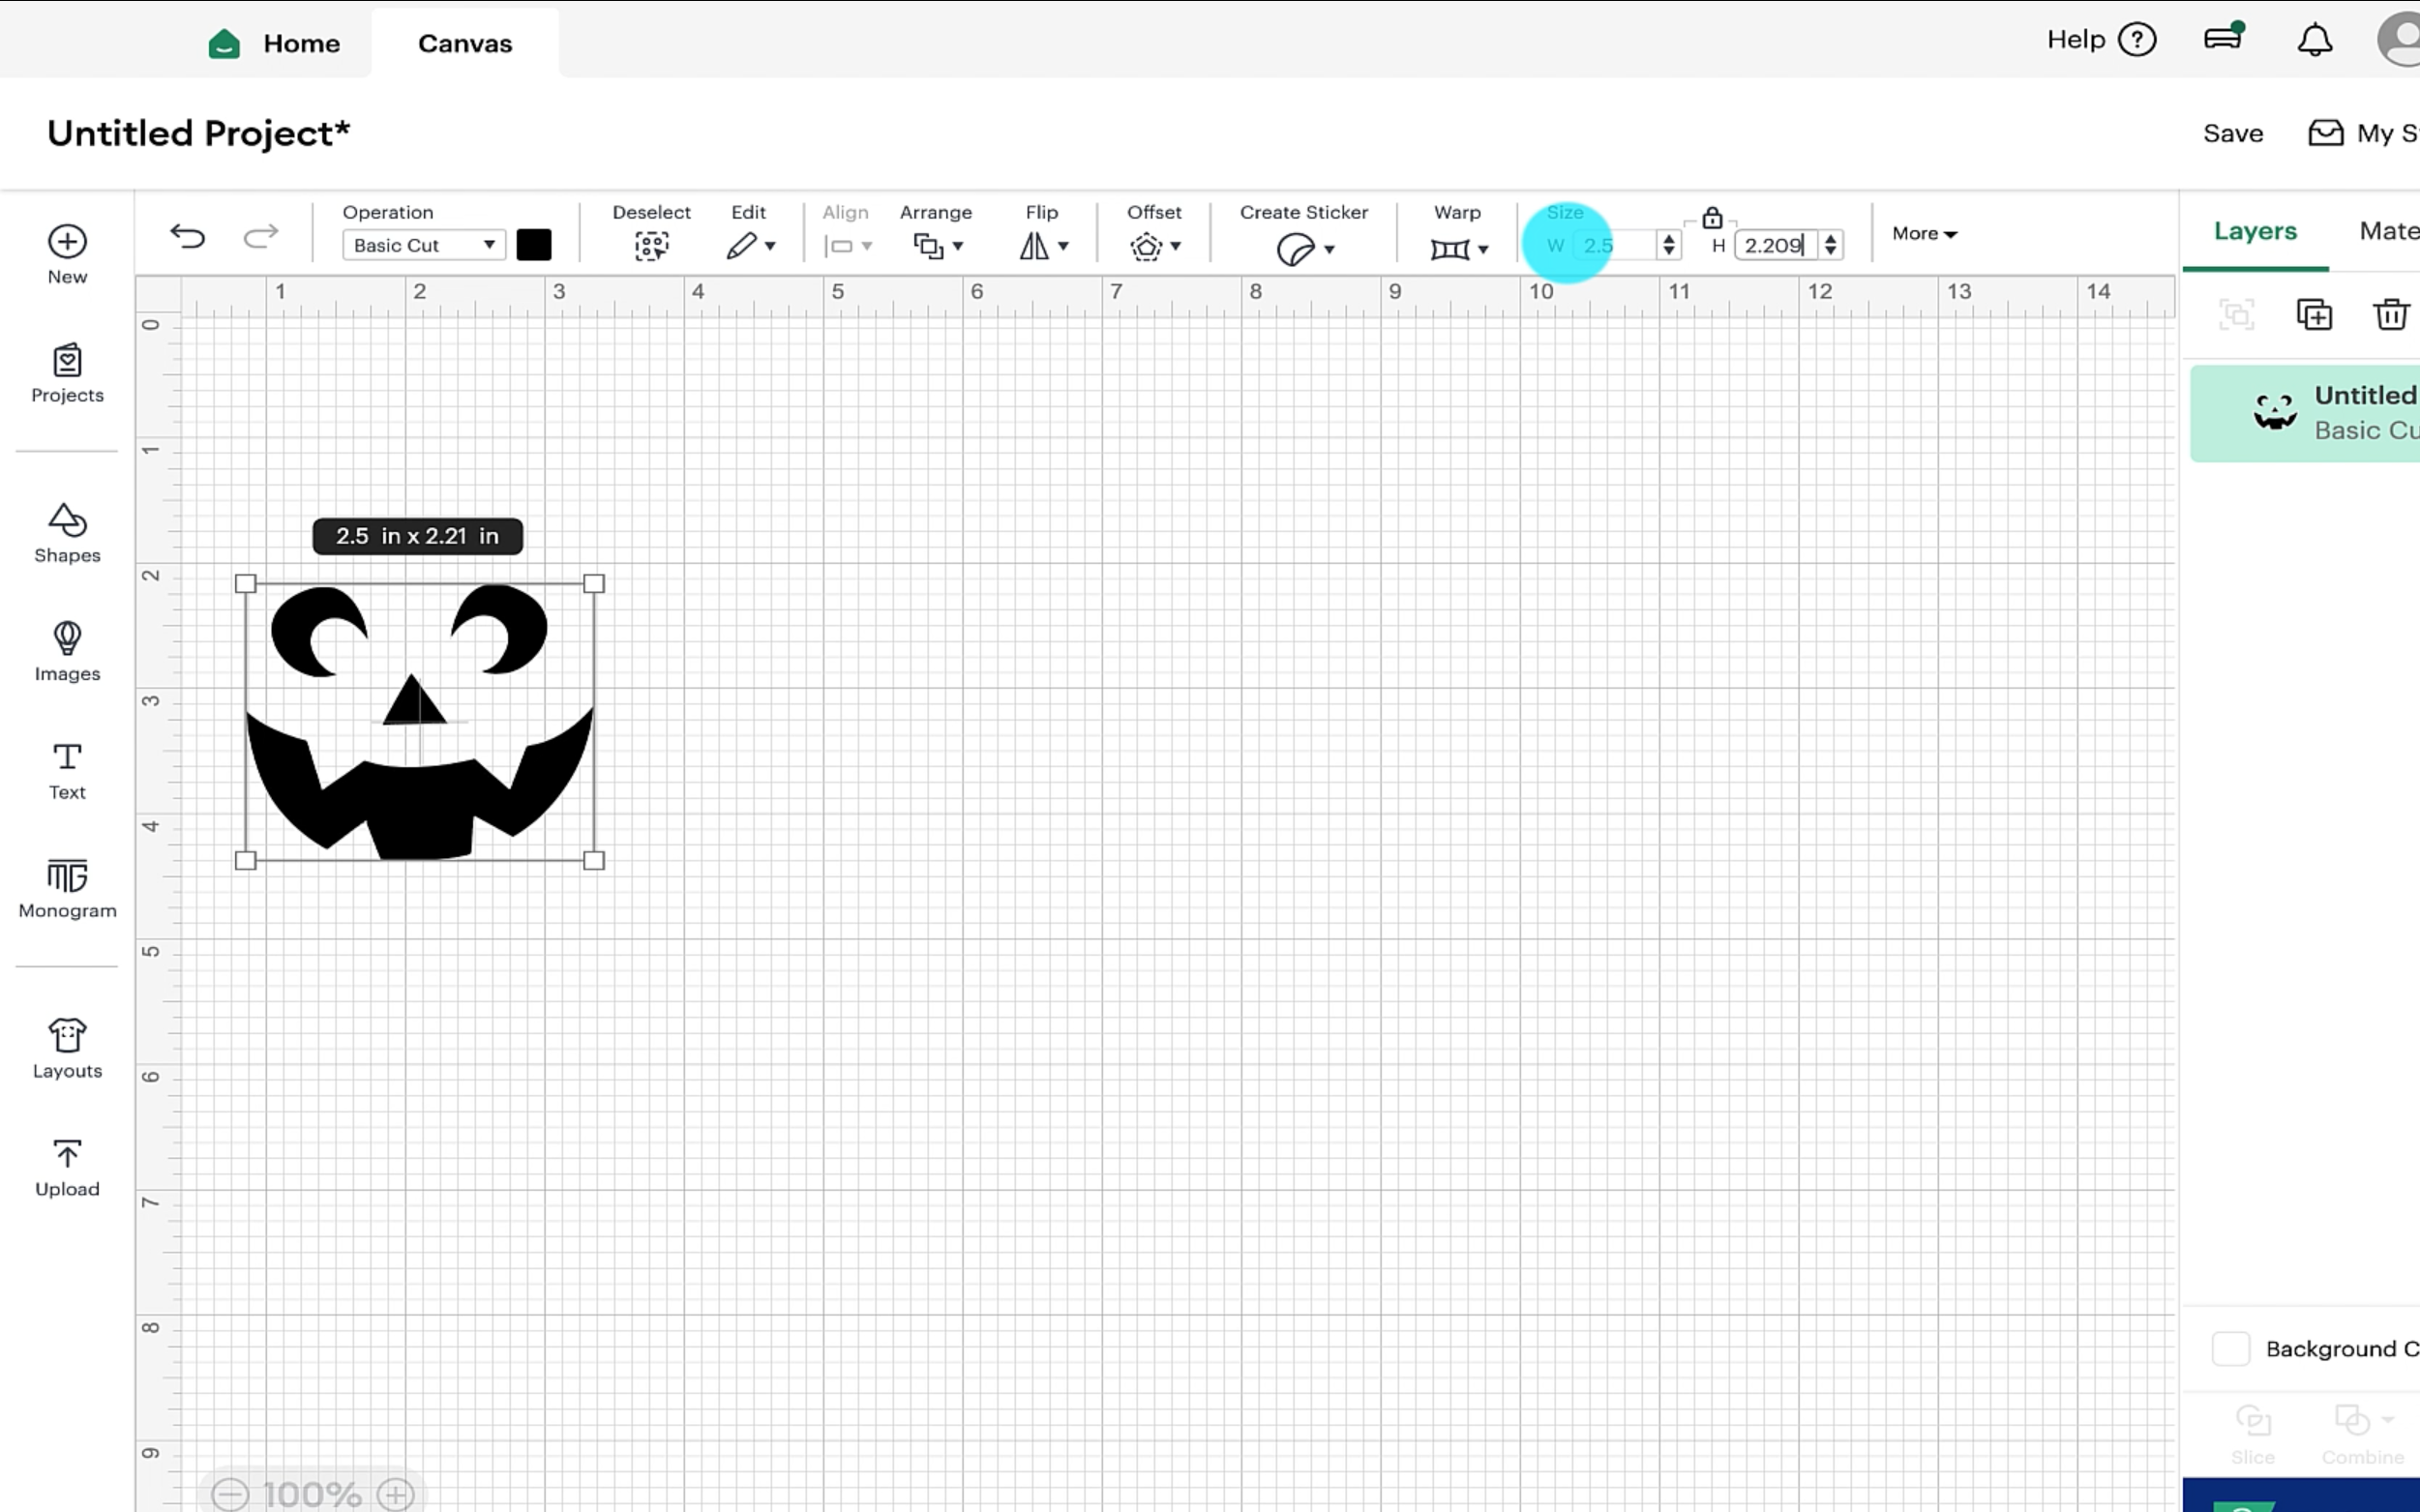
Load up Cricut Design Space. Select uploads and then select upload image. Select the ghost face image that you have downloaded from canva.
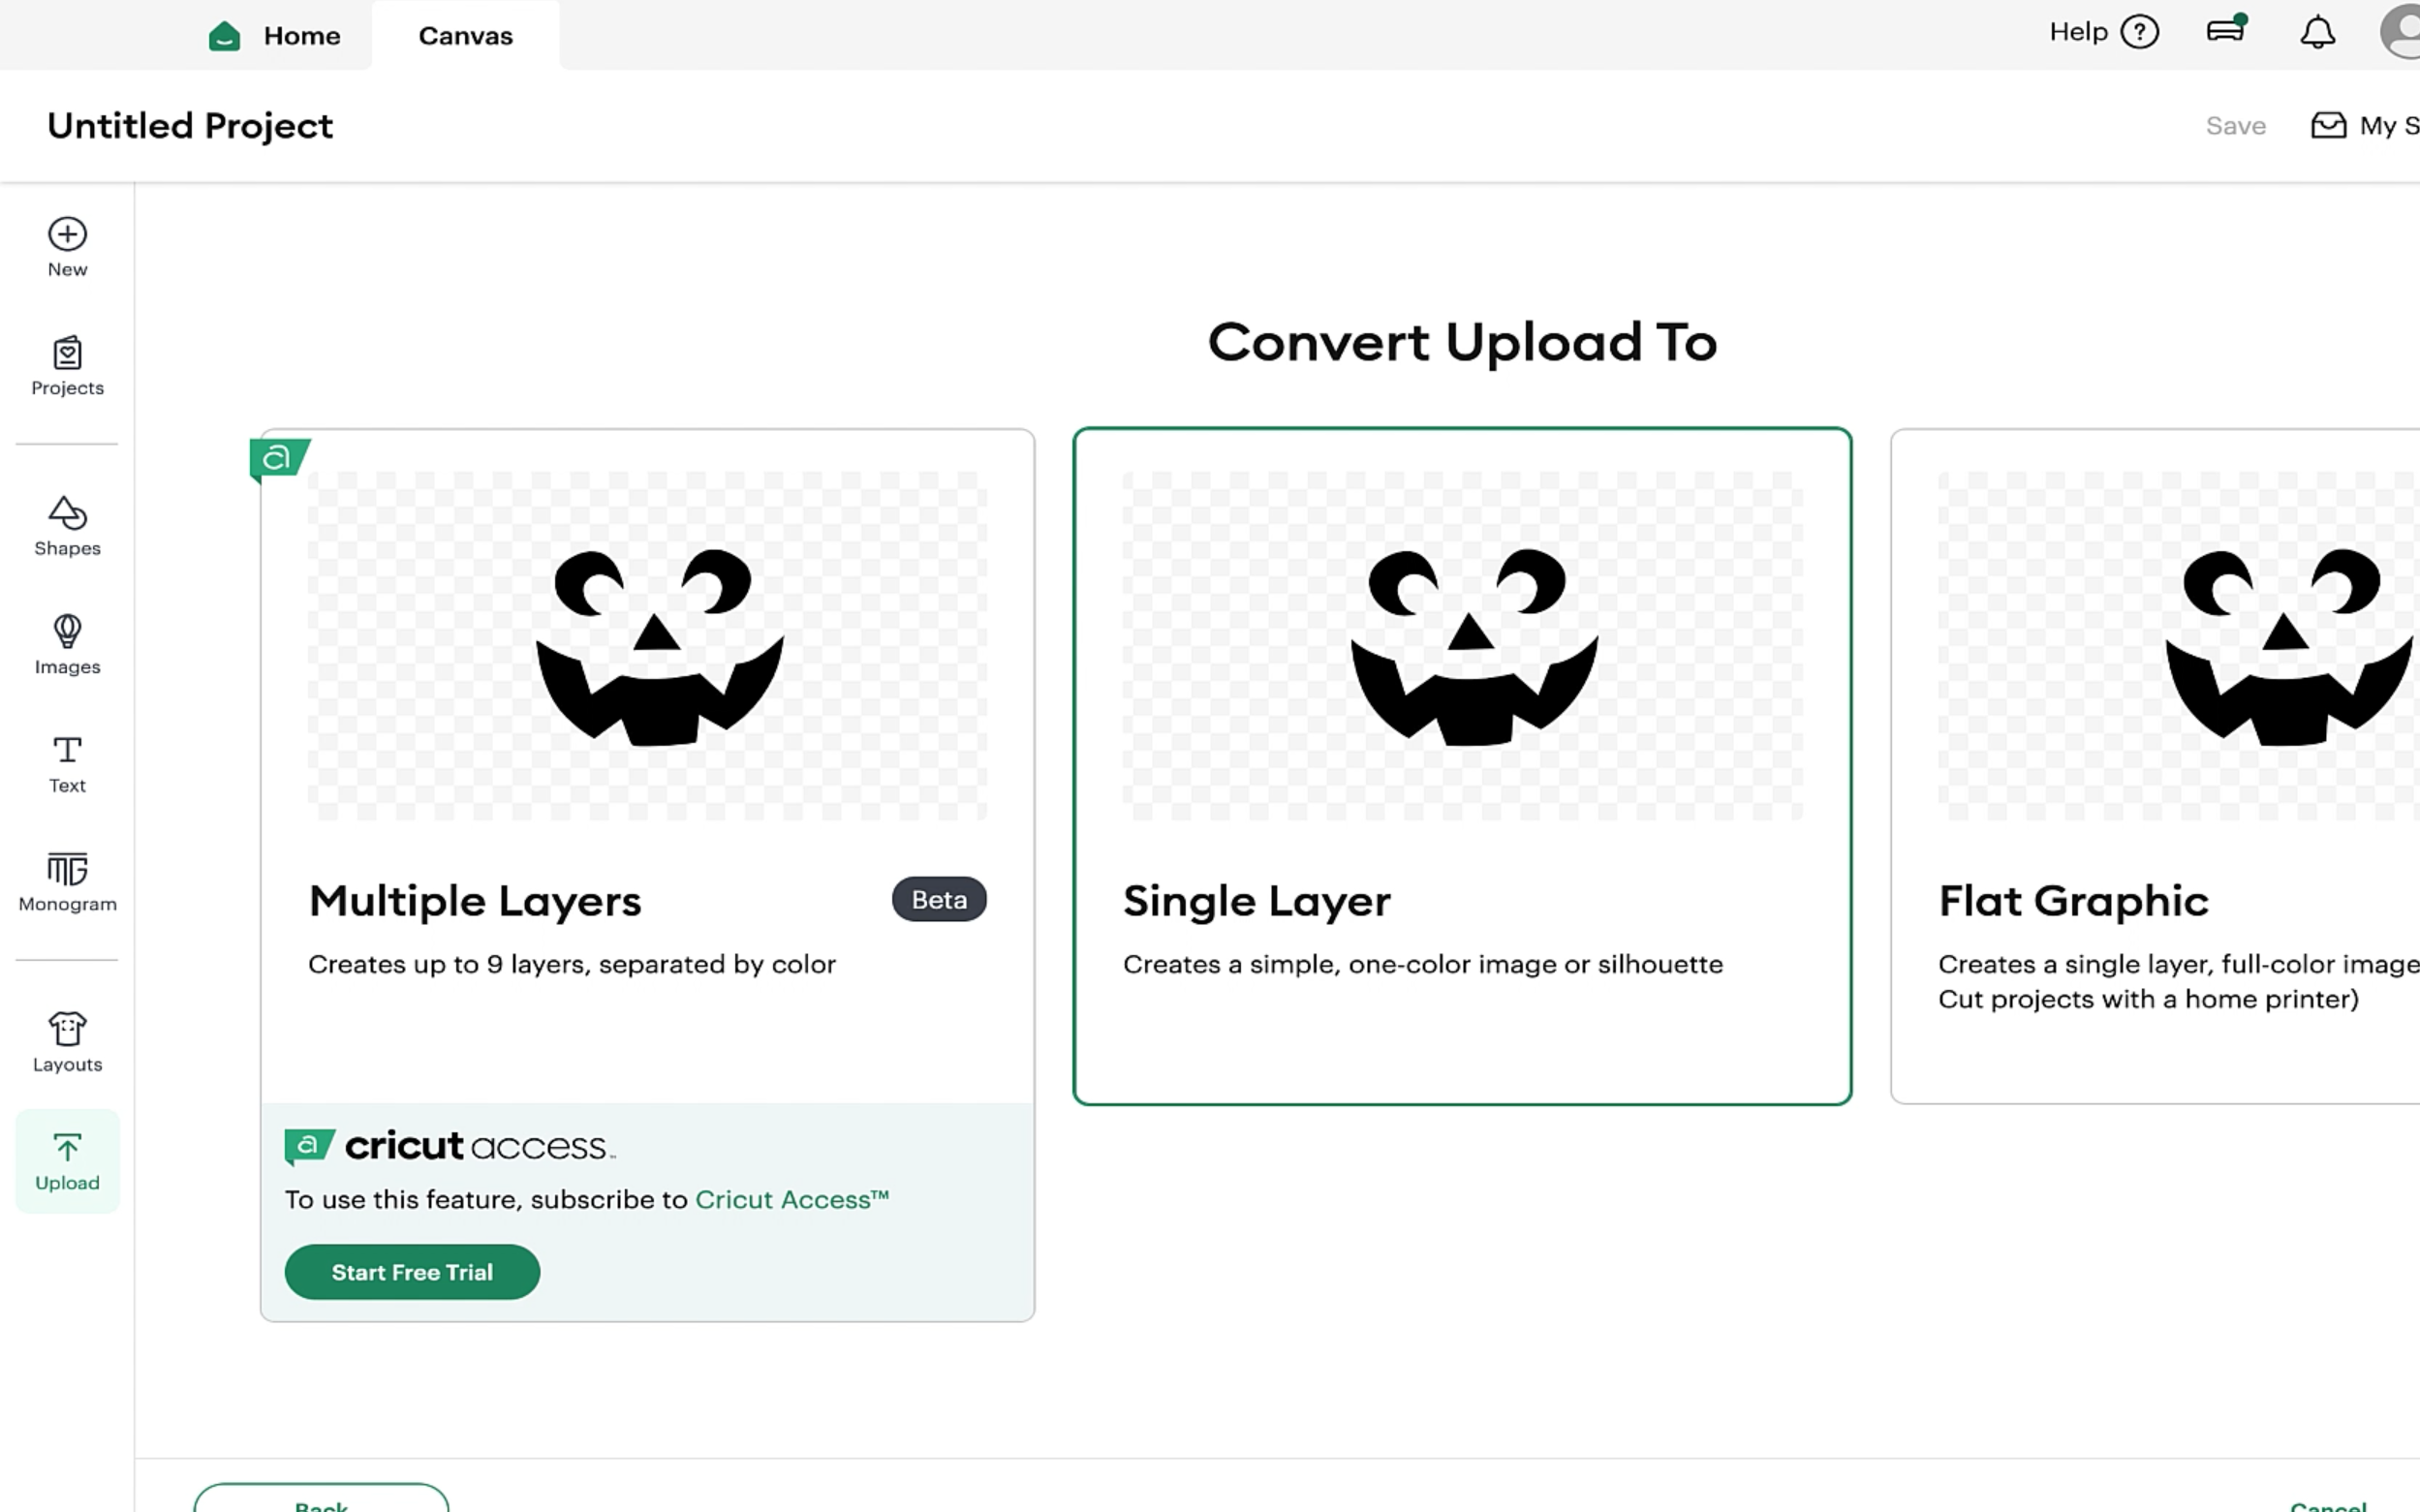
Once it has been uploaded than select single layer and add to canvas. You want it to be a single layer so that cricut will cut out the vinyl.
Step 3
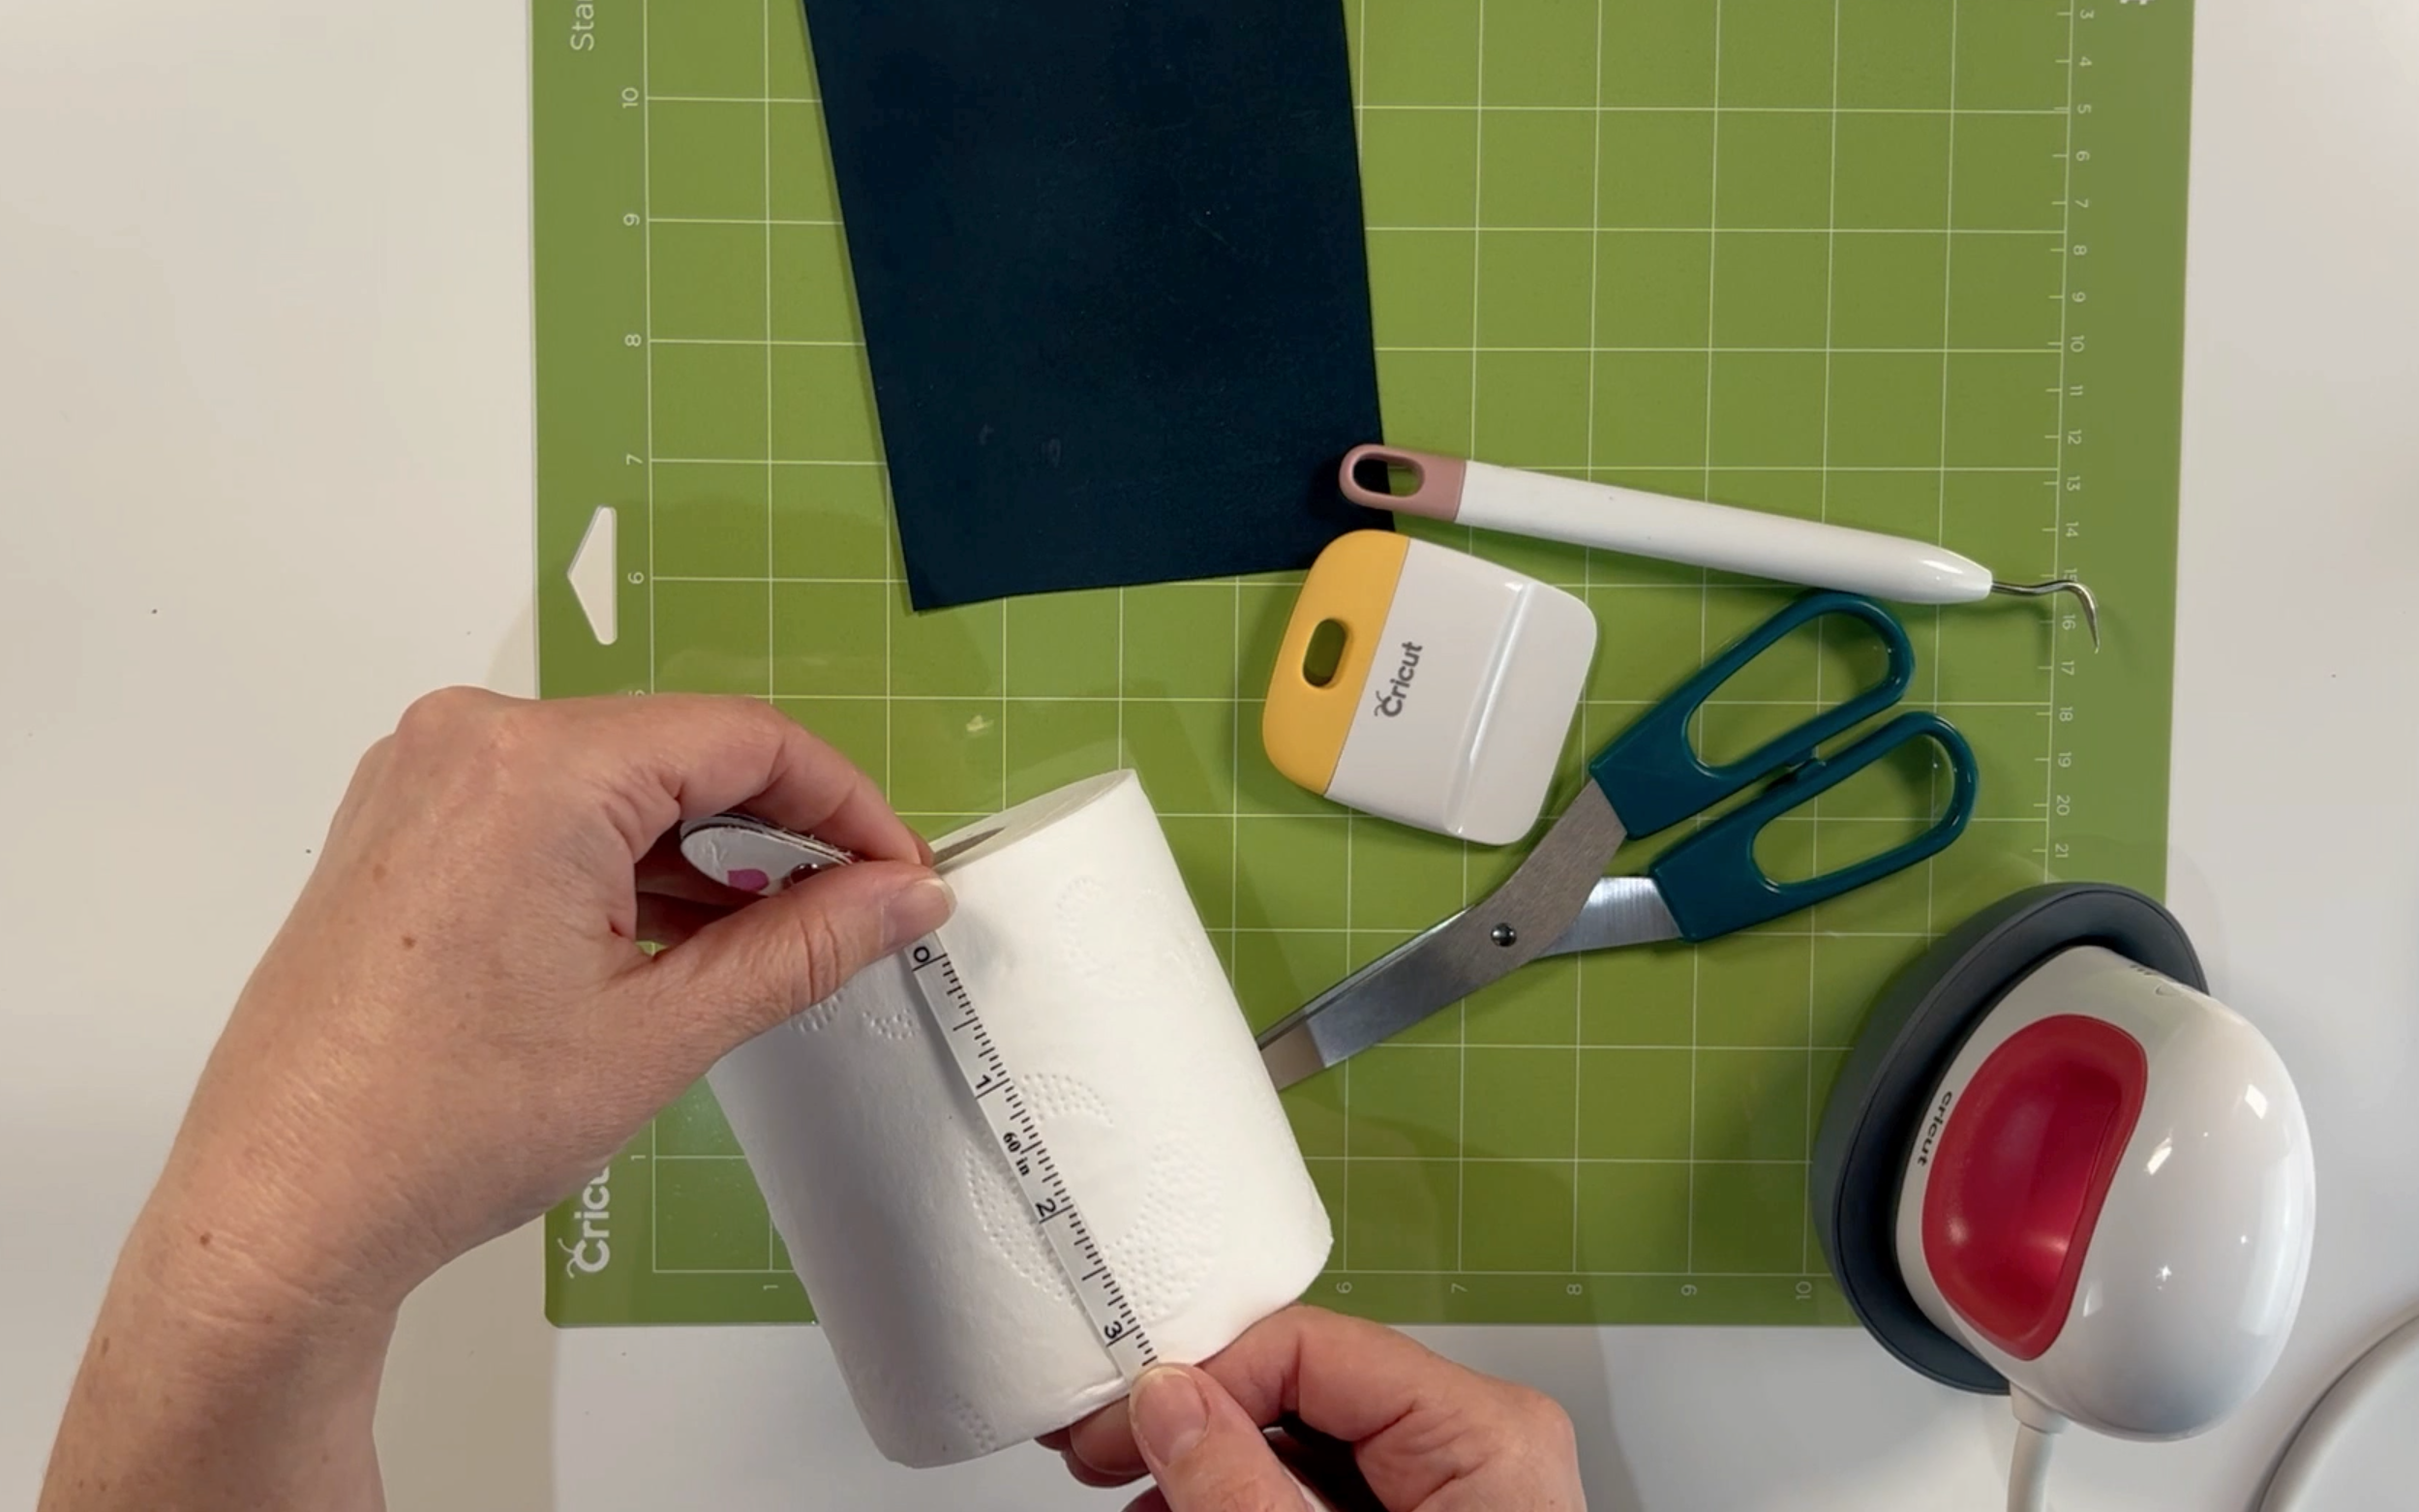
Measure the front of the toilet roll, this will allow you to decide what size you want your ghost face to be.
Back in Cricut design space change the size of the design. You can find the size boxes along the top of the canvas. This will make you ghost face the correct size to fit on the toilet roll.
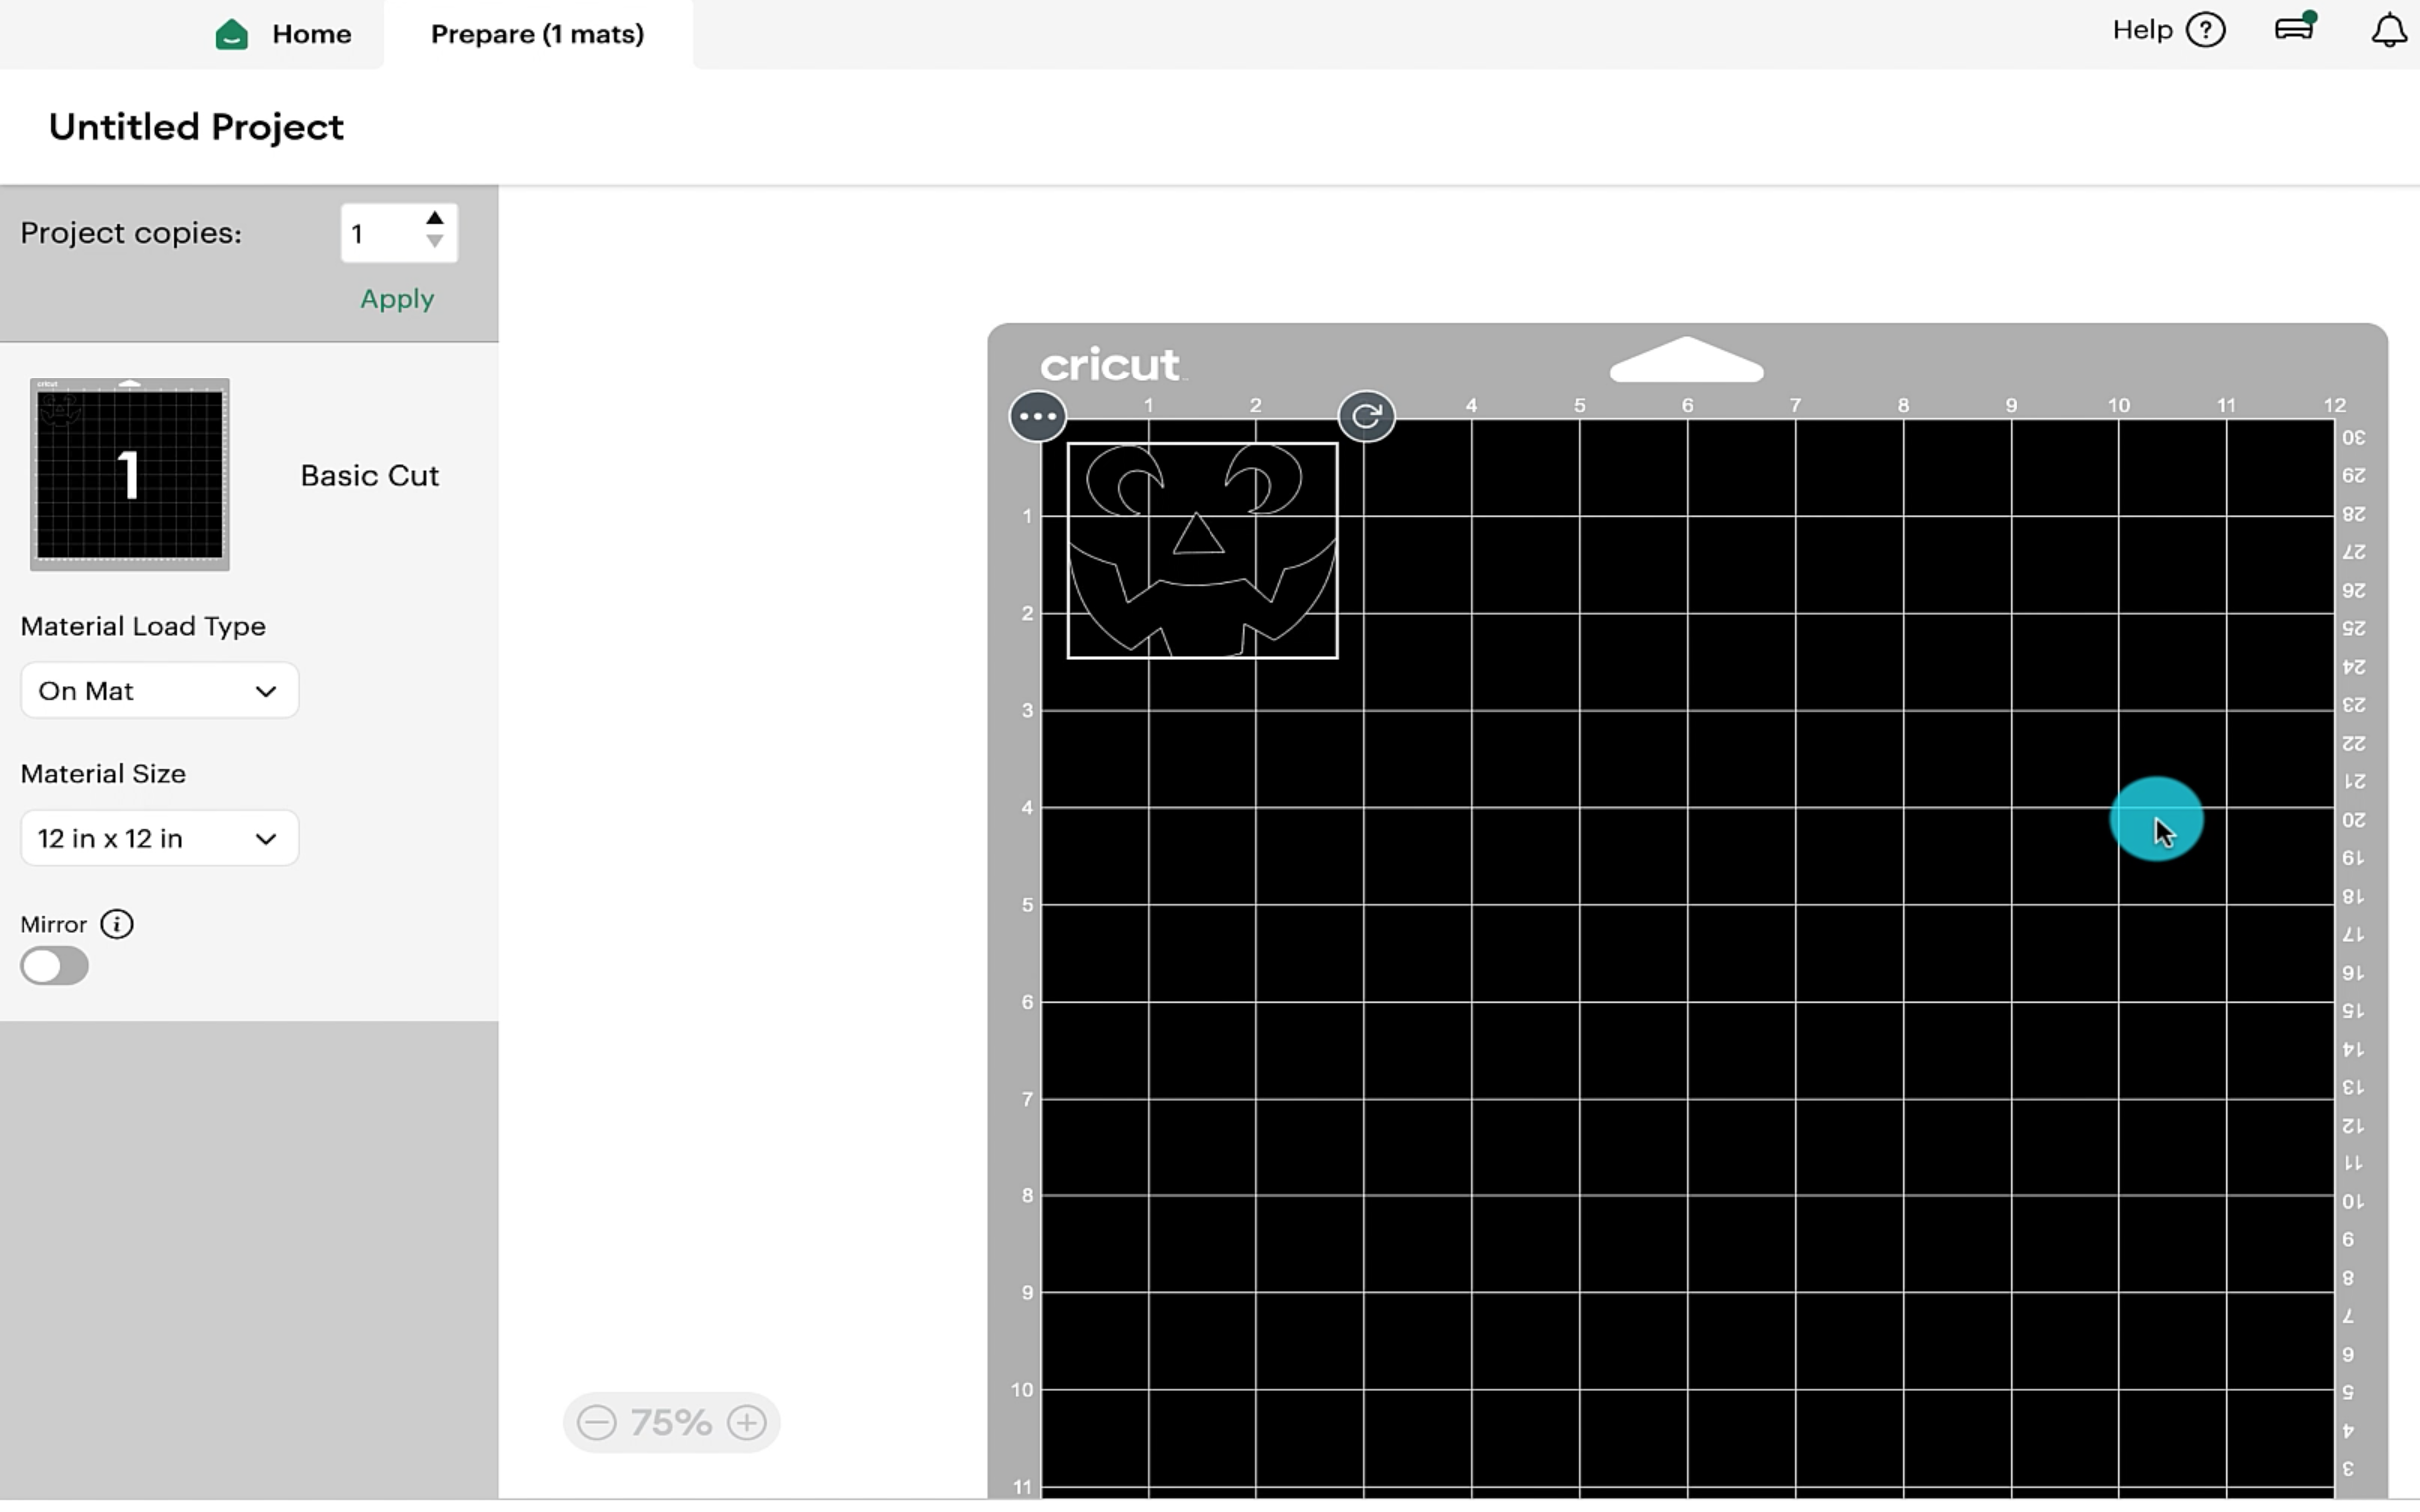
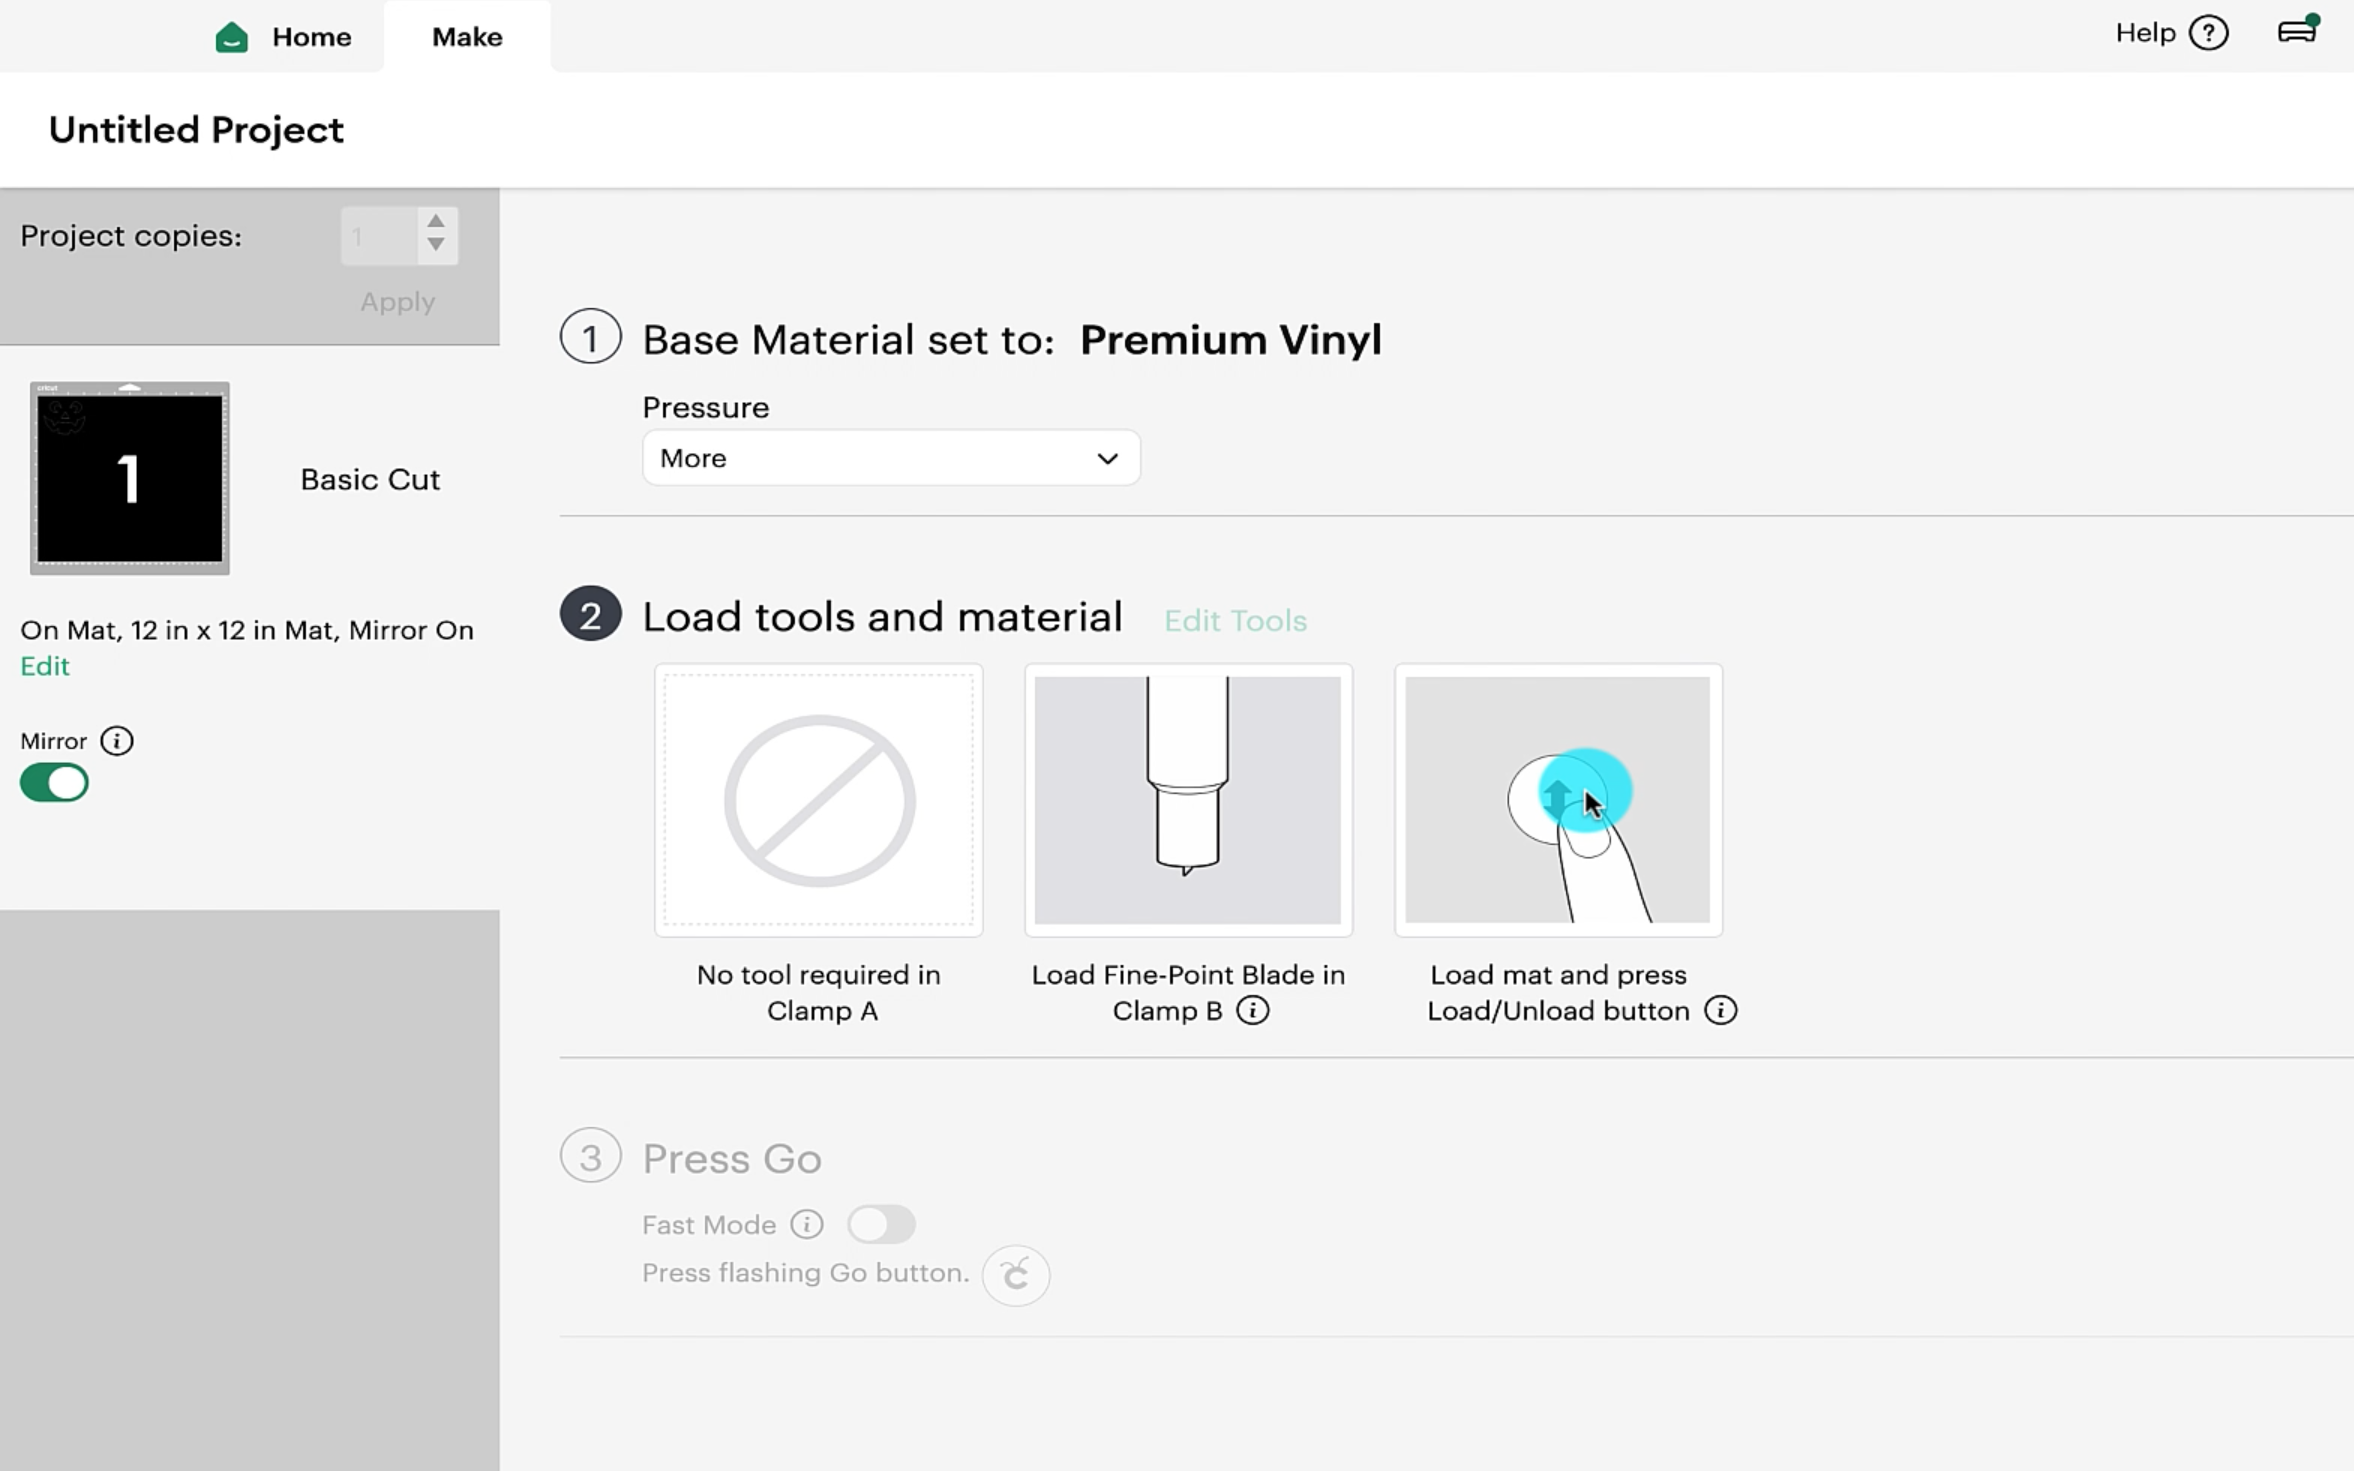
When you are happy with your design and the size, click on make it. As you are using Heat Transfer Vinyl remember to mirror your image.
Select the material that you want to use. I like to use the premium vinyl setting as i find this cuts out really well for me.
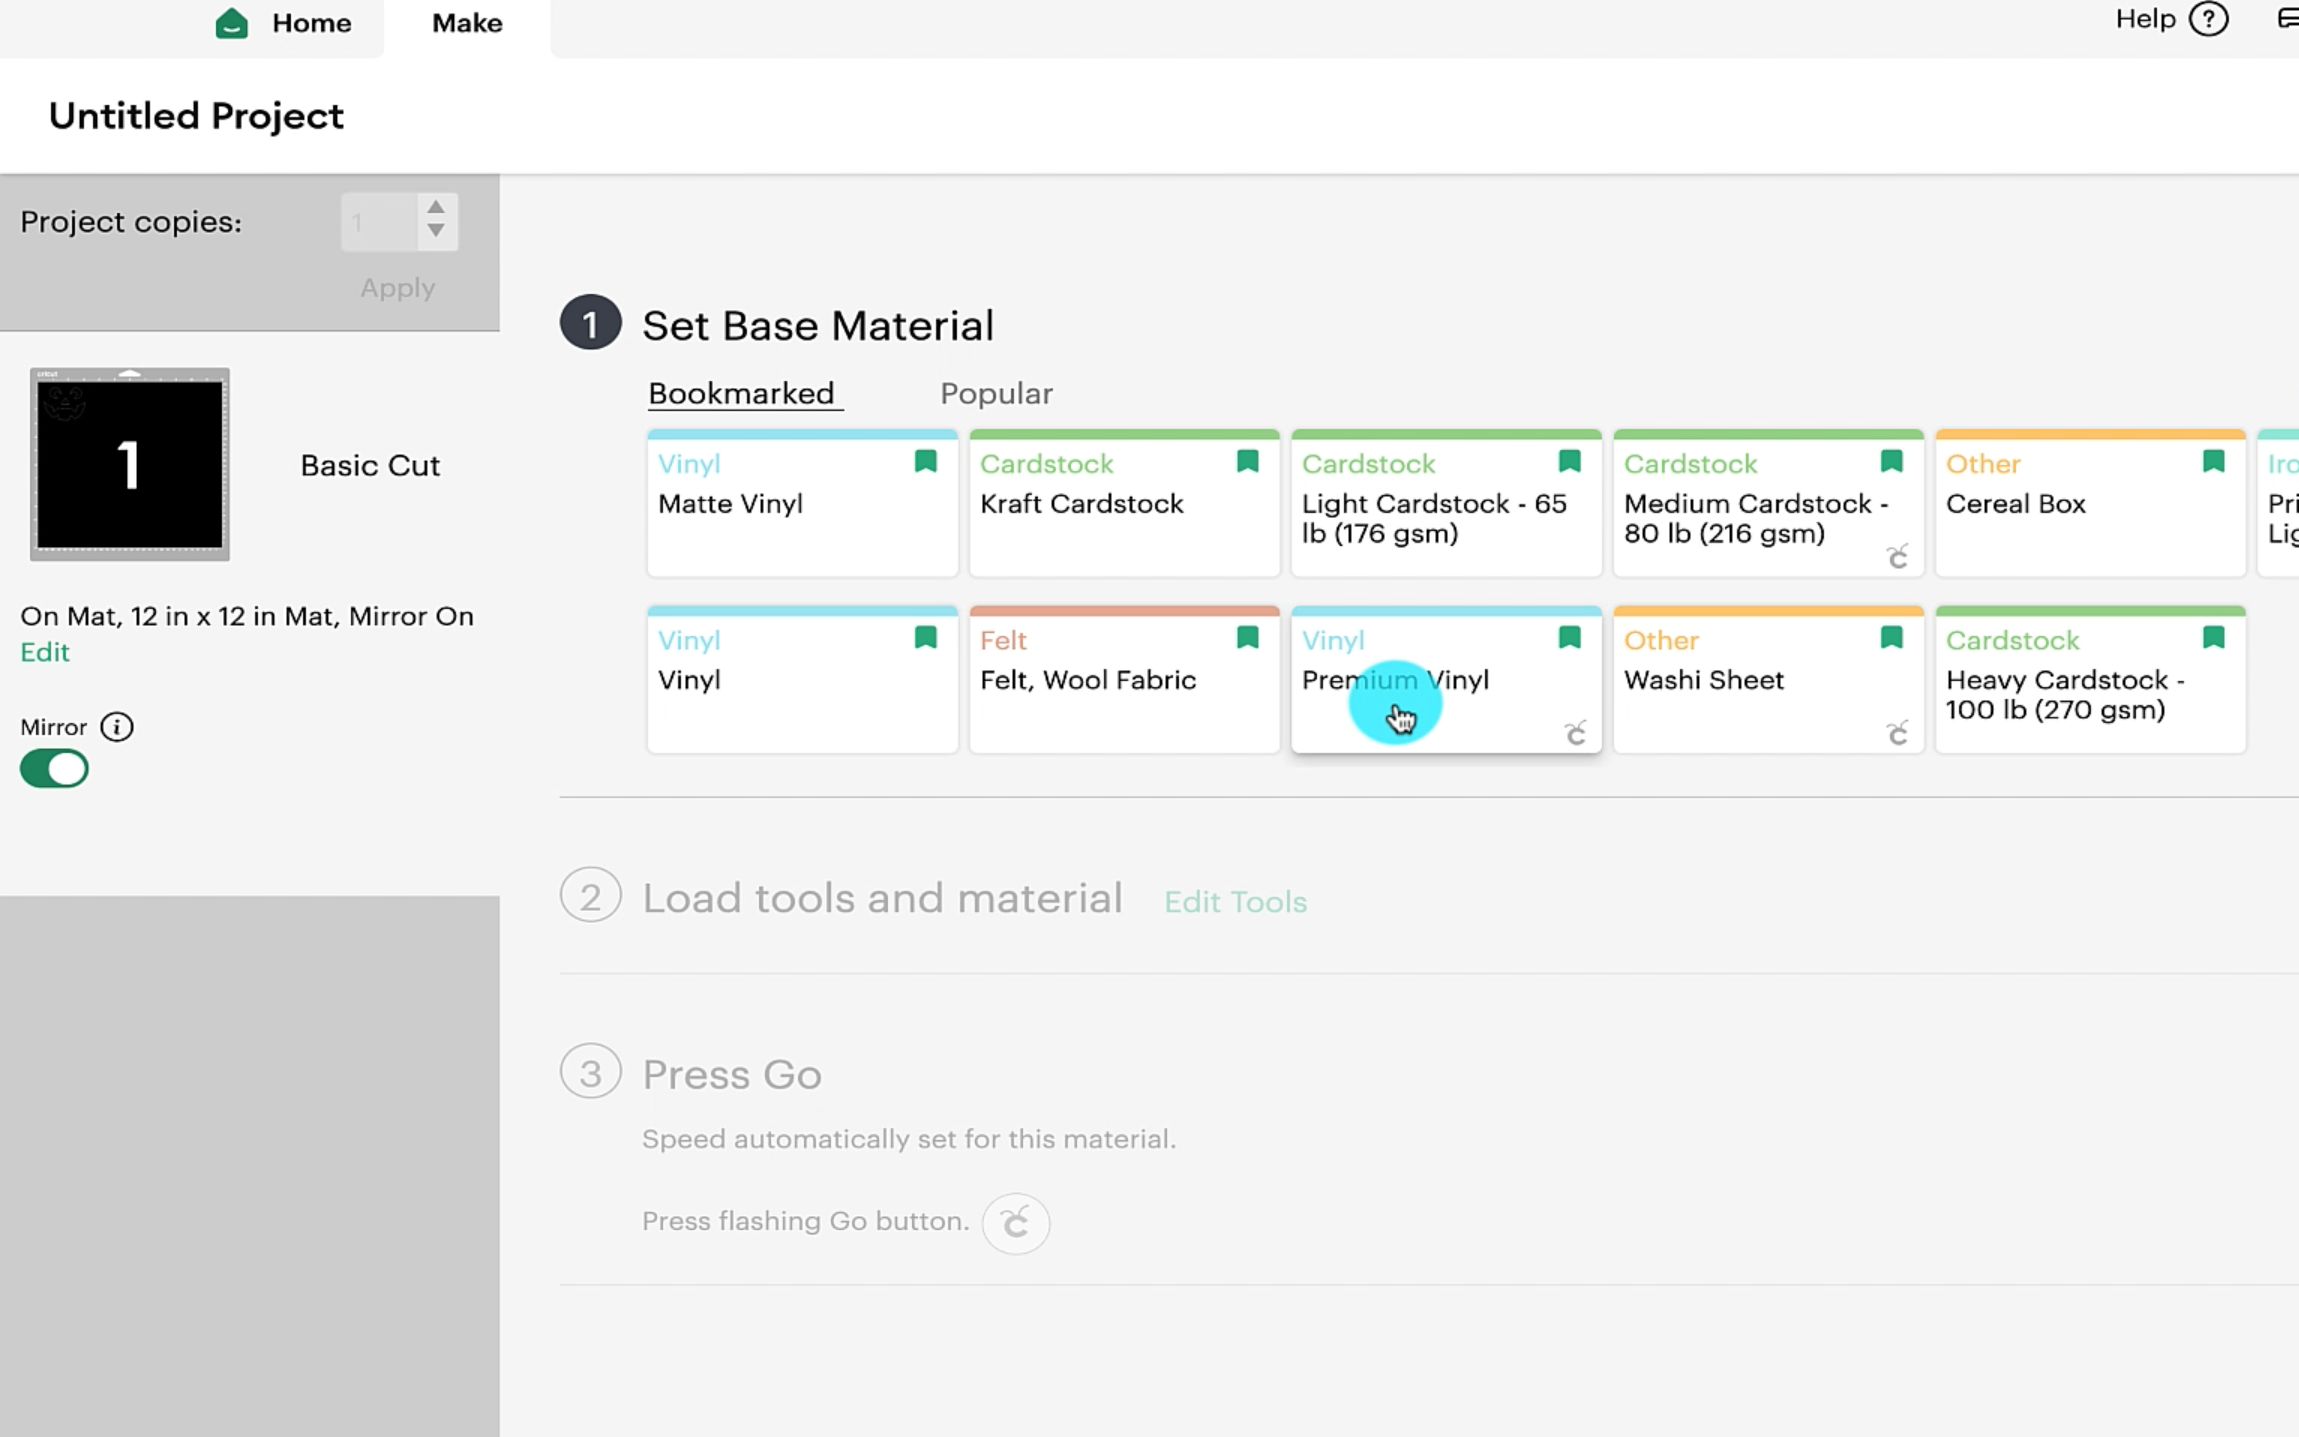
I always like to set the pressure to be more, but choose the best option for your machine.
Step 4
Prepare the cutting mat by placing the heat transfer vinyl in the top corner. Make sure that you place the carrier sheet down onto the mat.
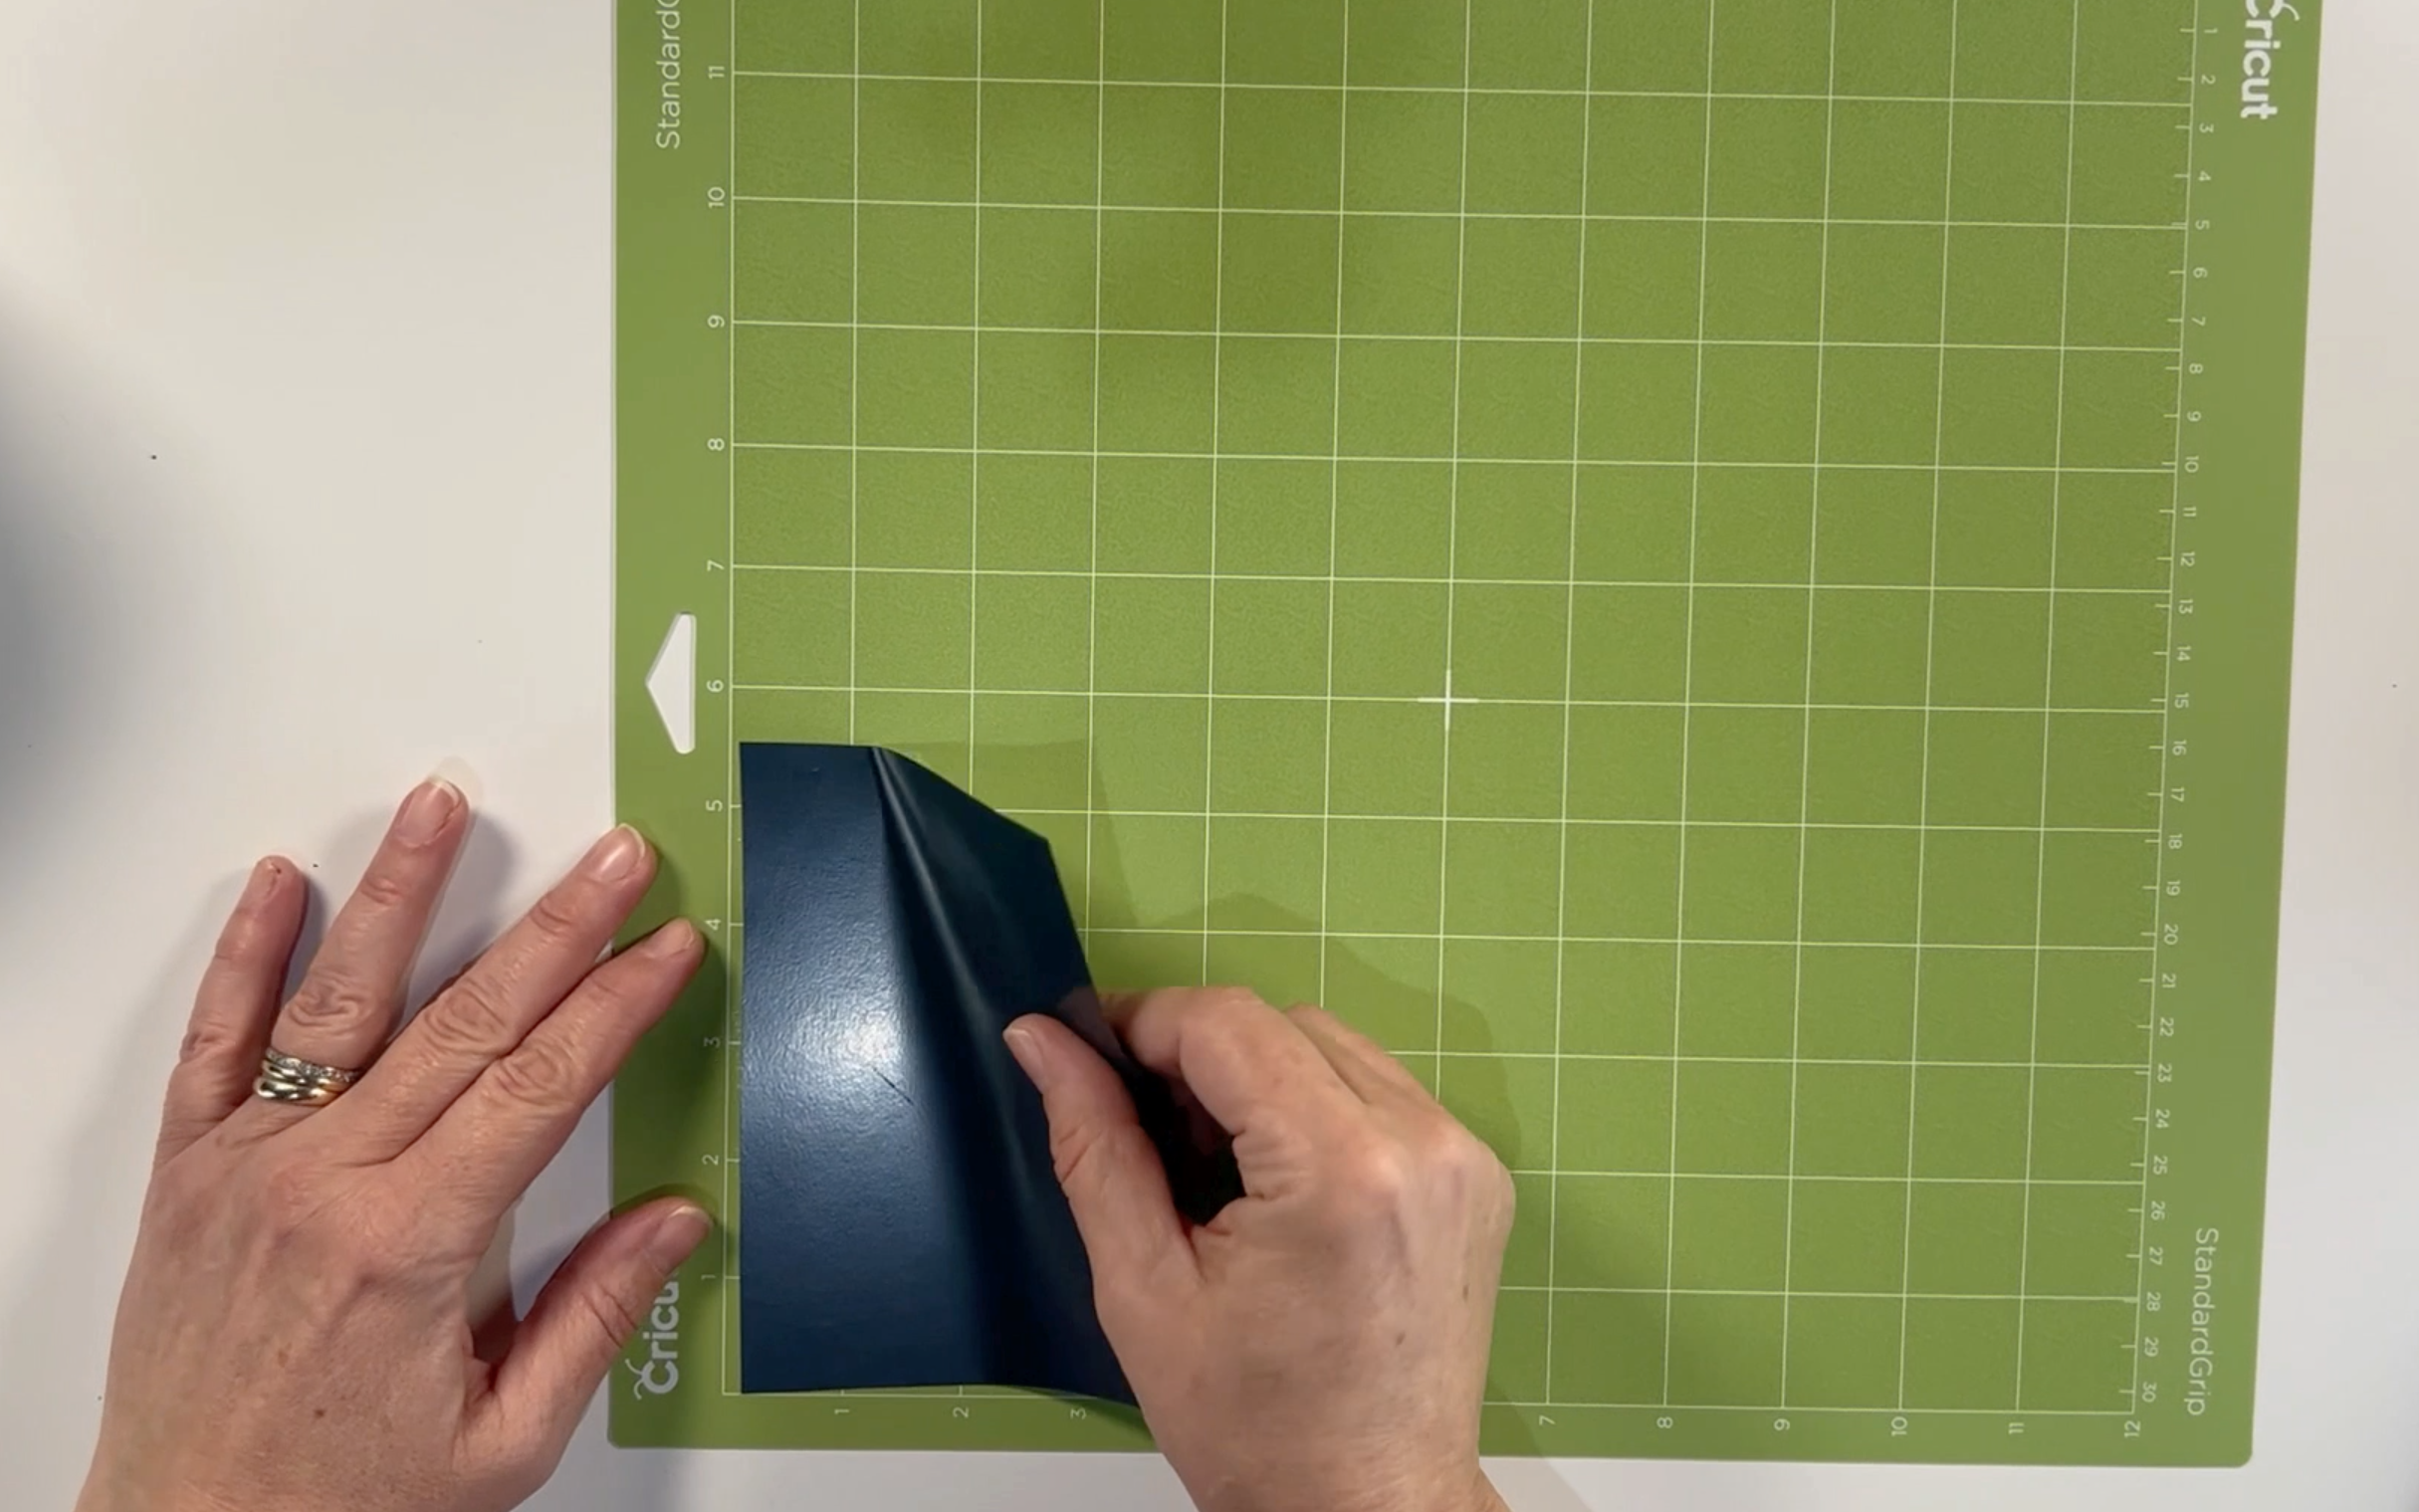
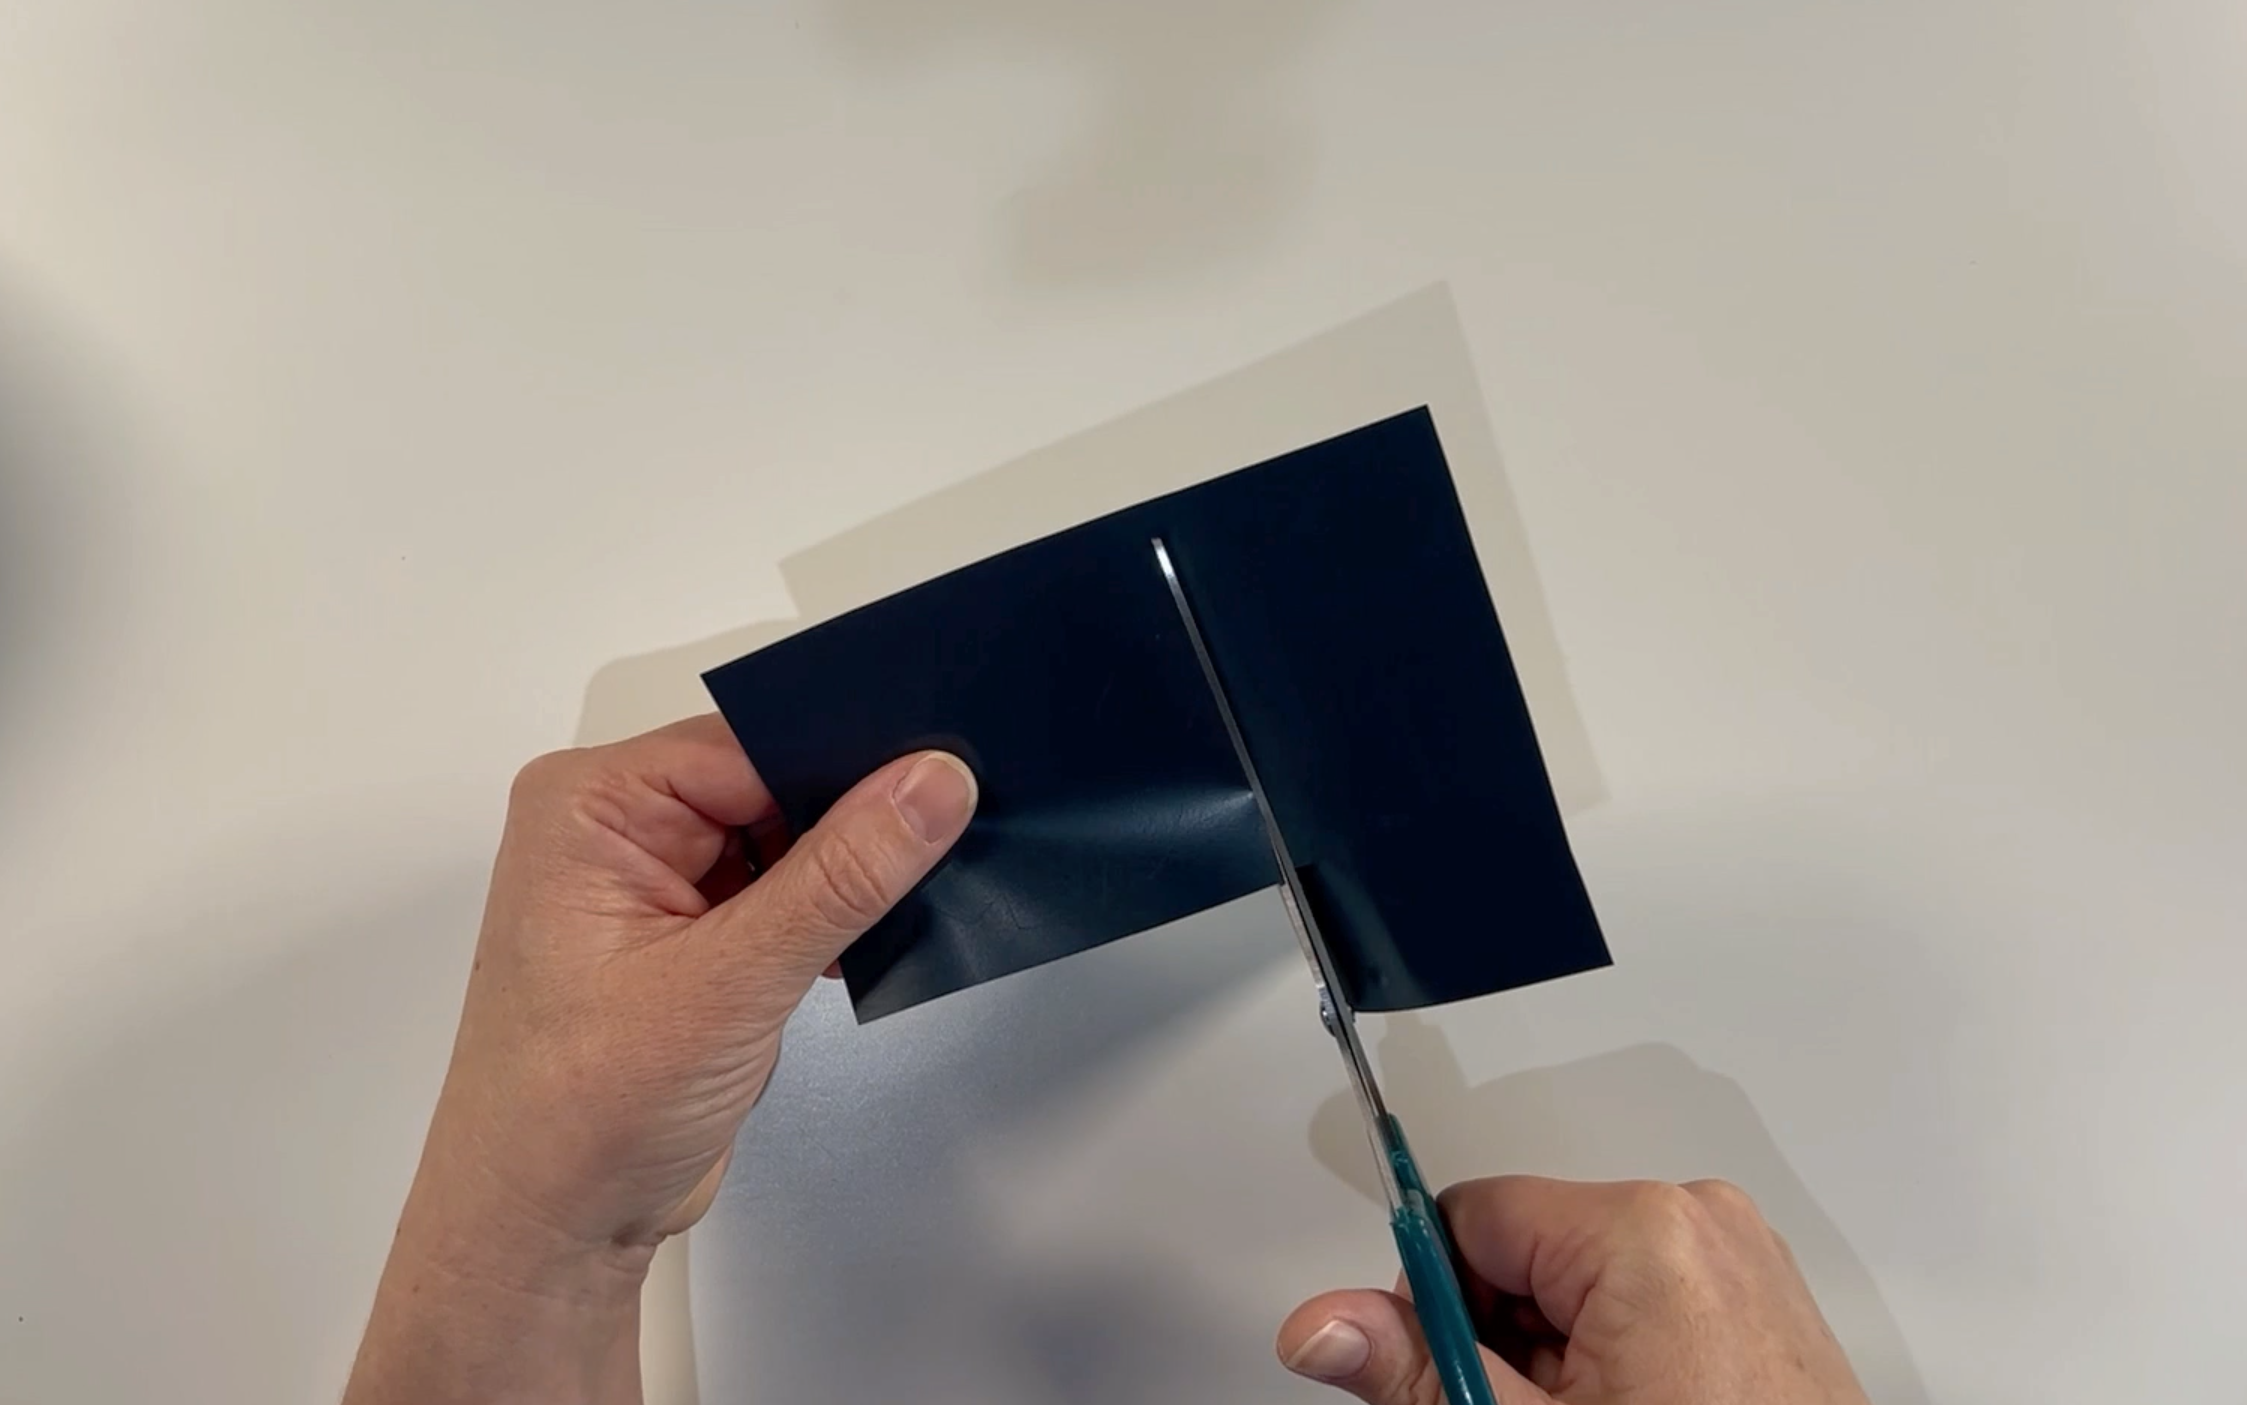
Pop the mat into your cricut machine and cut the vinyl. Once the vinyl has been cut take some scissors and trim around the edge of the design. This will save time when you are weeding.
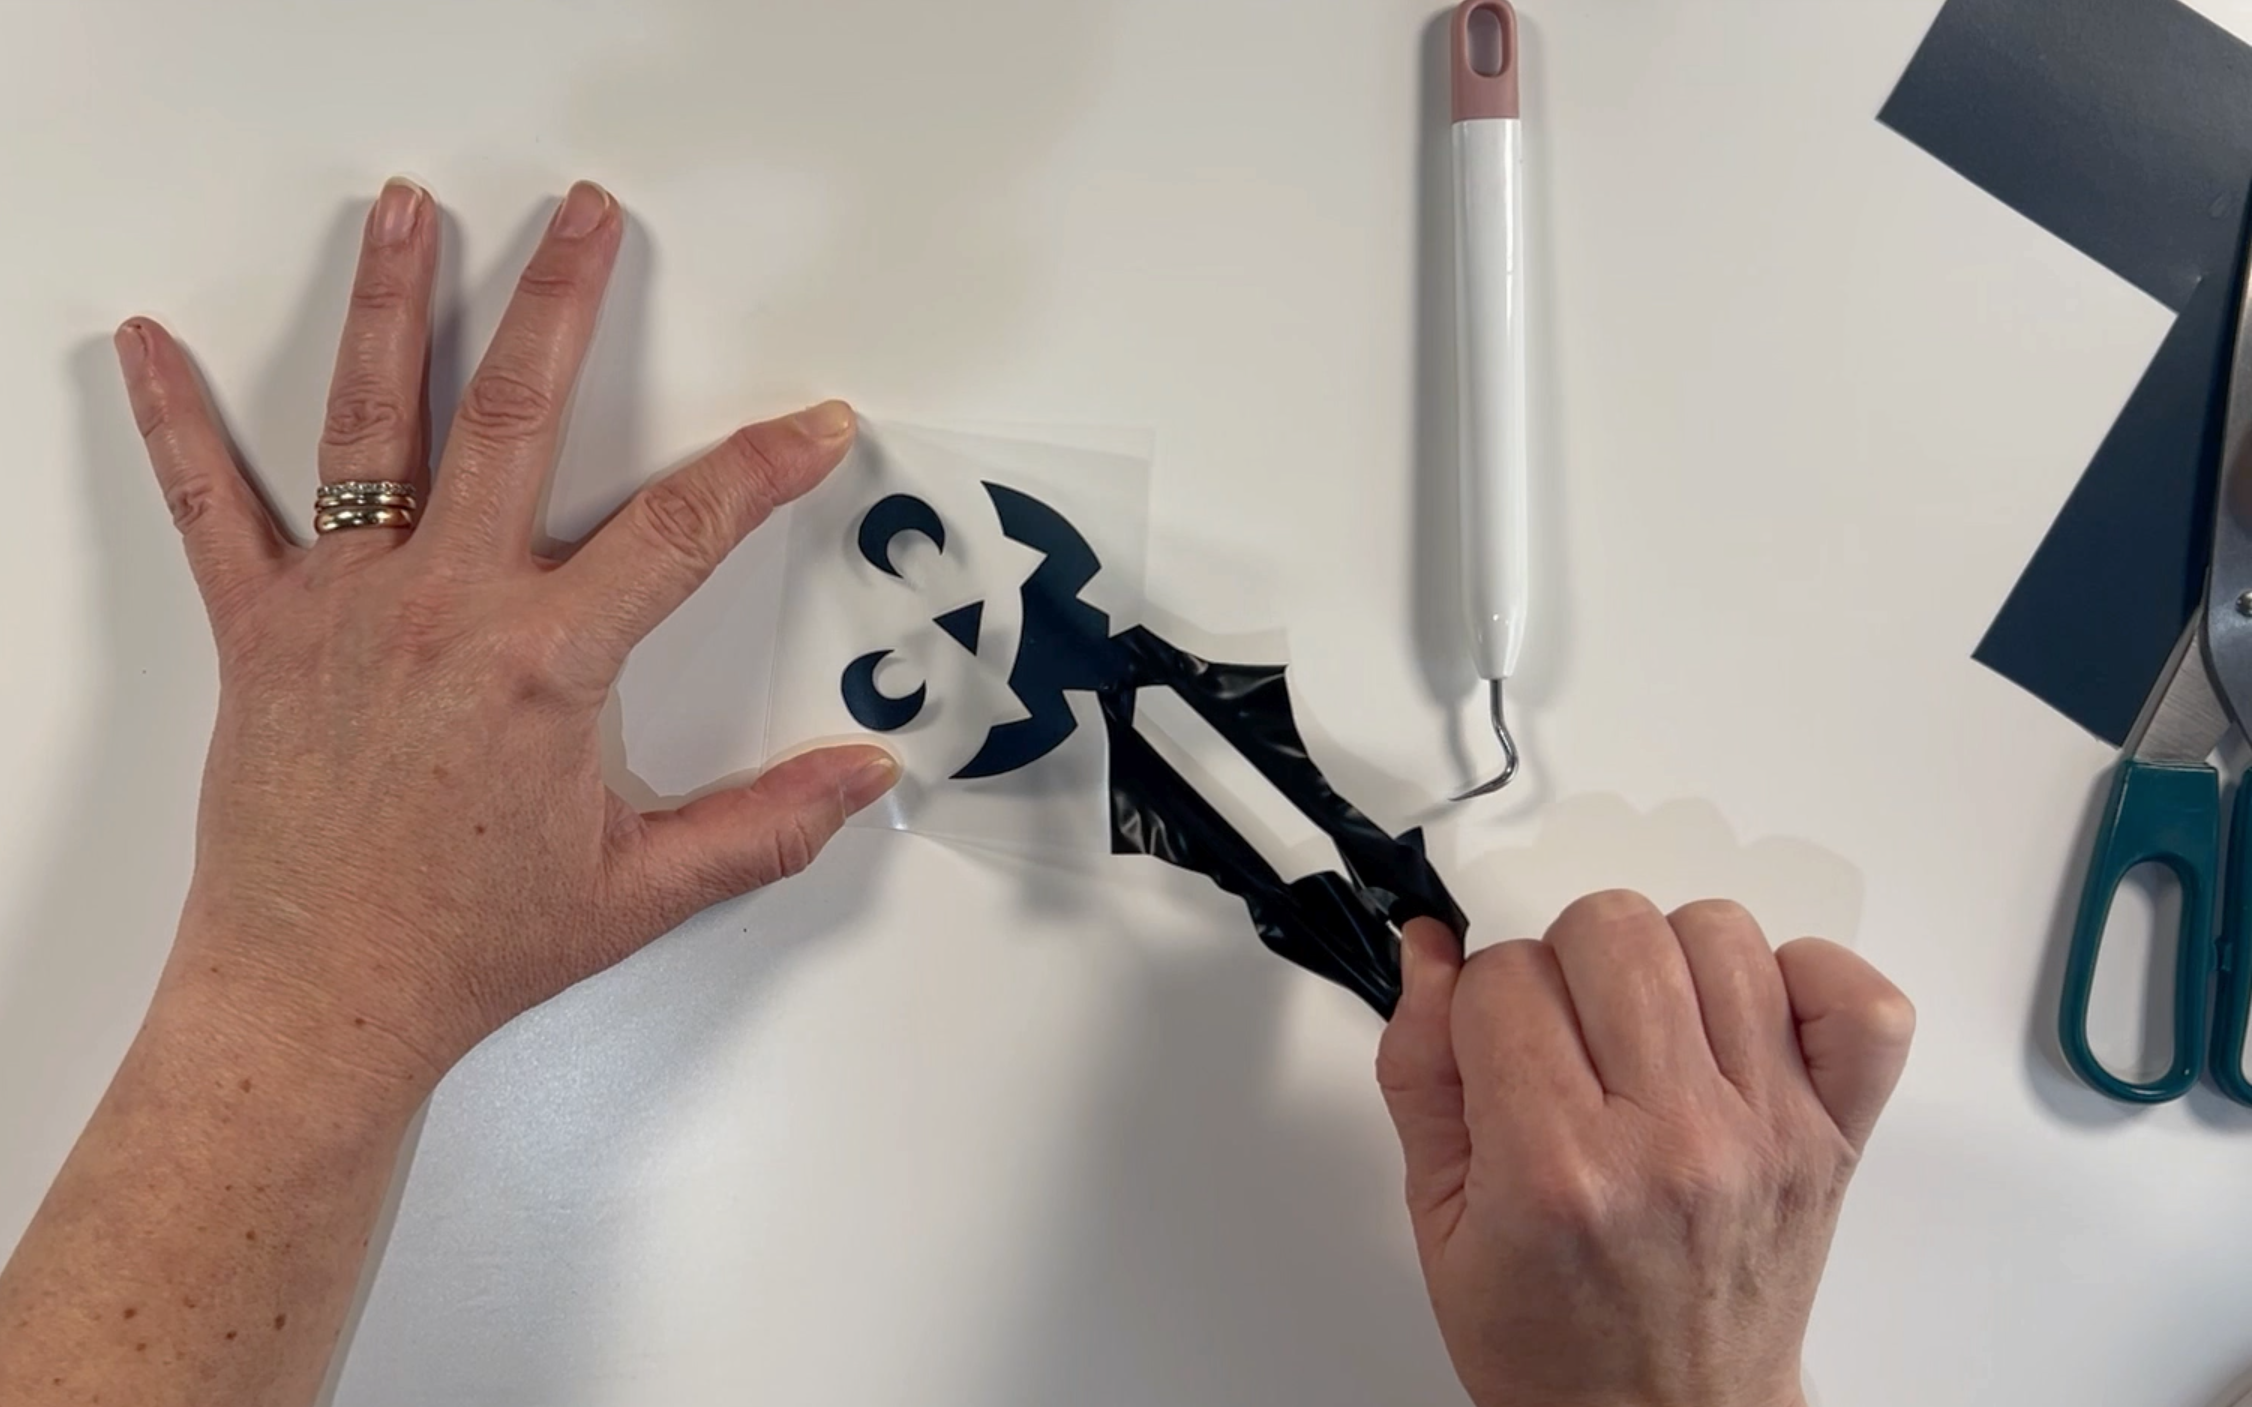
Weed all the design to remove all the excess vinyl.
Step 5
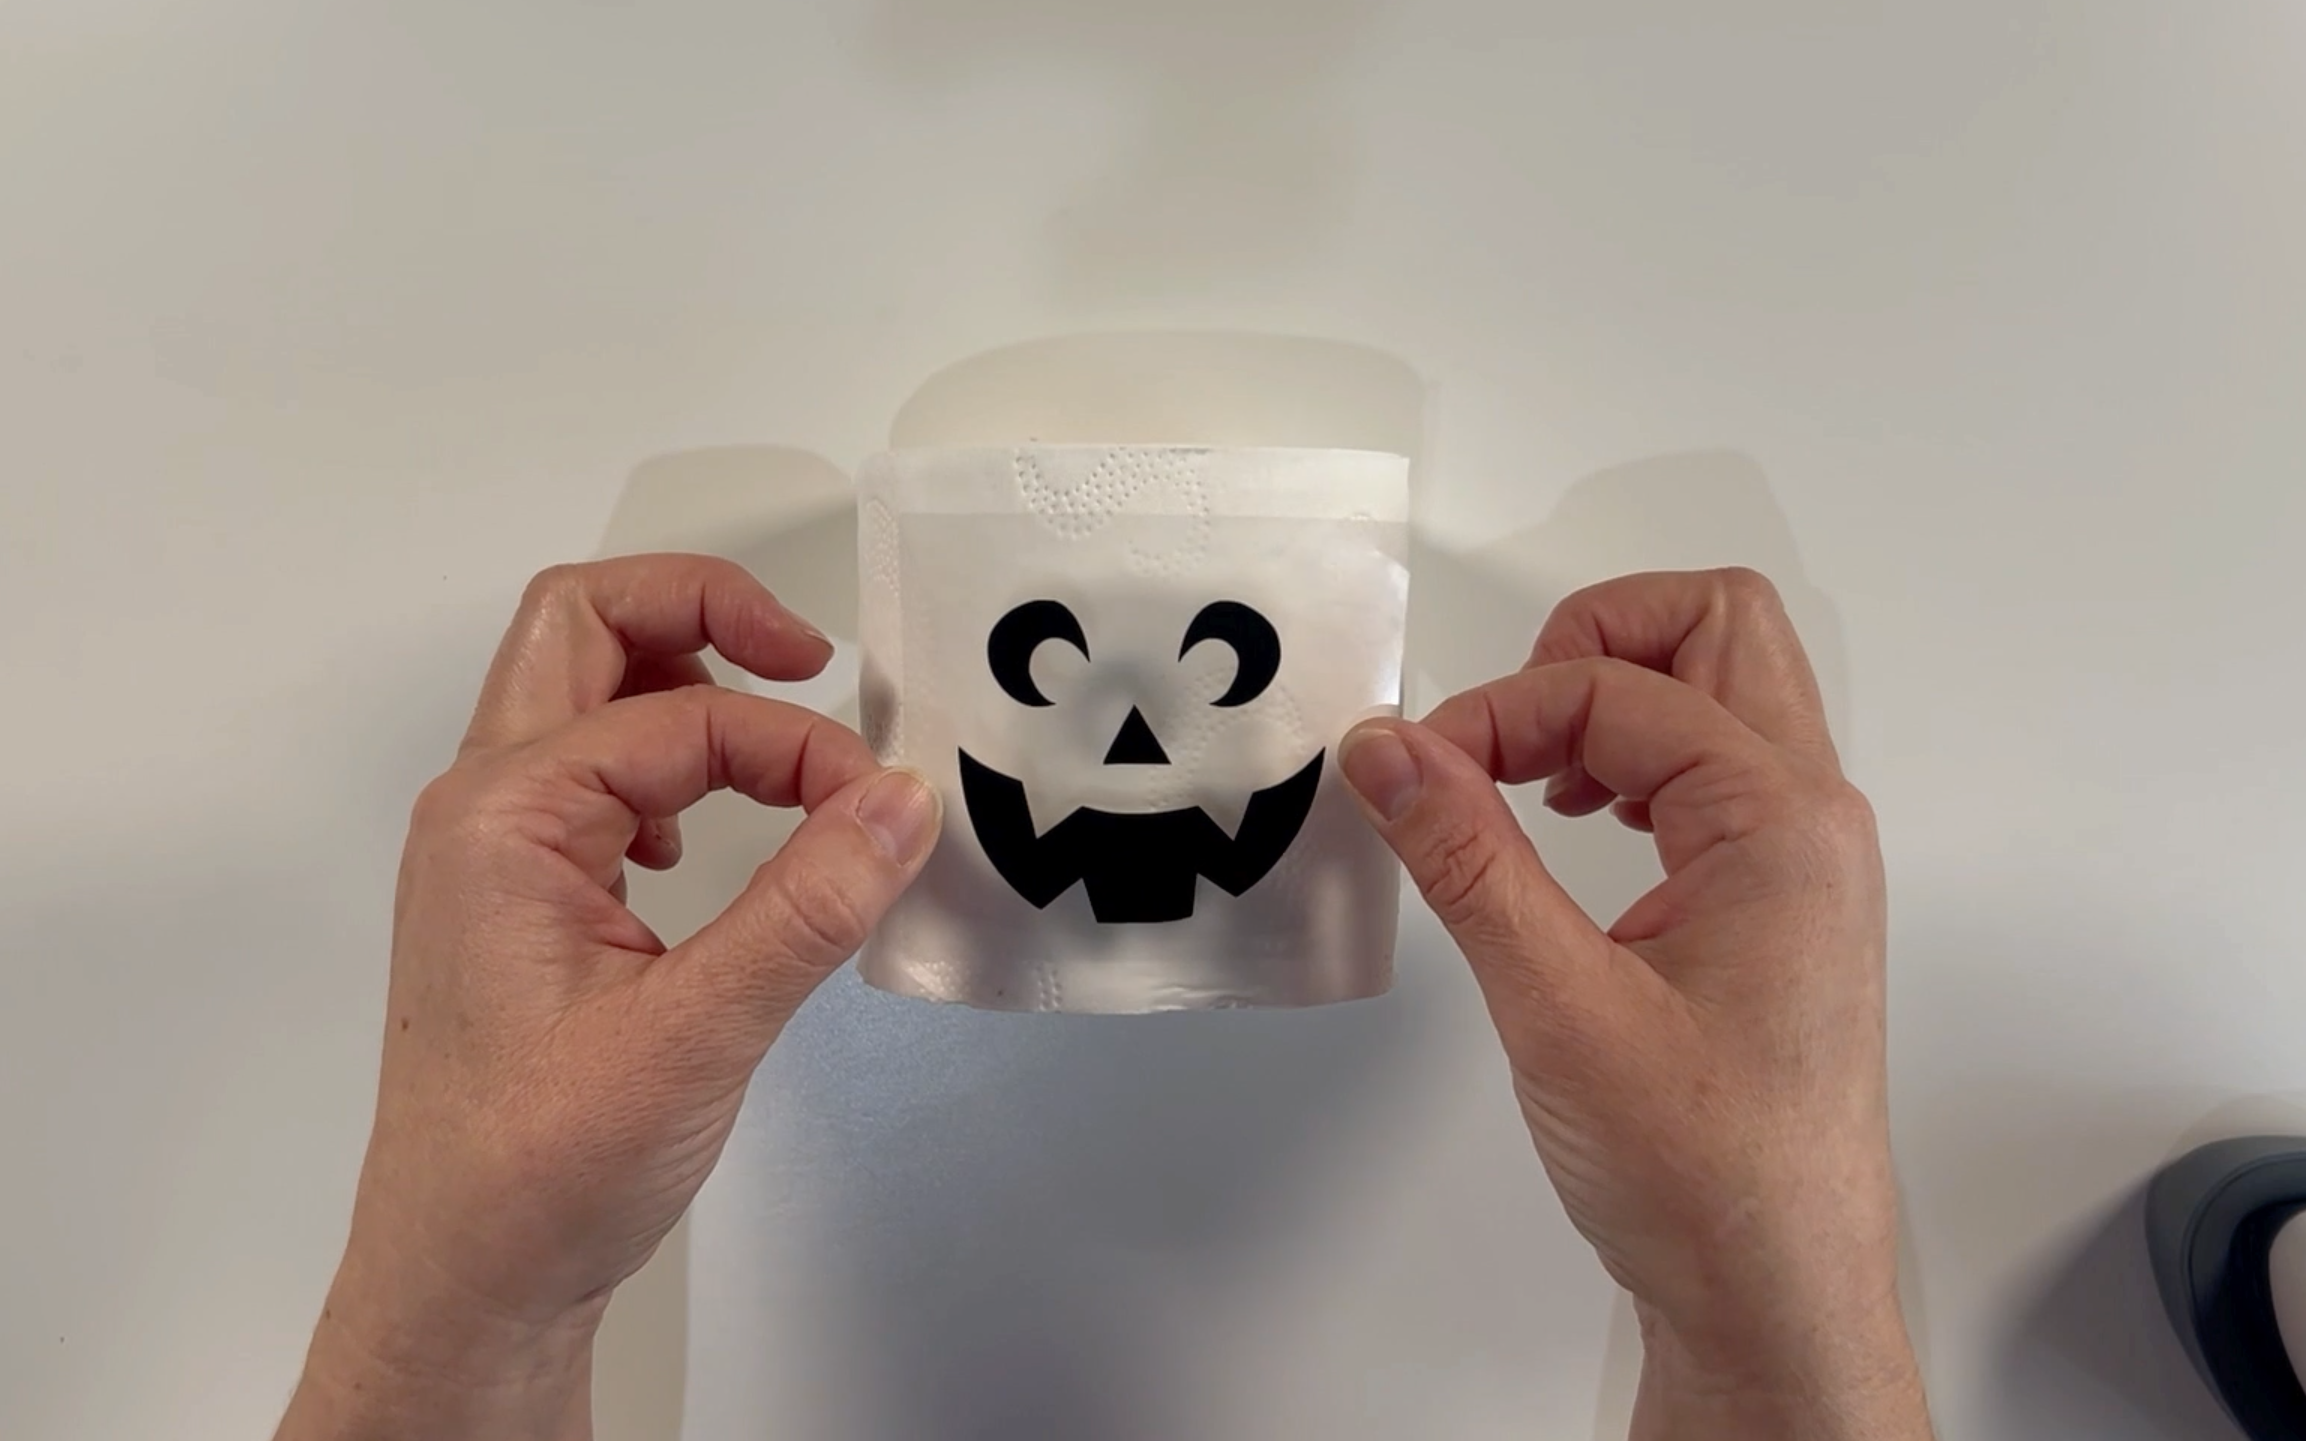
Take the toilet roll and the design. Line it up to find the right position that you want the design to be on the front of the toilet roll.
Take your heat press mini and press the design on to the front of the toilet roll. Keep pressing until you feel that the design has adhered to the toilet roll.
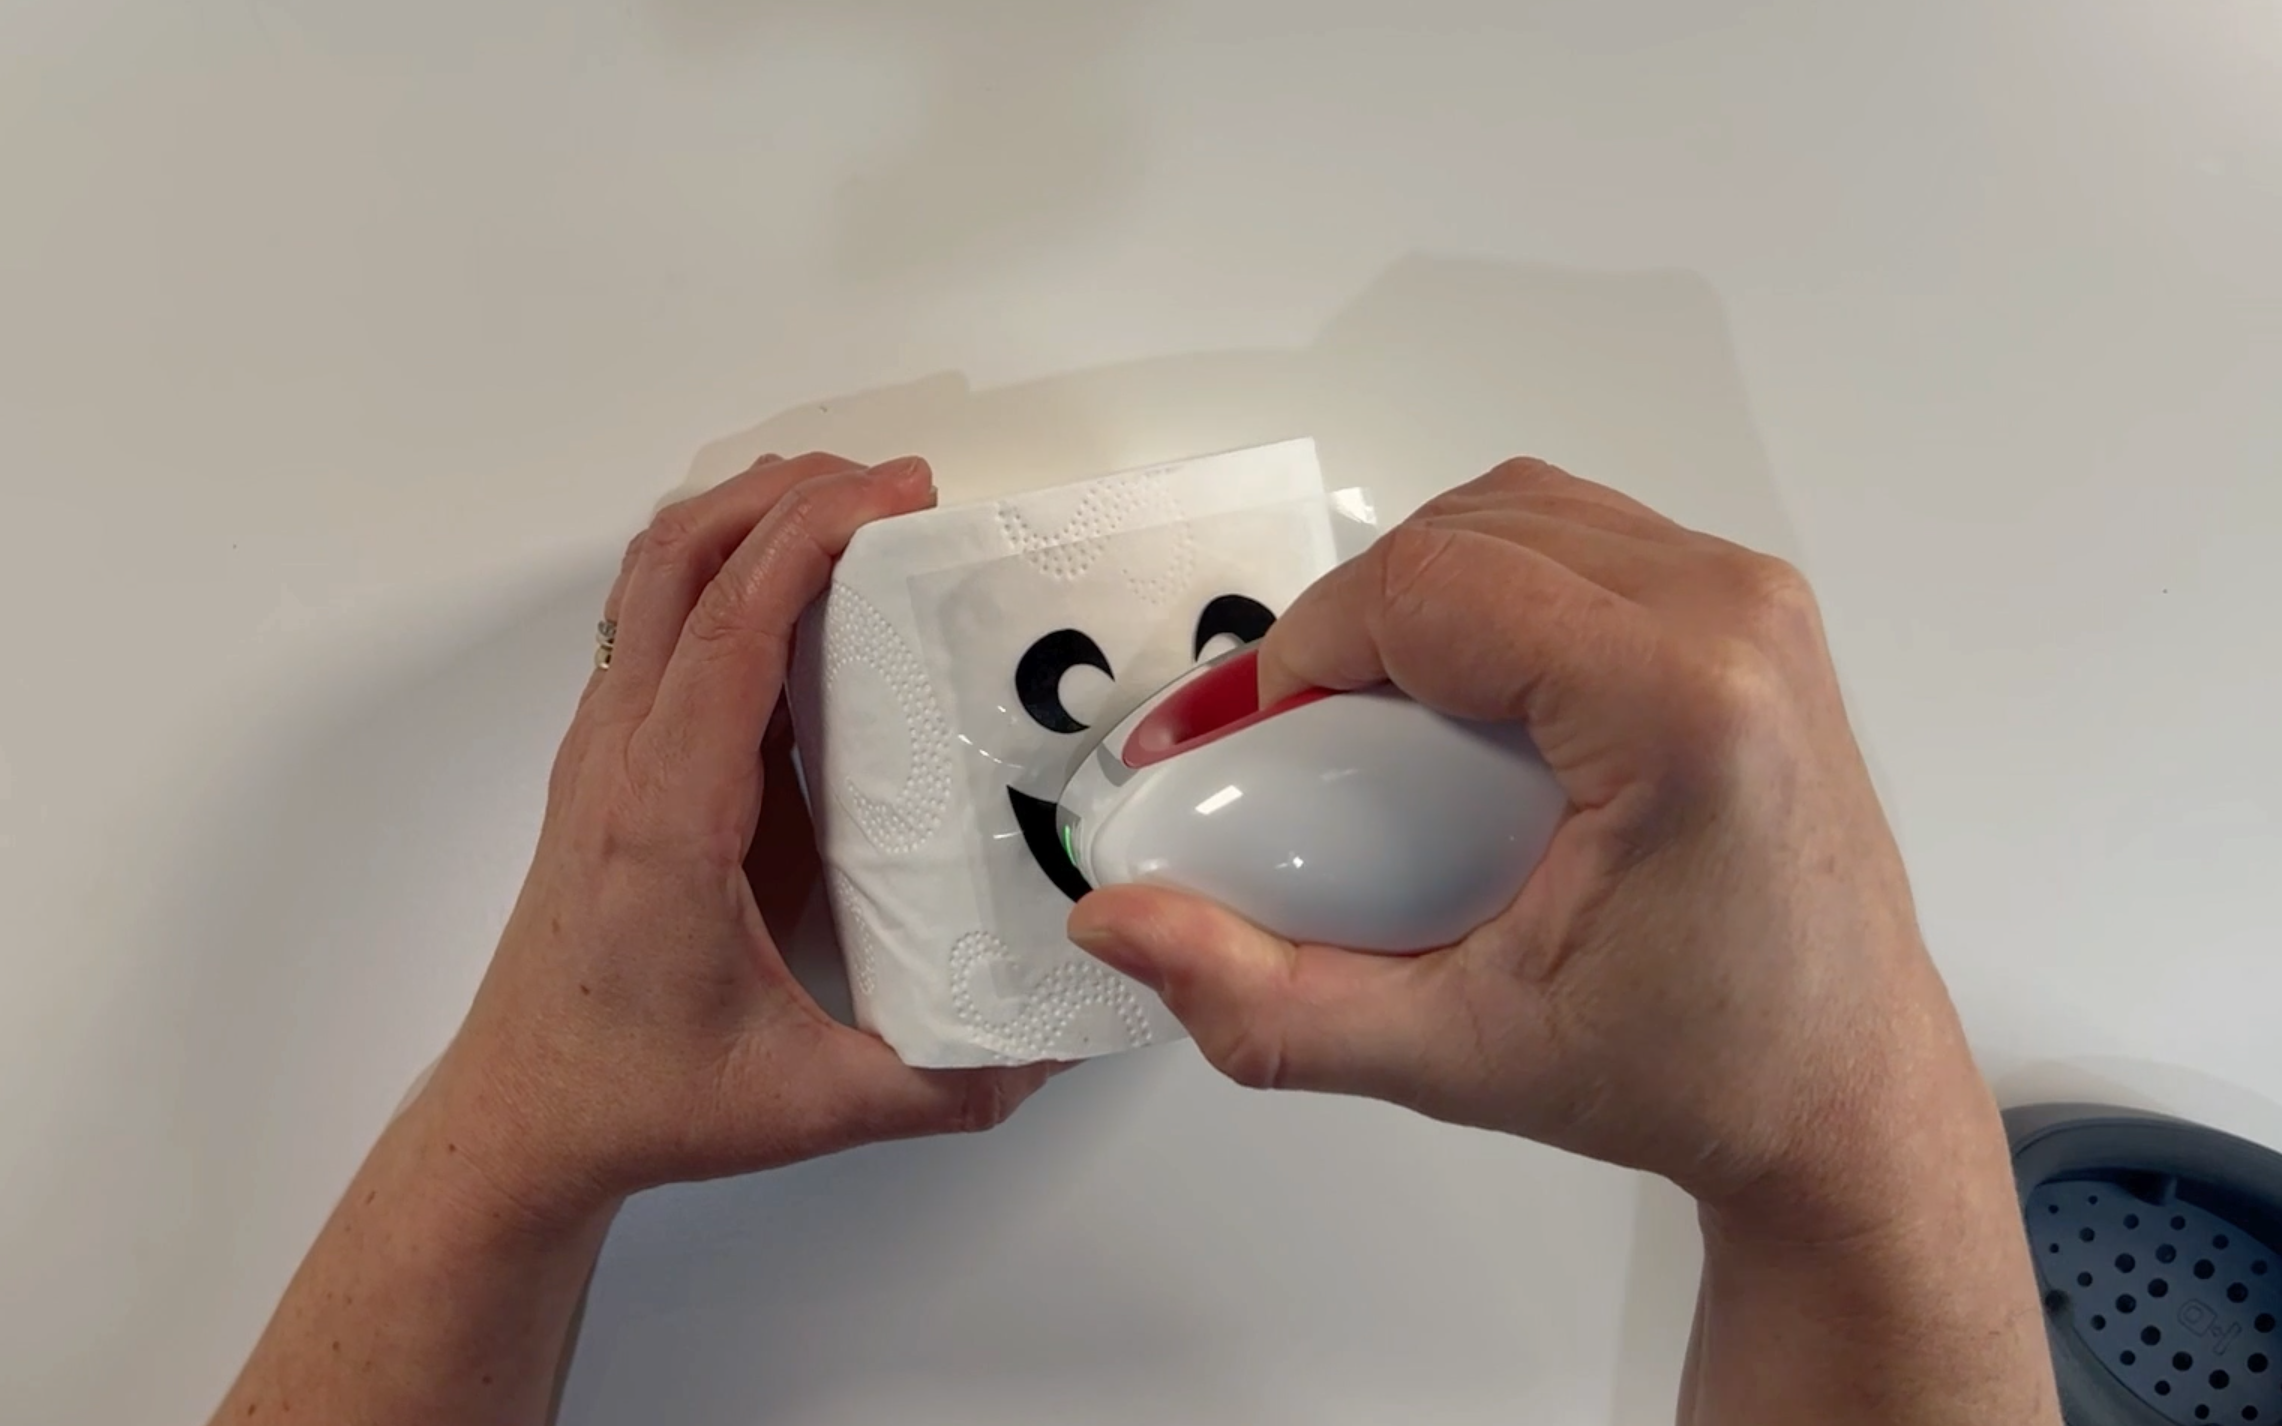
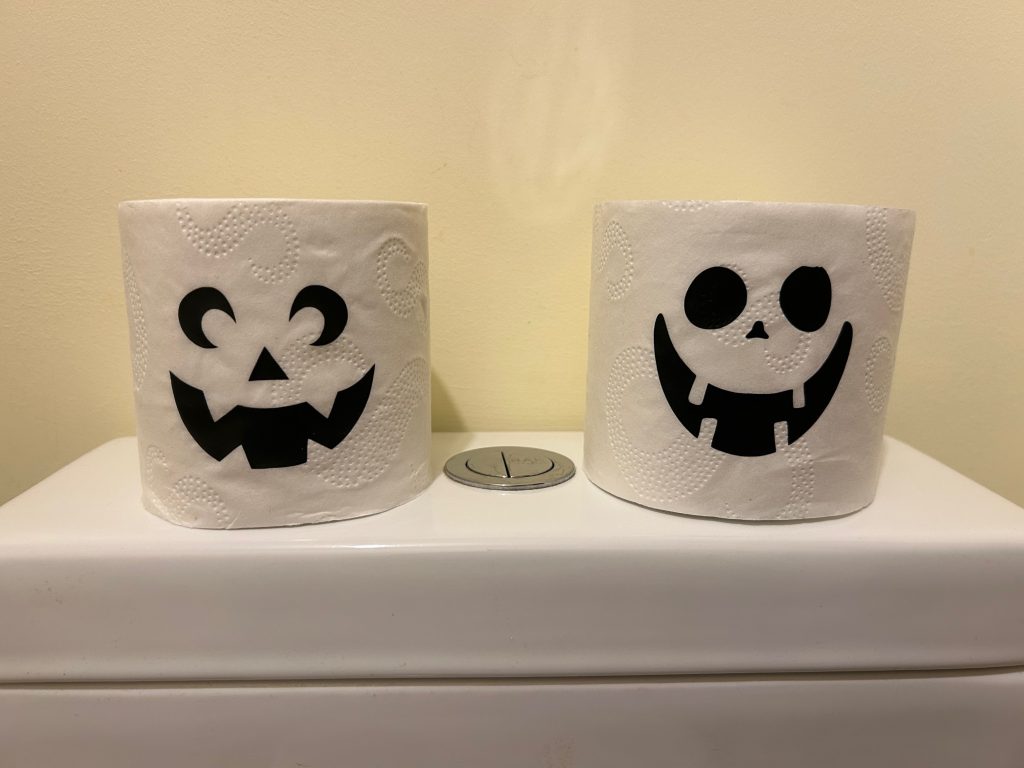
When you are happy that the vinyl has adhered to the toilet roll, carefully peel away the carrier sheet. Now you have your really cute spooky halloween toilet rolls.
If you would like to watch how i made my Easy To Make Halloween Toilet Rolls, click on the video below
If you enjoyed this blog them please check out my other blogs: